GMOD
Tripal Tutorial (pre version 0.3b)

This Tripal tutorial was presented by Stephen Ficklin at the 2011 GMOD Spring Training, 8-12 March 2011. The most recent Tripal tutorial can be found at the Tripal Tutorial page.
To follow along with the tutorial, you will need to use AMI ID: ami-b7fa4dde, name: GMOD 2012 day 2 start, available in the US East (N. Virginia) region. See the GMOD Cloud Tutorial for information on how to get this AMI.
The most recent version of this tutorial is available at the Tripal Tutorial page.
Contents
- 1 Introduction to Tripal
- 2 Pre-planning
- 3 Pre-Course Setup
- 4 Directory Overview
- 5 Database Setup
- 6 Install Drupal
- 7 Explore Drupal
- 8 Tripal
Tutorial
- 8.1 Installation
- 8.2 Install Chado
- 8.3 Jobs Management
- 8.4 PhpPgAdmin
- 8.5 Install Additional Tripal Modules
- 8.6 Install the Tripal Theme
- 8.7 Materialized Views
- 8.8 Controlled Vocabularies: Installing CVs
- 8.9 Organism Page
- 8.10 Loading Data
- 8.11 Feature Pages
- 8.12 Loading Functional Data
- 8.13 Drupal Taxonomy & Searching
- 9 Customizations
- 10 Creating new Data Views
- 11 Misc
Introduction to Tripal
Note: This tutorial was given using a pre-release version of Tripal v0.3b. Therefore, you will find some differences between what you see on your screen and what is shown in some of the screen shots below. The largest difference will be the layout of content on the pages because a new layout template was created for v0.3b. Also, there will some additional functionality that is not evident in the screen shots but will appear in the live version. However, the tutorial is still quite useful for learning to use Tripal v0.3b.
What is Tripal
Tripal is a suite of PHP5 modules that bridges the Drupal Content Managment System (CMS) and GMOD Chado.
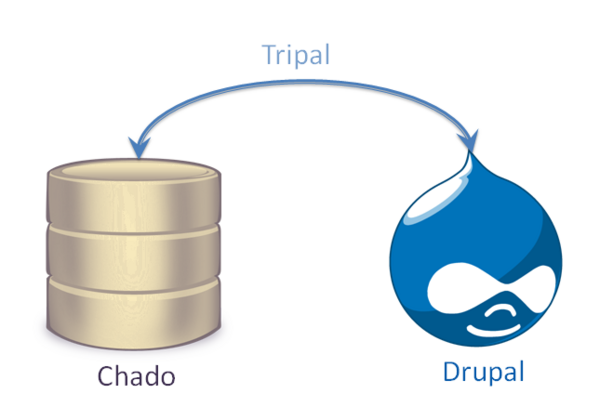
Content Management System
Definition From Wikipedia:
A content management system (CMS) is the collection of procedures used to manage work flow in a collaborative environment. These procedures can be manual or computer-based. The procedures are designed to do the following:
- Allow for a large number of people to contribute to and share stored data
- Control access to data, based on user roles (defining which information users or user groups can view, edit, publish, etc.)
- Aid in easy storage and retrieval of data
- Reduce repetitive duplicate input
- Improve the ease of report writing
- Improve communication between users
In a CMS, data can be defined as nearly anything: documents, movies, pictures, phone numbers, scientific data, and so forth. CMSs are frequently used for storing, controlling, revising, semantically enriching, and publishing documentation. Serving as a central repository, the CMS increases the version level of new updates to an already existing file. Version control is one of the primary advantages of a CMS.
Drupal
Drupal is an open-source freely available CMS with thousands of users and existing sites. Features of Drupal
- A well-supporting community.
- Books, tutorials and online forums for help .
- Hundreds of user-contributed extension modules that are freely available.
- Hundreds of user-contributed themes to instantly change the look-and-feel of the site
- User management infrastructure.
- Allows for non-coding manipulation of the website contents. Anyone can edit content.
- Easy to install and maintain
Drupal website: http://www.drupal.org
Drupal modules: http://www.drupal.org/project/modules
Drupal themes: http://www.drupal.org/project/themes
Chado
The session for Chado was presented yesterday Chado, so no need for introdcutions. However, one thing to remember is that Chado has a modular structure:
- Audit - for database audits
- Companalysis - for data from computational analysis
- Contact - for people, groups, and organizations
- Controlled Vocabulary (cv) - for controlled vocabularies and ontologies
- Expression - for summaries of RNA and protein expresssion
- General - for identifiers
- Genetic - for genetic data and genotypes
- Library - for descriptions of molecular libraries
- Mage - for microarray data
- Map - for maps without sequence
- Organism - for taxonomic data
- Phenotype - for phenotypic data
- Phylogeny - for organisms and phylogenetic trees
- Publication (pub) - for publications and references
- Sequence - for sequences and sequence features
- Stock - for specimens and biological collections
- WWW -
Tripal is also modular along these same designations.
Goals of Tripal
- Simplify Construction of Biological Databases
- Reduce time of development
- Reduce costs
- Reduce technical resources (i.e. programmers, systems admins).
- A non-technical site administrator can add content without knowing PHP, HTML, JavaScript.
- Greater Flexibility of the Biological Website
- Social Networking
- Non-biological content
- Outreach, tutorials, documentation, protocols, publications
- Expandability
- Site can be programmatically expanded in any way
- Changes to base-code are not needed but modules are added.
- Availability of an Application Programmer Interface (API)
- Reusability
- All code can be shared. Expansion modules created by one group can be shared with all.
Structure of Tripal
Tripal is a collection of modules that integrate with Drupal. These modules are divided into hierarchical categories:
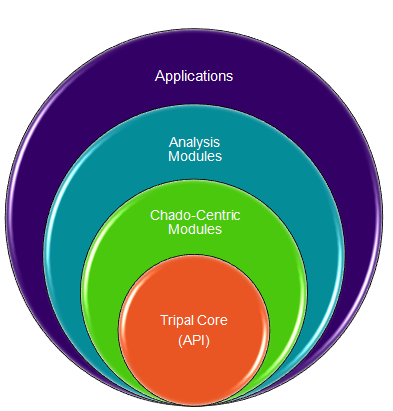
The Tripal Core level contains supportive functionality for all other modules. It contains
- A jobs management utility
- A utility to manage materialized views
- An API for these features
- Functions for managing module specific CV terms
- Functions for interfacing with Chado.
The Chado-centric modules provide:
- Edit/Update/Delete for Chado modules.
- Bulk loaders for these data
- Basic visualizations for data in Chado specific for the module
- An API for easily accessing Chado.
Analysis modules provide
- Custom visualization for specific analyses (e.g. Blast, KEGG, InterProScan, Unigene construction)
- Uses the API from the Tripal Analysis (Chado-centric) module.
Applications:
- These are full blown applications that use Tripal, Drupal and Chado and typically consist of several Chado-centric modules, Analysis modules and custom built modules. (e.g. Breeders Toolbox currently under construction).
Sites Running Tripal
| Site Name | URL | Tripal Version |
|---|---|---|
| Pulse Crops Genomics & Breeding | <a href=”http://knowpulse2.usask.ca/portal/” class=”external free” | |
| rel=”nofollow”>http://knowpulse2.usask.ca/portal/</a> | SVN version | |
| Genome Database for Vaccinium | <a href=”http://www.vaccinium.org” class=”external free” | |
| rel=”nofollow”>http://www.vaccinium.org</a> | v0.2 | |
| Cool Season Food Legume Database | <a href=”http://www.gabcsfl.org” class=”external free” | |
| rel=”nofollow”>http://www.gabcsfl.org</a> | v0.2 | |
| Cacao Genome Database | <a href=”http://www.cacaogenomedb.org” class=”external free” | |
| rel=”nofollow”>http://www.cacaogenomedb.org</a> | v0.2 | |
| Fagaceae Genome Web | <a href=”http://www.fagaceae.org” class=”external free” | |
| rel=”nofollow”>http://www.fagaceae.org</a> | v0.2 | |
| Citrus Genome Database | <a href=”http://www.citrusgenomedb.org” class=”external free” | |
| rel=”nofollow”>http://www.citrusgenomedb.org</a> | v0.2 | |
| Marine Genomics Project | <a href=”http://www.marinegenomics.org” class=”external free” | |
| rel=”nofollow”>http://www.marinegenomics.org</a> | pre v0.1 |
Resources
The Tripal Sourceforge home site where you can find everything about Tripal: http://tripal.sourceforge.net
GMOD Tripal mailing lists: http://gmod.org/wiki/GMOD_Mailing_Lists
GMOD Tutorials from previous GMOD schools: http://gmod.org/wiki/Tripal
Contributing Organizations
Individuals from these organizations have provided design and coding for Tripal

![]()
![]()
Funding
Funding for Tripal has been provided through various grants from the USDA, NSF, in-house funding from the Clemson University Genomics Institute (CUGI), and Clemson’s Cyberinfrastructure and Technology Integration (CITI) group.
Additional Support
- Logistical and community interaction support and has been provided by GMOD!!
- The South Carolina Marine Genomics Consortium with researchers housed primarily at the NOAA Hollings Marine Lab in Charleston South Carolina provided input and direction for the first versions of Tripal.
Pre-planning
IT Infrastructure
Setup of the prerequisites for Tripal can be the most challenging part depending on the IT infrastructure currently available for your project. Tripal requires a server with adequate resources to handle the expected load and systems administration skills to get the machine up and running, applications installed and everything properly secure. Tripal requires a PostgreSQL databases server, Apache (or equivalent) web server, PHP5 and several configuration options to make it all work. However, once these prerequisites are met, working with Drupal and Tripal are quite easy.
There are three basic ways you could get a Tripal/Drupal/Chado database web server available for your site
- Option #1 In-house dedicated servers: You may have access to servers in your own department or group which you have administrative control and wish to install Tripal/Drupal/Chado on these.
- Option #2 Institutional IT support: Your institution may provide IT servers and would support your efforts to install a website with database backend.
- Option #3 Commercial web-hosting: If options #1 and #2 are not available to you, commercial web-hosting is an affordable option. For large databases you may require a dedicated server.
After selection of one of the options that works best for you you can arrange your database/webserver in the following ways:
- Arrangement #1: The database and web server are housed on a single server. This is the approach taken by this course. It is necessary to gain access to a machine with enough memory (RAM), hard disk speed and space, and processor power to handle both services.
- Arrangement #2: The database and web server are housed on different servers. This provides dedicated resources to each service (i.e. web and database).
Selection of an appropriate machine
Databases are typically bottlenecked by RAM and disk speed. Selection of the correct balance of RAM, disk speed, disk size and CPU speed is important and dependent on the size of the data. Unfortunately, we have only tested production installations of Tripal on a limited number of server configurations. The best advice is to consult an IT professional who can recommend a server installation tailored for the expected size of your data.
Note: Tripal does require command-line access to the web server with adequate local file storage for loading of large data files. Be sure to check with your service provider to make sure command-line access is possible.
Technical Skills
Depending on your needs, you may need additional Technical support….
Tripal already supports my data, what personnel to I need to maintain it?
- Someone to install/setup the IT infrastructure
- Someone who understands the data to load it properly
Tripal does not yet support all of my data, but I want to use what’s been done and expand on it….?
- Someone to install/setup the IT infrastructure
- Someone who understands the data to load it properly
- PHP/HTML/CSS/JavaScript programmer(s) to write your custom extensions
Why Use Tripal
Tripal does not yet fully support Chado. We are getting closer, but as of now, it is still lacking in many areas… So why use Tripal?
- If you want to use Chado
- You need a web interface
- You need CMS capabilities (distributed content editing, user management, social networking… i.e. Drupal)
- You want to contribute to a community effort to help build a tool others can use.
- Participate in a community of other database developers using the same technology, confronting similar problems and helping each other.
- It is all open-source and free technology!
Pre-Course Setup
By way of information the following steps were performed prior to the course. These steps will not be needed during the class but are here for reference.
Software Used
database. It is not required for successful operation of Tripal but is very useful.
   cd /home/gmod/Documents/Software/tripal/packages
   wget http://downloads.sourceforge.net/phppgadmin/phpPgAdmin-4.2.3.tar.gz?download
As root:
   cd /var/www
   sudo tar -zxvf /home/gmod/Documents/Software/tripal/packages/phpPgAdmin-4.2.3.tar.gz
   sudo ln -s phpPgAdmin-4.2.3/ phppgadmin
Copy the conf/config.inc.php-dist to conf/config.inc.php
   cd phppgadmin/conf
   sudo cp config.inc.php-dist config.inc.php
Set permission for the web user:
   cd /var/www
   sudo chgrp -Rh www-data phppgadmin
   sudo chgrp -Rh www-data phpPgAdmin-4.2.3/
Prepare Apache
Enable the rewrite module for apache. This is useful so that we can use Clean URLs with Drupal. Clean URLs are not required but make the page URLs easier to use. We’ll discuss clean URLs later.
   cd /etc/apache2/mods-enabled
   sudo ln -s ../mods-available/rewrite.load
Next we need to edit the apache configuration file to allow URL rewrites. We can do this by adding the following stanza to the bottom of the file /etc/apache2/sites-available/default:
   <Directory /var/www/>
      RewriteEngine on
      RewriteBase /
      RewriteCond %{REQUEST_FILENAME} !-f
      RewriteCond %{REQUEST_FILENAME} !-d
      RewriteRule ^(.*)$ index.php?q=$1 [L,QSA]
   </Directory>
Now restart your apache again.
sudo /etc/init.d/apache2 restart
Directory Overview
For reference, these are the file system directories where important components of this tutorial are located
| Web configuration files | /etc/apache2 |
| PHP configuration files | /etc/php5/apache2 and /etc/php5/cli |
| Web document root | /var/www |
| Home directory | /home/gmod |
| Tutorial files | /home/gmod/Tripal |
Database Setup
The postgres database comes pre-installed on the GMOD 2011 VMWare image. Drupal can run on a MySQL or PostgreSQL database but Chado prefers PostgreSQL so that is what we will use for both Drupal and Chado.
With appropriate command-line access and permissions, which we have on this VMWare image) the following command can be used to create a new database user and database for this tutorial.
First, become the ‘postgres’ user:
sudo su - postgres
Next, create the new ‘tripal’ user account. This account will not be a “superuser’ nor allowed to create new roles, but should be allowed to create a database.
createuser -P tripal
  Enter password for new role: gmodamericas2011
  Enter it again:  gmodamericas2011
  Shall the new role be a superuser? (y/n) n
  Shall the new role be allowed to create databases? (y/n) y
  Shall the new role be allowed to create more new roles? (y/n) n
Finally, create the postgres database:
createdb tripal_demo -O tripal
We no longer need to be the postgres user so exit
exit
Install Drupal
Software Installation
Drupal can be freely downloaded from the http://www.drupal.org website. However, to save time, the file has been pre-downloaded onto the VMWare image. You can find the compressed package file here:
/home/gmod/Tripal/drupal-6.20.tar.gz
We want to install Drupal into our web document root (/var/www). We
want to be able to do this as our ‘gmod’ user. So, first, let’s set the
directory permissions to allow this:
  cd /var
  sudo chgrp gmod www
  sudo chmod g+rw www
In the command above we set the group of the directory to be gmod (our user group) and we gave the directory read and write permissions for the group.
Next, we want to install Drupal. We will use the tar command to uncompress the software:
  cd /var/www
  tar -zxvf /home/gmod/Tripal/drupal-6.20.tar.gz
Notice that we now have a drupal-6.20 directory with all of the Drupal
files. We want the Drupal files to be in our document root, not in a
‘drupal-6.20’ subdirectory. So, we’ll move the contents of the directory
up one level:
mv drupal-6.20/* ./
mv drupal-6.20/.htaccess ./
mv index.html index.html.orig
Note: It is extremely important the the hidden file .htaccess is
also moved (note the second ‘mv’ command above. Check to make sure this
file is there
Notice that the last of the three mv commands renames the index.html
file and calls it index.html.orig. The index.html file was serving
as the home page for the website. Drupal uses an index.php page for
it’s home page but the web server has preference for the index.html
page. So, we move it out of the way.
Configuration File
Next, we need to tell Drupal how to connect to our database. To do this we have to setup a configuration file. Drupal comes with an example configuration file which we can borrow.
First navigate to the location where the configuration file should go:
cd /var/www/sites/default/
Next, copy the example configuration that already exists in the
directory to be our actual configuration file by renaming it to
settings.php.
cp default.settings.php settings.php
Now, we need to edit the configuration file to tell Drupal how to connect to our database server. To do this we’ll use an easy to use text editor gedit
gedit settings.php
Find the variable $db_url and set it to this
$db_url = 'pgsql://tripal:gmodamericas2011@localhost/tripal_demo';
Final directory creation
Finally, we need to create three new directories. The first is the
files directory which Drupal uses for storing uploaded files.
  cd /var/www/sites/default
  mkdir files
  sudo chown www-data:gmod files
  sudo chmod g+rw files
The above command creates the directory but sets the owner to be the web server (i.e. www-data) and the group to be gmod, with read/write permissions. This way the web server can write to the directory but so can we.
Also, we need to create two new directories, one for storing module files we’ll be installing and another for themes which we’ll also be installing later:
Now create the modules and themes directory
  cd /var/www/sites/all
  mkdir modules
  mkdir themes
Compatibility with other tools
We want to ensure that our Drupal installation doesn’t interfere with
other web-based tools, such as GBrowse. We need update a setting in the
.htaccess file that came with Drupal which instructs the web server to
look for both index.php and index.html files when serving pages.
Use ‘gedit’ to modify the /var/www.htaccess file.
   cd /var/www
   gedit .htaccess
Locate the line DirectoryIndex and change it to mach the following:
DirectoryIndex index.php index.html
Web-based Steps
Navigate to the installation page of our new web site http://localhost/install.php
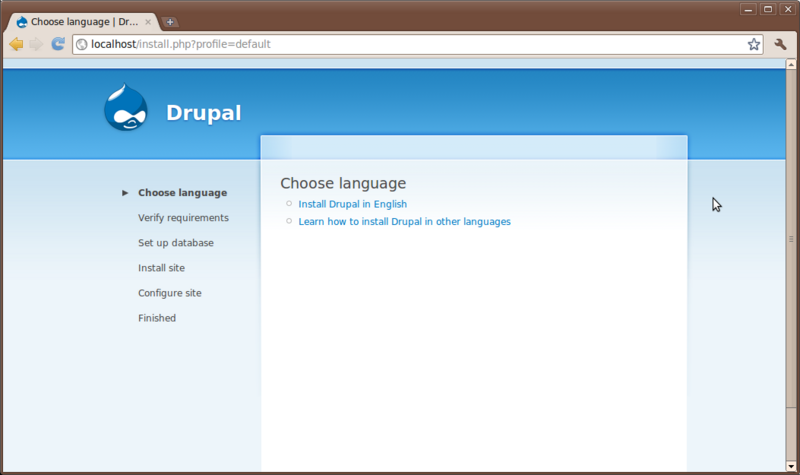
Click the link in the middle section that reads Install Drupal in English
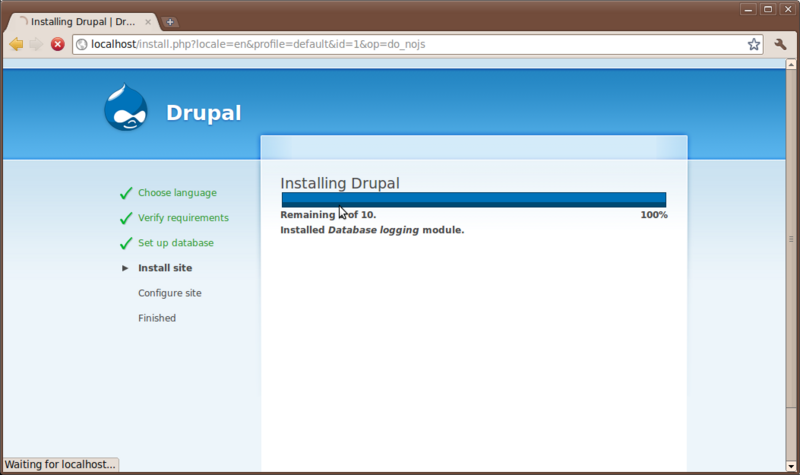
When the progress bar shows completing the page will switch to a configuration page with some final settings.
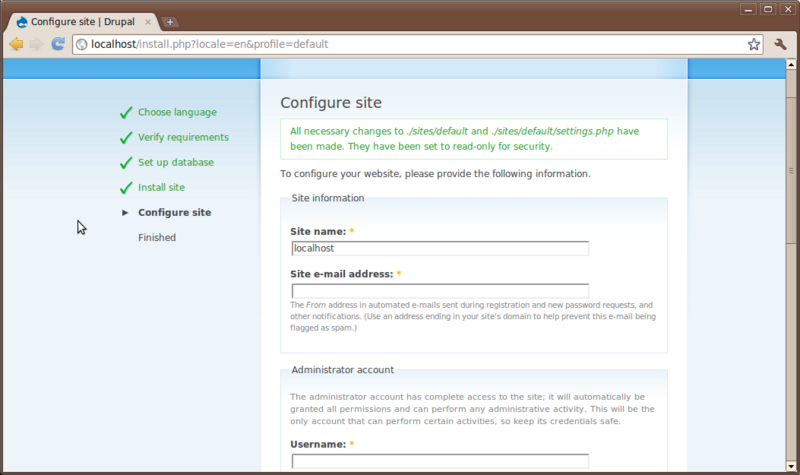
Set the following
- Site Name: Tripal Demo
- Site email: Your email address
- Administrator Username: administrator (all lower-case)
- Administrator Email: Your email address
- Password: gmodamericas2011
- Default time zone: leave as is
- Clean URLs: enabled
- Update Notification: check for updates automatically
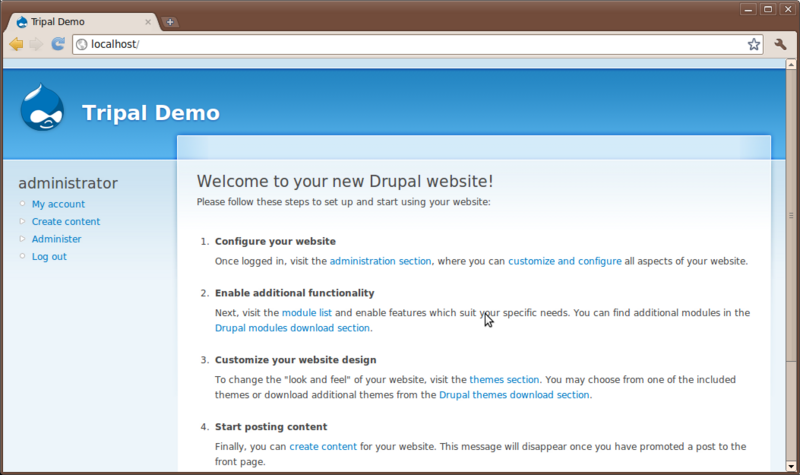
Now, click the Save and Continue button. You will see a message about unable to send an email. This is safe to ignore as email capabilities are not fully enabled on this VMWare image. Now, your site is enabled. Click the link Your new site:
Drupal Cron Entry
The last step for installing Drupal is setting up the automatted Cron entry. The Drupal cron is used to automatically execute necessary housekeeping tasks on a regular interval. Cron is a UNIX facility for scheduling jobs to run at specific intervals.
Drupal itself requires an entry in the crontab to function. To edit the cron launch the crontab editor:
sudo crontab -e
A word on text editors such as nano.
Add this line to the crontab
0,30 * * * * /usr/bin/wget -O - -q http://localhost/cron.php > /dev/null
Now save the changes. We have now added a UNIX cron job that will occur
every 30 minutes that will execute the cron.php script and cause
Drupal to perform housekeeping tasks.
Explore Drupal
User Account Page
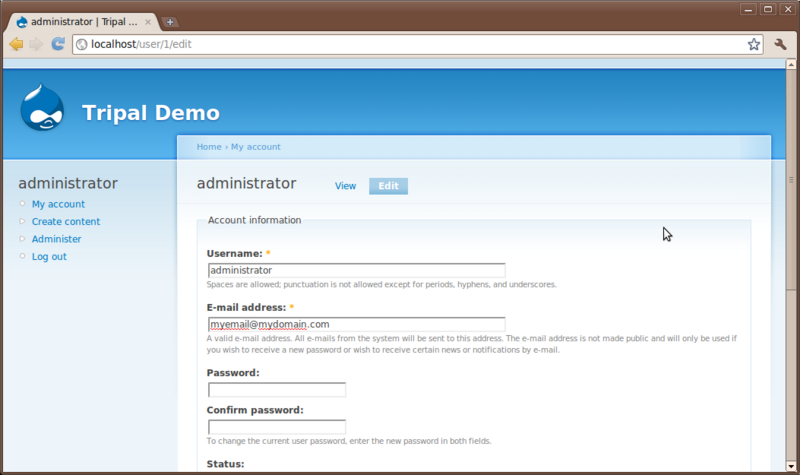
All users have an account page. Currently, we are logged in as the administrator. The account page is simple for now. Click the My account link on the left sidebar. You’ll see a brief history for the user and an Edit tab. Users can edit their own information using the edit interface:
Creating Content
Creation of content in Drupal is very easy. Click the Create content link on the left sidebar.
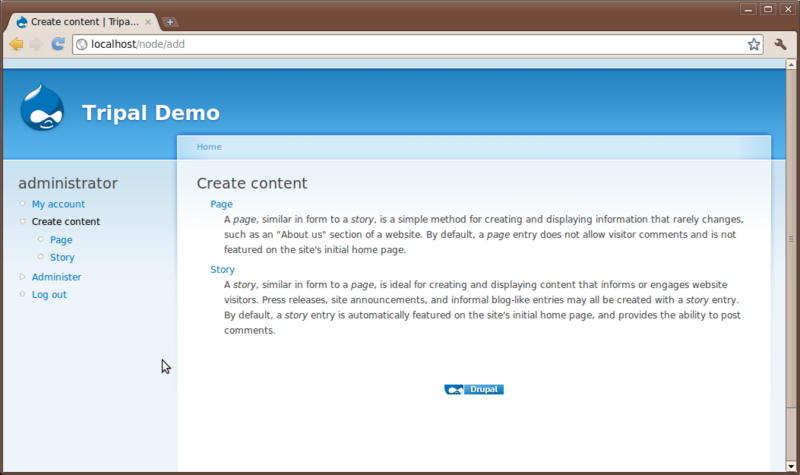
You’ll see to content types that come default with Drupal: Page and Story. Here is where a user can add simple new pages to the website without knowledge of HTML or CSS. Click the Page content type to see the interface for creating a new page:
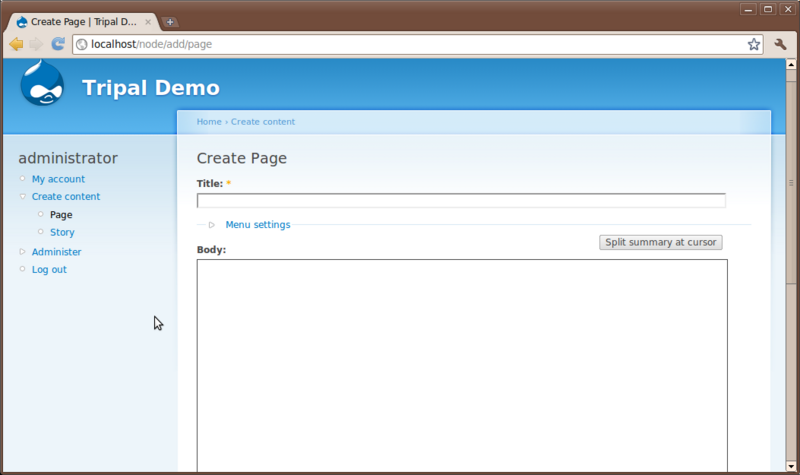
You’ll notice at the top a Title field and a Body text box. All pages require a title and typically have some sort of content entered in the body. Additionally, there are other options that allow someone to enter HTML if they would like, save revisions of a page to preserve a history and to set authoring and publishing information.
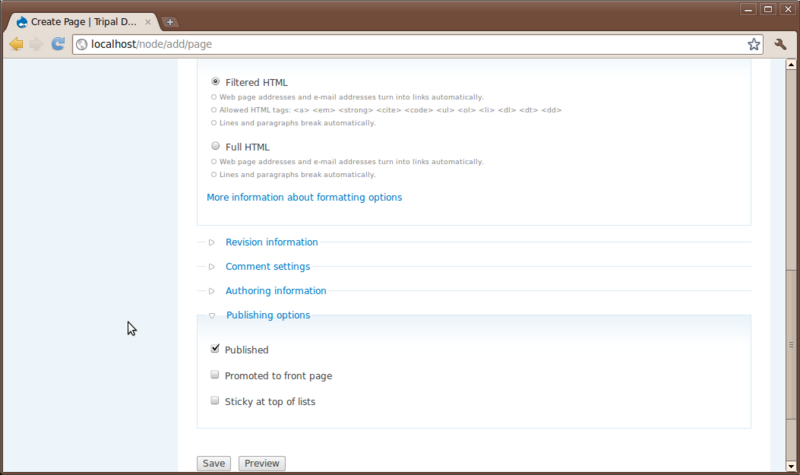
Let’s create two new pages. A Home page and an About page for our site. First create the home page and second create the about page. Add whatever text you like for the body.
Site Administration
Content Management
There are many options under the Administer link on the left sidebar. Here you can manage the site setup, monitor and control content, manage users and view reports.
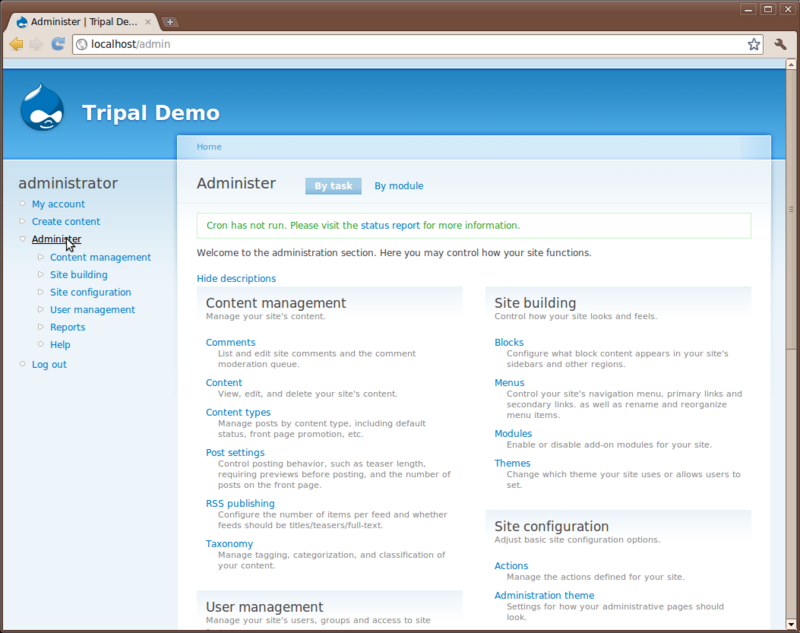
We will not explore all of the options here but will visit a few of the more important ones for this tutorial. First, click the Content Management link on the left sidebar. You’ll see different options.
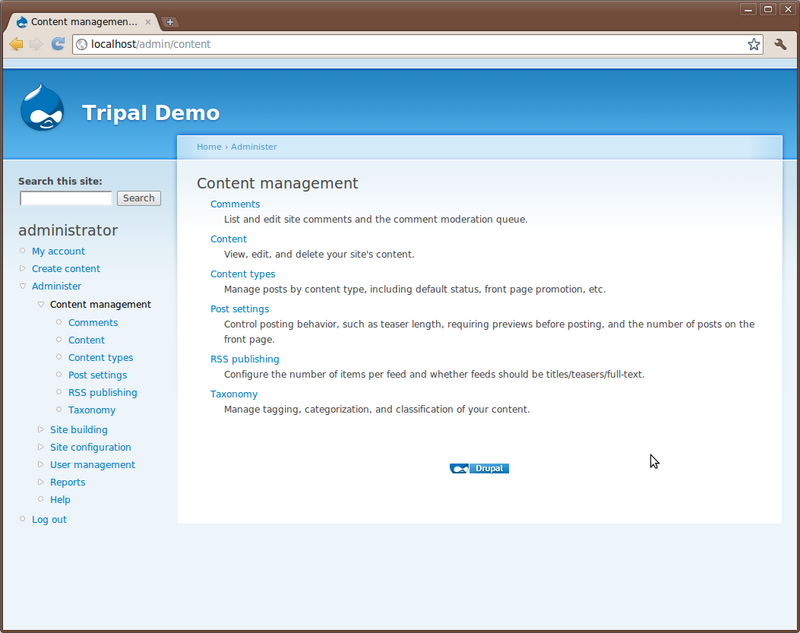
Click the Content link. The page shows all content available on the site. You’ll see the two pages we created previously:
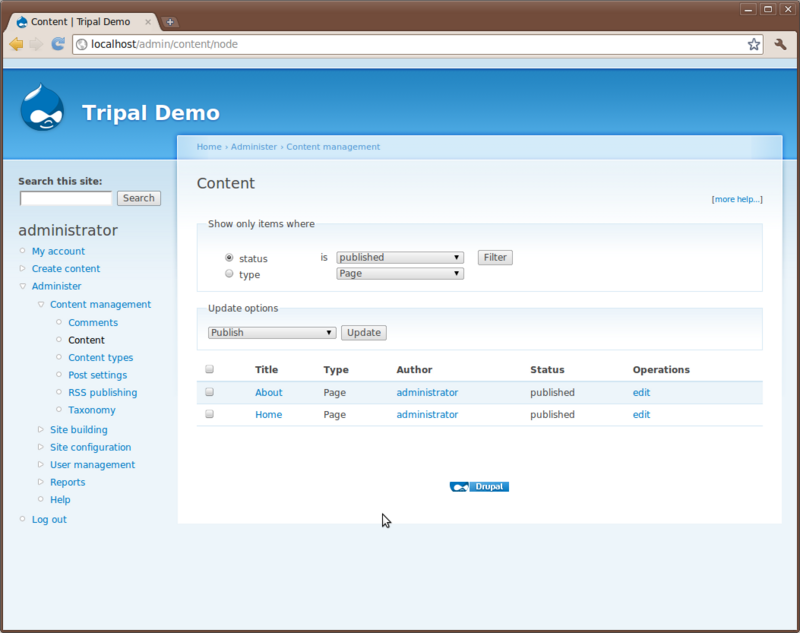
You’ll also notice a set of drop down boxes for filtering the content. For sites with many different content types and pages this helps to find content. You can use this list to click to view each page or to edit.
Site Building
Modules
Click the Site Building link on the let sidebar under the Administer link. You’ll see several new menu options: Blocks, Menus, Modules and Themes. First click Modules
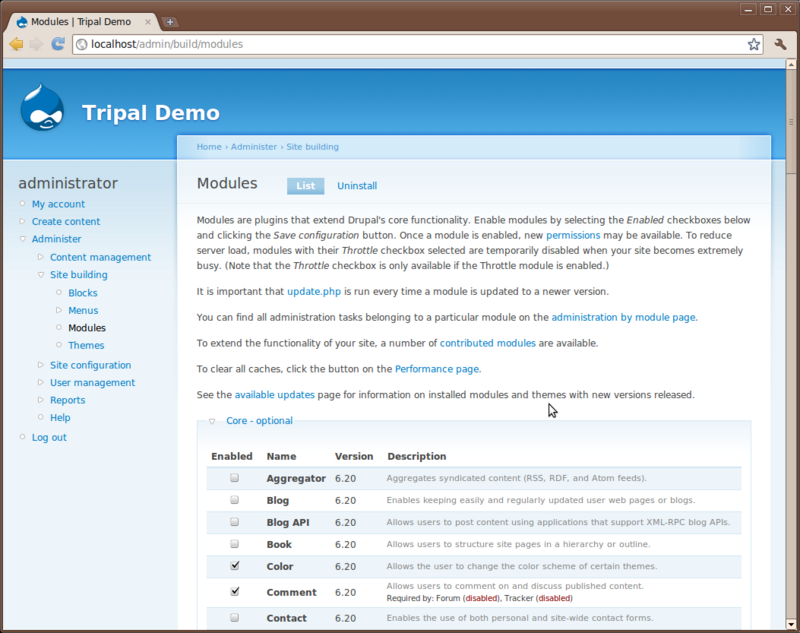
Here is where you will see the various modules that make up Drupal. Take a minute to scroll through the list of these and read some of the descriptions. The modules you see here are core modules that come with Drupal. Those that are checked come pre-enabled. Those that are not checked we will need to install. For this tutorial we will need two additional modules that are not yet installed. Locate the modules Path and Search and check the box next to each of those. Scroll to the bottom and click ‘Save configuration’.
The Path and Search modules are now installed. The Search module enables site-wide searching capabilities for our site and the Path module enables alternative naming of page URLs (we will discuss later).
Module Installation
We can install new extension modules which we will need later. For this workshop we have several modules that we will need to install but which do not yet appear in the list of modules. To do this, we must follow these steps:
- Locate and download the extension modules from the Drupal website
- Unpack the module in the /var/www/sites/all/modules directory
- Check for a README.txt or INSTALL.txt for any further instructions for installation of the module
- Return the the Drupal ‘Administer’ -> ‘Site Building’ -> ‘Modules’ page and enable the module.
For an example, let’s install the Views module needed for this
workshop. The views module has been pre-downloaded and saved in the
/home/gmod/Tripal directory.
First, let’s look and see what’s there
ls /home/gmod/Tripal
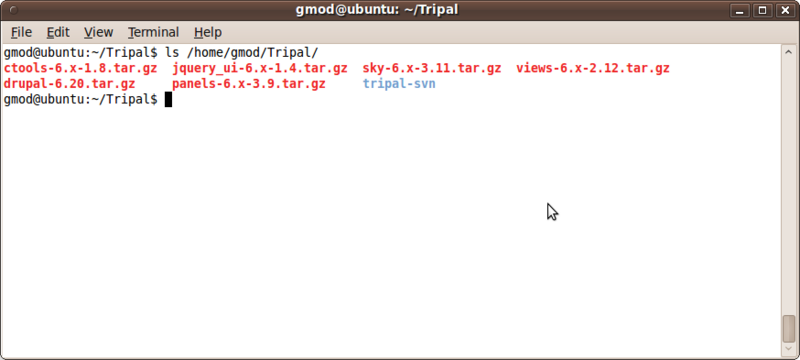
There are several .tar.gz files. These are all Drupal modules we’ll be
installing for this workshop. To install the Views module go to our
modules directory, unpack the file.
  cd /var/www/sites/all/modules
  tar -zxvf /home/gmod/Tripal/views-6.x-2.12.tar.gz
Check the README for additional installation instructions
  cd views
  ls
  less README.txt
Use the space-bar to scroll through the README.txt file. Hit the ‘q’ key to quit
There are not other installation steps besides what we’ve done. So return to the Administer → Site Building → Modules page and enable the module.
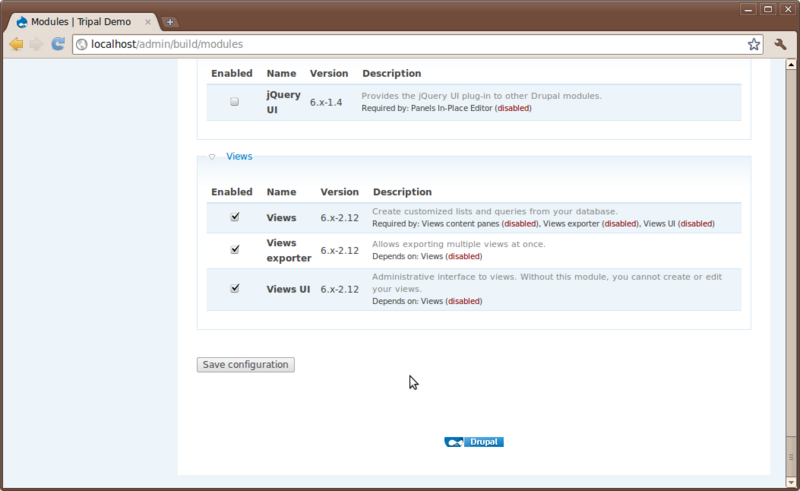
Notice that the Views package provided three different related modules and they all appear under a Views category.
EXERCISE #1
 Install the Chaos tools modules on your own.  The packages is found here:

 /home/gmod/Tripal/ctools-6.x-1.8.tar.gz

 Enable these modules under the Chaos tool suite category:
 * Chaos tools
 * Custom content panes
 * Page Manager
 * Views content panes
Next, we need the JQuery UI module. We will do this one together as it
has a dependency we must install. The package is found here:
/home/gmod/Tripal/jquery_ui-6.x-1.4.tar.gz
  cd /var/www/sites/all/modules
  tar -zxvf /home/gmod/Tripal/jquery_ui-6.x-1.4.tar.gz
Check the README for additional installation instructions
  cd jquery_ui
  ls
  less README.txt
The installation file indicates we need to install the JQuery UI package before we can eanble this module. We must first get this package from online.
Here is a quick command for downloading this file
  cd /var/www/sites/all/modules/jquery_ui
  wget http://jquery-ui.googlecode.com/files/jquery.ui-1.6.zip
Now unzip the package and rename it according to the instructions
  unzip jquery.ui-1.6.zip
  mv jquery.ui-1.6 jquery.ui
Now, return to our Drupal website and enable the Jquery UI module. It can be found under the User Interface category.
EXERCISE #2
 Now install the module package Panels found here  /home/gmod/Tripal/panels-6.x-3.9.tar.gz

 Enables these modules under the Panels category:
 * Mini panels
 * Panel nodes
 * Panels
EXERCISE #3
 For this last exercise, we need to install the Content-Construction Toolkit (CCK) module.
 For this exercise we will download the file from the Drupal site: http://drupal.org/project/cck.
 Be sure to download the 6.x-2.9 version.  Follow the same installation steps as performed
 previously.  Enable all modules under the CCK category.
For reference, the modules installed above can be found here:
- CTools: http://drupal.org/project/ctools
- Views: http://drupal.org/project/views
- Panels: http://drupal.org/project/panels
- JQuery-ui: http://drupal.org/project/jquery_ui
- CCK: http://drupal.org/project/cck
Themes
Next, click the Themes link under Administer → Site Building on the left sidebar.
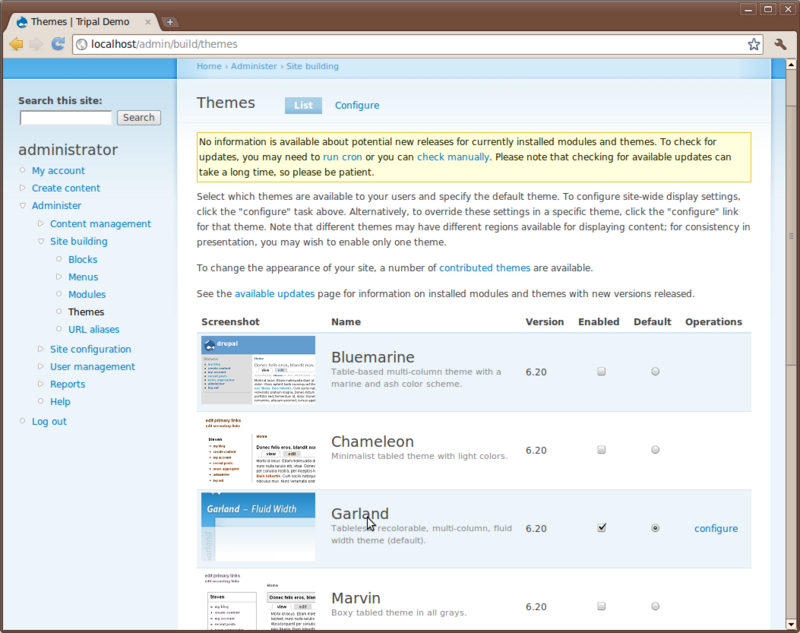
Here, you’ll see a list of themes that come with Drupal by default. If you scroll down you’ll see that one theme named Garland is enabled and set as default. The current look of the site is using the Garland them. Change the them by checking the Enable checkbox and the default radio button for the Pushbutton theme and then clicking Save configuration. Now you’ll see that the theme has changed.
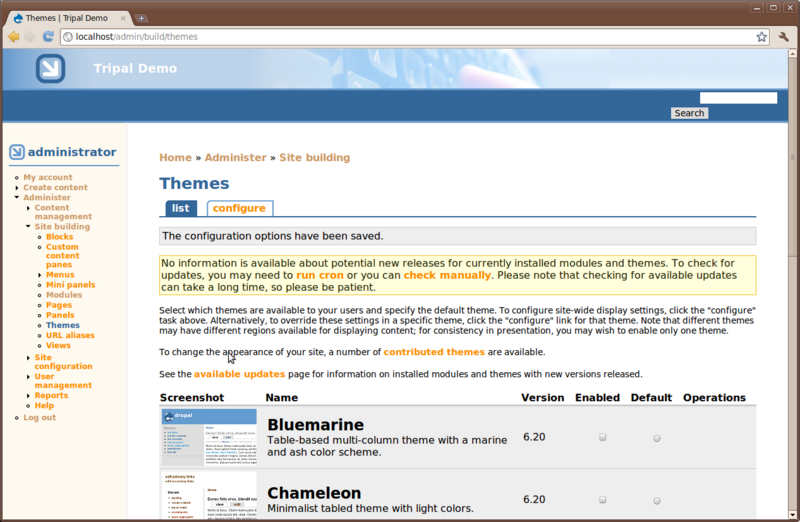
Theme Installation
Drupal allows us to install new themes. Installation of themes involves these steps:
- Locate and download a theme from the Drupal website (http://www.drupal.org/themes)
- Unpack the theme in the /var/www/sites/all/themes directory
- Return to the Drupal Administer → Site Building → Themes page and enable the theme
For an example, the Sky theme is available in the home directory on this VMWare image. We’ll install that.
  cd /var/www/sites/all/themes
  tar -zxvf /home/gmod/Tripal/sky-6.x-3.11.tar.gz
This should unpack the theme for us. Now, navigate to Administer → Site Building → Themes and enable the ‘Sky’ theme:
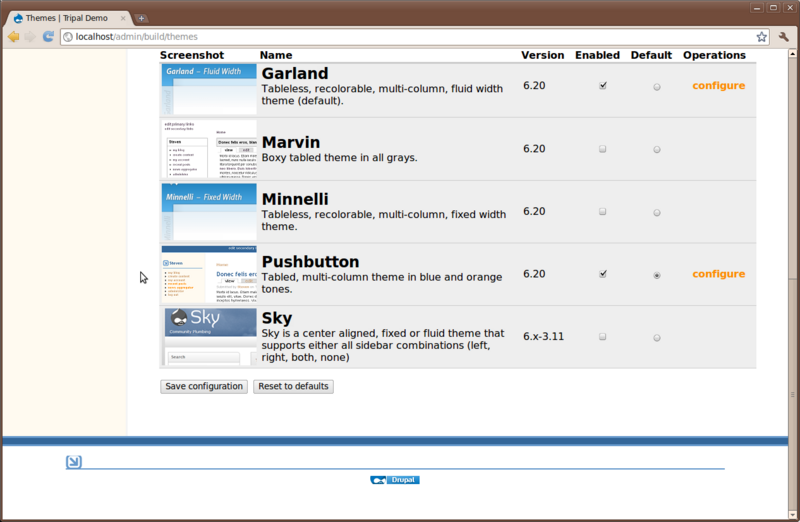
The sky theme was obtained at this address: http://drupal.org/project/sky
Blocks
Blocks in Drupal are used to provide content in regions of a Drupal theme. For example, navigate to Adminster → Site Building → Blocks.
You’ll see that regions of the theme have been identified. Within the Sky theme you can see the regions with dashed lines around them. Also, you’ll see a list of available blocks. You can select where blocks will appear by selecting the region in the drop down list. Blocks may also be hidden, if desired, by selecting <none> in the dropdown.
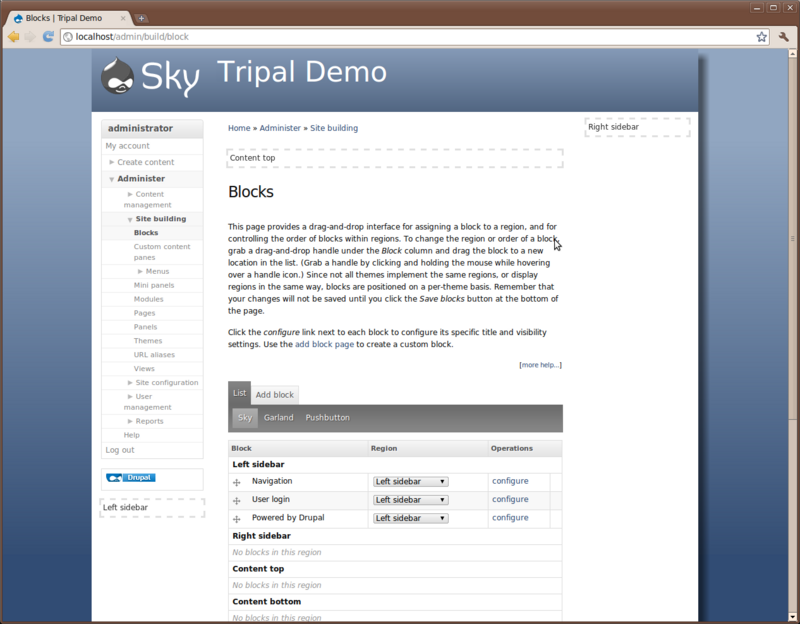
Exercise #4
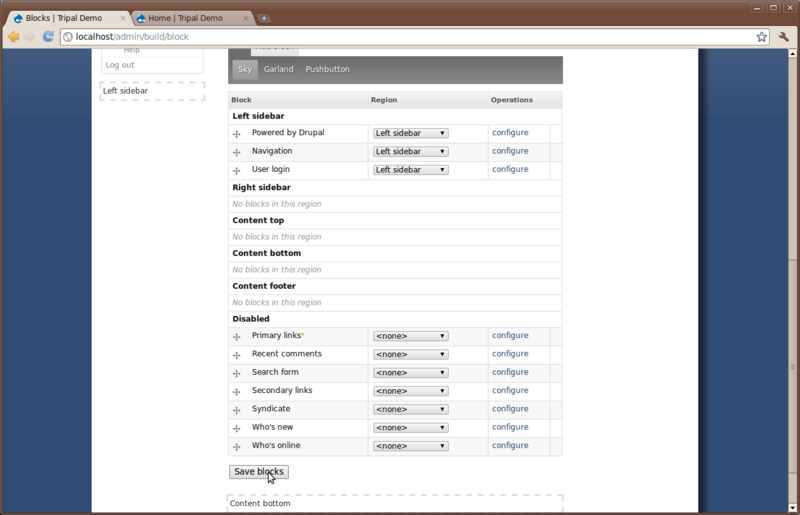
 Take time to turn on and off blocks to see where they appear.  Re-arrange blocks
 by dragging and dropping the cross-hairs beside each one.  Be sure to leave the
 blocks in the configuration shown in the image below finished:
Menus
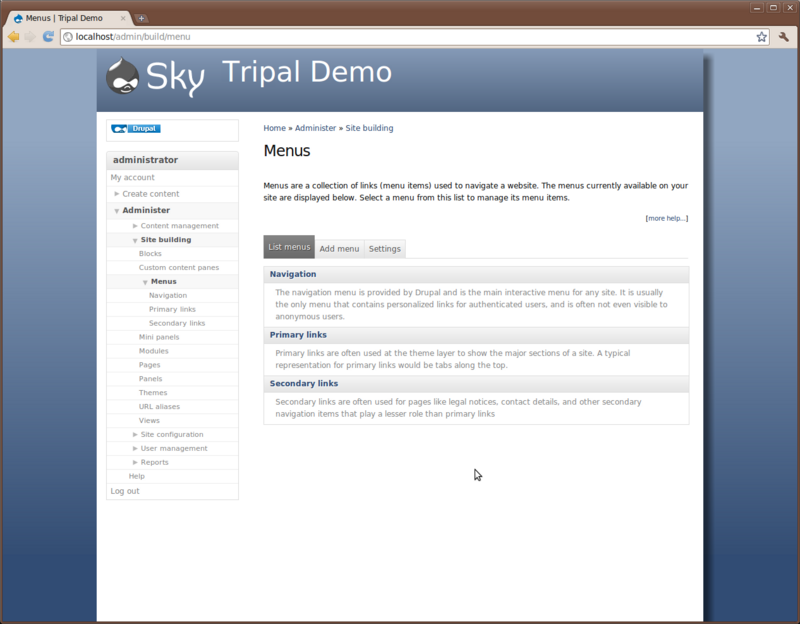
Drupal provides an interface for working with menus, including adding new menu items to an existing menu or for creating new menus. For the exercise in the Blocks section above we added the Primary links menu to the Content top section of the Sky theme. To view the Primary links menu, navigate to Administer → Site building → Menus.
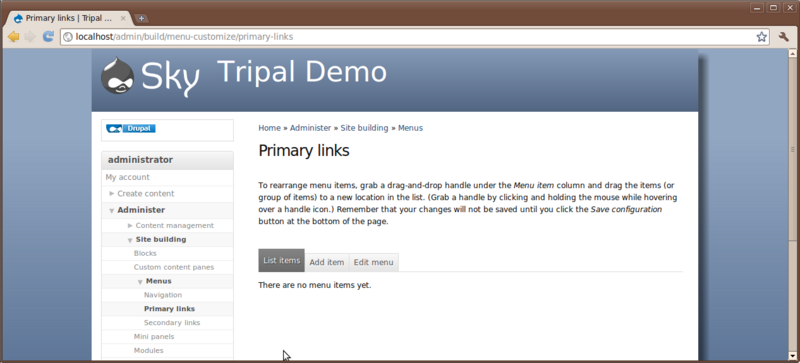
Select the menu Primary links. You’ll see it currently has no item.
As a demonstration for working with menus we’ll add two menu items for the Home and About pages we created earlier. To do so, click the Add item tab. You will see a form for providing information about the menu item to be added.
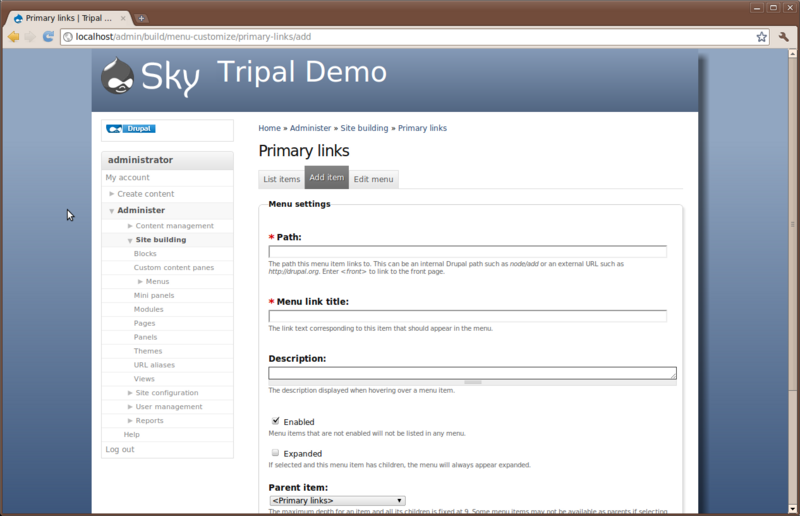
The first field is the path. We need to find the path for our home page.
Exercise #5
 Open new browser tabs or windows and find the About page
 and the Home page we created earlier.
The path for a page can be found in the address bar for the page. In Drupal pages of content are generally referred to as nodes. So, in the address bar for our home page you’ll see the address is http://localhost/node/1. Our about page should be http://localhost/node/2 (i.e the first and second pages we created).
The path for each of these nodes is simply node/1 and node/2.
Returning to our tab where we are adding a menu item, enter the path
node/1. We will set the fields in this ways:
- Path: node/1
- Menu Link Title: Home
- Description: Tripal Demo Home Page
- Enabled: checked
- Expanded: no check
- Parent item: <primary links>
- Weight: 0
The settings above will give the menu link a title of Home and put it on the Primary Links menu. We now have a Home menu item in the top just under the header, and our Home menu item now appears in the list of menu items for the Primary Links menu
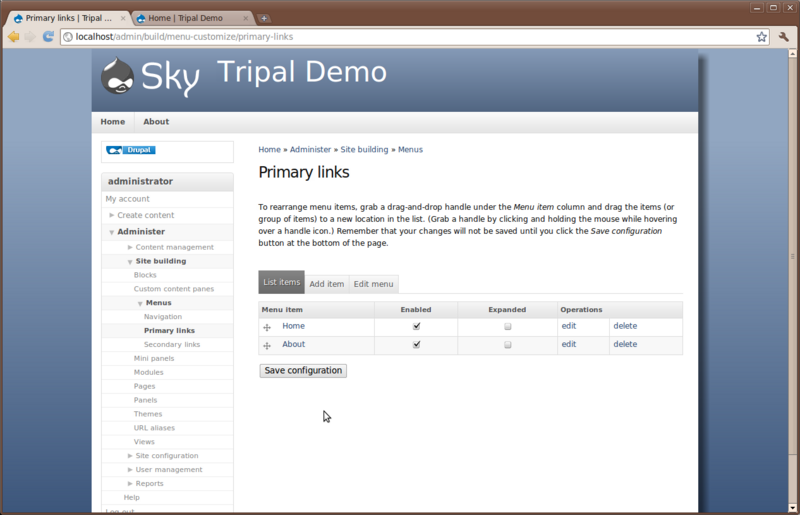
Exercise #6
 Add a second menu item for our about page and arrange them so that our Home
 link appears first and the About link appears second.
URL Path
As mentioned previously, the URL paths for our pages have node/1 and
node/2 in the address. This is not very intuitive for site visitors.
Earlier we enabled the Path module. This module will allow us to set
a more human-readable path for our pages.
To set a path, click on our new About page in the new menu link at the top and click the Edit tab. Scroll to the bottom of the edit page and you’ll see a section titled URL path setting. click to open this section.
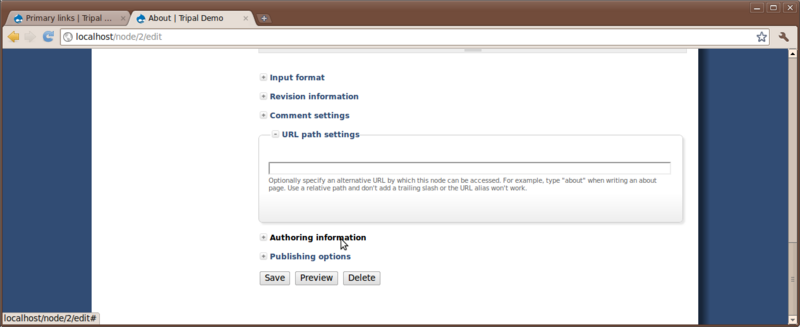
Since this is our about page, we simply want the URL to be http://localhost/about. To do this, just add the word about in the text box. You will now notice that the URL for this page is no longer http://localhost/node/2 but now http://localhost/about. Although, both links will still get you to our About page.
Exercise #7
Set a path of 'home' for our home page.
Site Configuration
There are many options under the Administer → Site configuration page. Here we will only look at one of these at the moment–the Site Information page.
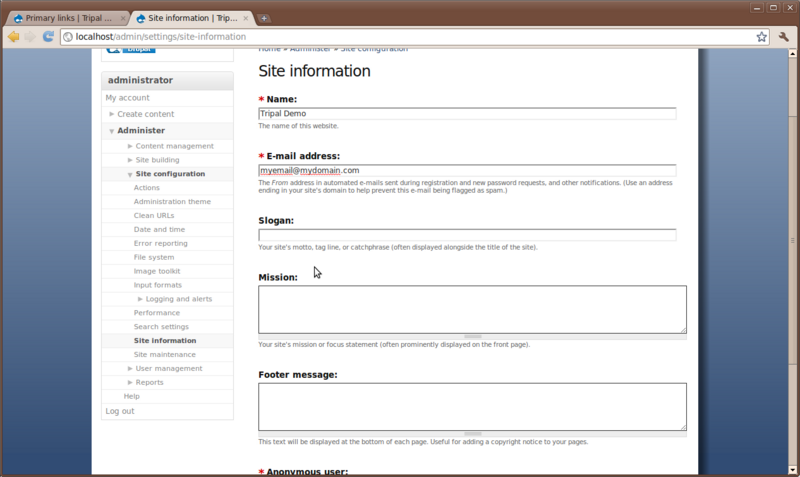
Here you will find the configuration options we set when installing the
site. You can change the site name, add a slogan, mission and footer
text to the. Towards the bottom there is a text box titled Default
front page. This is where we can tell Drupal to use our new Home
page we created as the first page visitors see when the view the site.
In this text box enter the text node/1. This is the address of our
home page. We must use the node number here and not our new URL pat of
‘home’ that we just created. Let’s change the name of our site from
Tripal demo to Fly Genes Database and add a slogan: Resources
for Fly Genomics.
Now, click the Save configuration button at the bottom. You’ll see our site name has changed at the top. Also, if we click the logo image at the top of the site and it will take you to the front page with our new home page appearing.
Theme Configuration
Here we return to theming. There are several configuration options that are available to help customize the theme for your site. These can be found by navigating to the Administer → Site Building → Themes page and clicking the Configure tab near the top.
Appearing under the Configure link will be small menu with a listing of every theme we have enabled. You should see the Sky theme at the end of this list. Click that theme because that is the one we are using and want to configure:
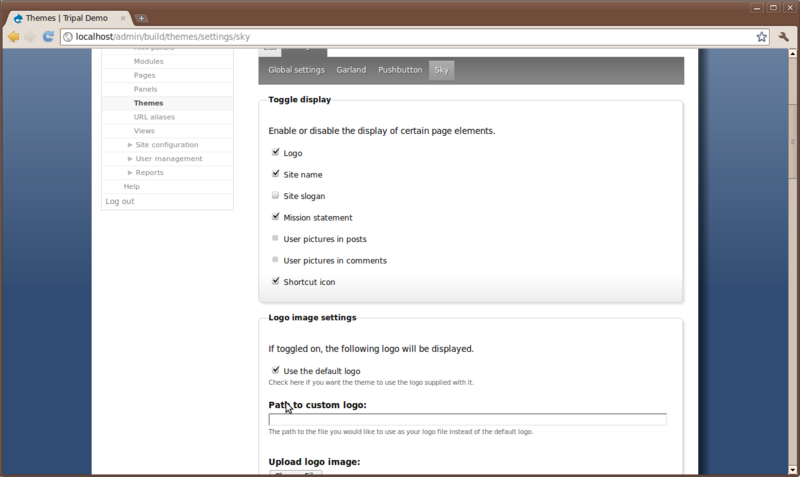
Here you can turn on and off the presence of the logo, site name, slogan, mission statement, etc. For this particular theme we can also adjust background colors and images, link colors, font style and size, and more. Notice when we added a slogan in the previous step that it did not appear anywhere on the site. To make it appear, check the box next to Slogan.
We also want to add a new logo for our site. Since we’ll be loading fly data we want to add a picture of a fruit fly as our logo. We will use the following image:

This image was taken from Wikimedia Commons (http://commons.wikimedia.org/wiki/File:Drosophila.png). Right-click on this image and download it somewhere on your machine. Next, return to our Drupal theme configuration page and use the Logo file upload interface on the page to upload this file as our logo.
Also set the following for the theme:
- The dark blue header is a bit too dark for our logo image. So, let’s add a different color that. Find the text box for the header color and enter this color: ‘#EE2222’ (red color).
- Set the ‘Custom Layout Width’ to be 90% to give us more room
- Set the height of the header to be 120px to give a bit more room there as well.
Then, click the Save Configuration button at the bottom. We now have a new logo and our slogan appears.
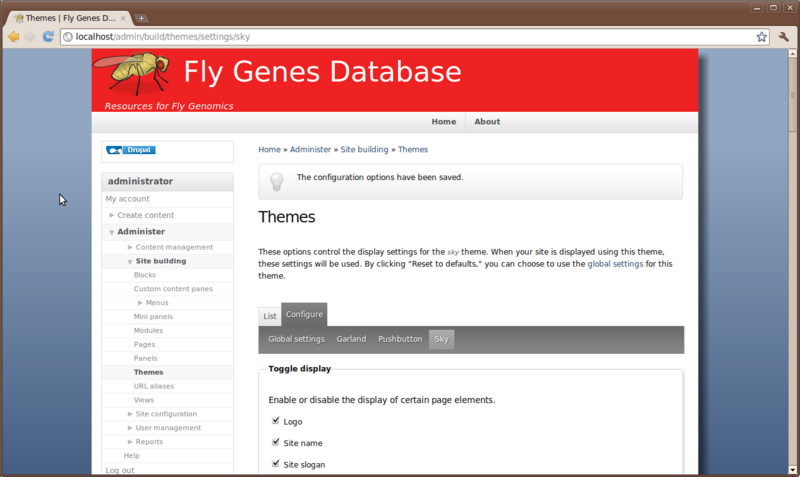
User Accounts
We will not discuss in depth the user management infrastructure except to point out:
- User accounts can be created here
- Users are assigned to various roles
- Permissions for those roles can be set to allow groups of users certain administrative rights or access to specific data.
- How user accounts are created can also be set here.
Tripal Tutorial
Installation
We’re going to use the development version from SVN because it has so
many more features that the current v0.2. A new version, v0.3 will be
released soon and will have many of these features we’ll be using in the
development version. A recent version from SVN was downloaded to he
/home/gmod/Tripal/tripal-svn directory. The following command was used
to do this. You do not need to perform this step as it has been done for
you:
svn co https://gmod.svn.sourceforge.net/svnroot/gmod/tripal/trunk
mv trunk tripal-svn
However, since this version of Tripal was downloaded to the VMWare image there have been further updates which we want to include for this workshop. To get those we need to update the SVN. We can do this simply by issuing the ‘svn update’ command:
cd /home/ficklin/gmod/Tripal/tripal-svn
svn update
To install Tripal we need to do the same as we did for the other modules, with the exception of unpacking the files. The files are already decompressed. So, let’s just copy them to our Drupal modules directory:
cp -R tripal_* /var/www/sites/all/modules
cp -R theme_tripal /var/www/sites/all/themes
Note:: typically, one would download the Tripal package and uncompress it as we did with the other modules we installed. But since we’re using SVN we just copy it over.
There are no special instructions for installing Tripal other than copying the files so we will now navigate to the Administer → Site Building → Modules page to install Tripal. Here you’ll see a long list of modules under two categories: Tripal and Tripal Analyses.
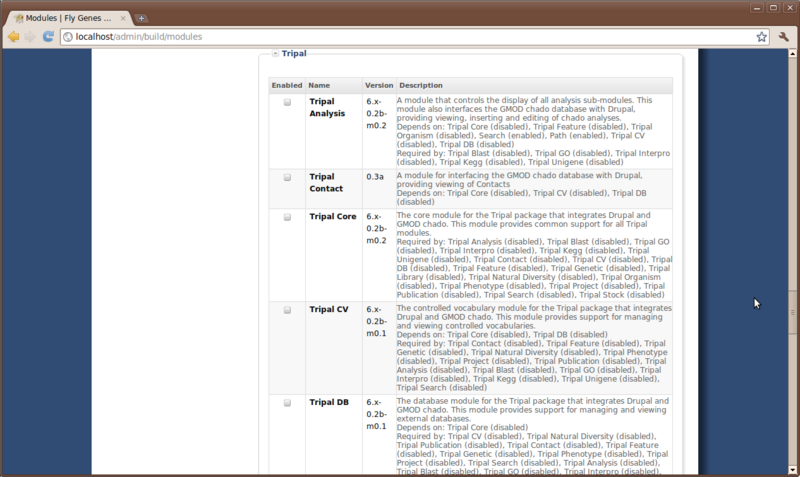
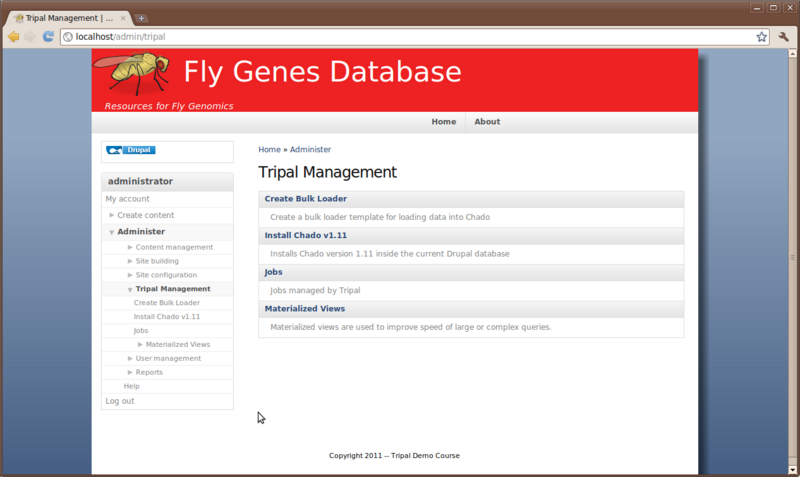
Enable the module Tripal core only. There is now a Tripal Management link under Administer with several sub items:
- Create Bulk Loader (under development, not yet functional)
- Install Chado v1.11
- Jobs
- Materialized Views
Install Chado
The first thing we want to do is install Chado. If Chado is already installed in another database then Tripal can use that Chado as well. However, for better compatibility with all functionality of Drupal it is best if Drupal and Chado live in the same database. Instructions for integrating Tripal with an external Chado database are provided in the User’s Guide but will not be shown in this workshop.
To install Chado, simply navigate to the page Administer → Tripal Management → Install Chado v1.11, read the warning message and click Install Chado when ready.
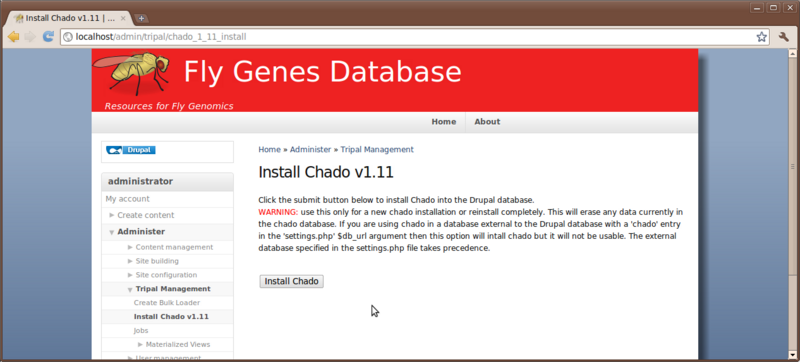
A message will then be given that says
"Job 'Install Chado' submitted. Click the jobs page for status". If we
then click the link jobs page we can then see our job in the list:
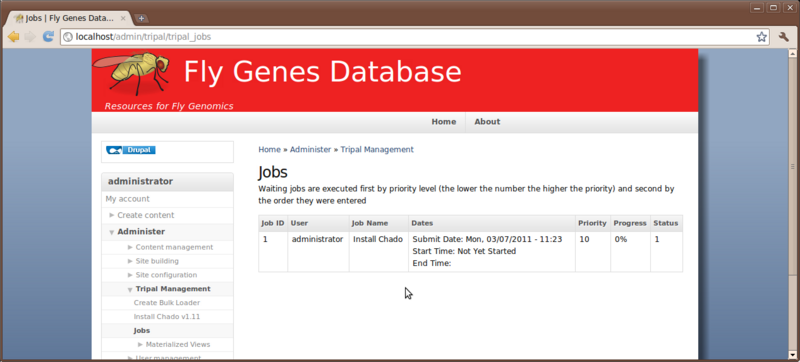
We will continue our installation of Chado in the next section.
Jobs Management
The jobs management subsystem allows modules to submit long-running jobs, on behalf of site administrators or site visitors. Often, long running jobs can time out on the web server and fail to complete. The jobs system runs separately in the background using the command-line on an automated schedule but jobs are submitted through the web interface by users.
Tripal provides two API function calls that allows any module to submit a job to the queue
- A job sumbission function
- A job status update function
So, in the example above we now see a job for installing Chado. The job view page provides details such as the name of the job, The user who submitted the job, dates that the job was submitted and job status.
Jobs in the queue can be executed in two ways:
- Manually through a command-line call
- Using the UNIX cron to automatically launch the command-line
When we installed Drupal we installed a Cron job to allow the software to run housekeeping tasks on a regular bases. Tripal needs a cron entry as well to allow for regular execution of jobs in the queue. We will need to add a second cron entry:
sudo crontab -e
A word on text editors such as nano.
Add this line to the crontab
0,15,30,45 * * * * (cd /var/www; php ./sites/all/modules/tripal_core/tripal_launch_jobs.php administrator ) > /dev/null
This entry will run the Tripal cron every 15 minutes as the administrator user. For this workshop we do not want to wait 15 minutes at the most to execute our jobs. So, we’ll run the jobs in the queue manually. We will execute the same command that we used in the cron above:
cd /var/www; php ./sites/all/modules/tripal_core/tripal_launch_jobs.php administrator
We should now see that Chado is being installed!
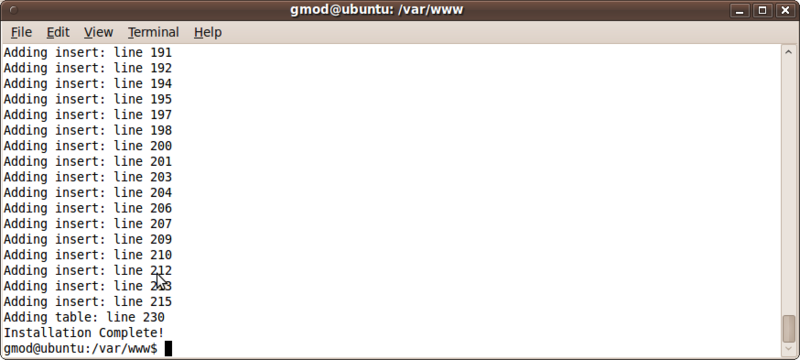
Also, we see that the job has completed when refreshing the jobs management page:
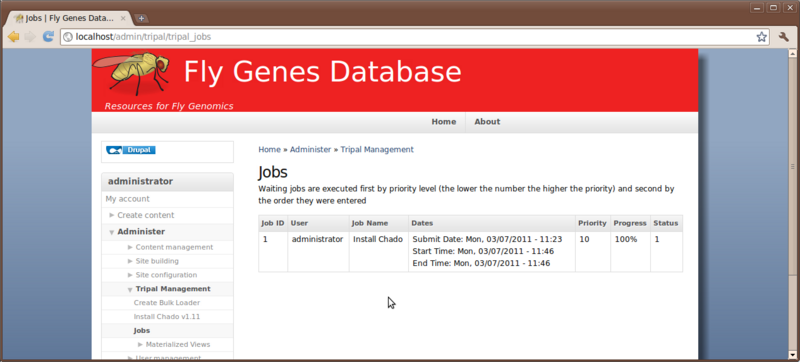
PhpPgAdmin
A nice database management tool is freely available for managing a PostgreSQL database. It is currently installed on the VMWare image and is accessible at this URL: http://localhost/phppgadmin/
Let’s look at our Chado and Drupal databses using phpPgAdmin by first logging in with the username gmod and password gmodamericas2011. When the tool opens you’ll see several databases listed down the left-hand side. Click the tripal_demo database to open the tree.
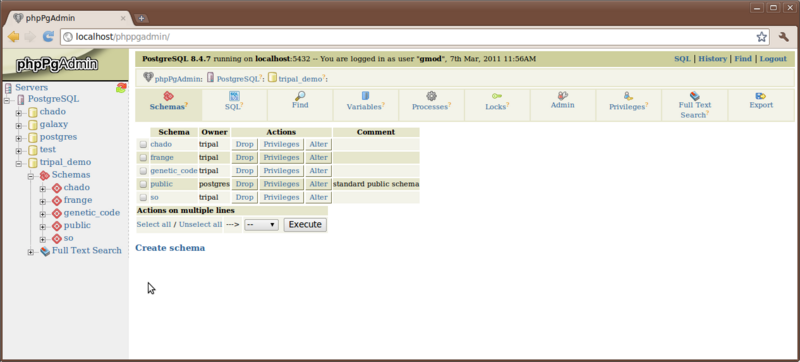
Under the tripal_demo database you’ll see several different schemas:
- chado
- frange
- genetic_code
- public
- so
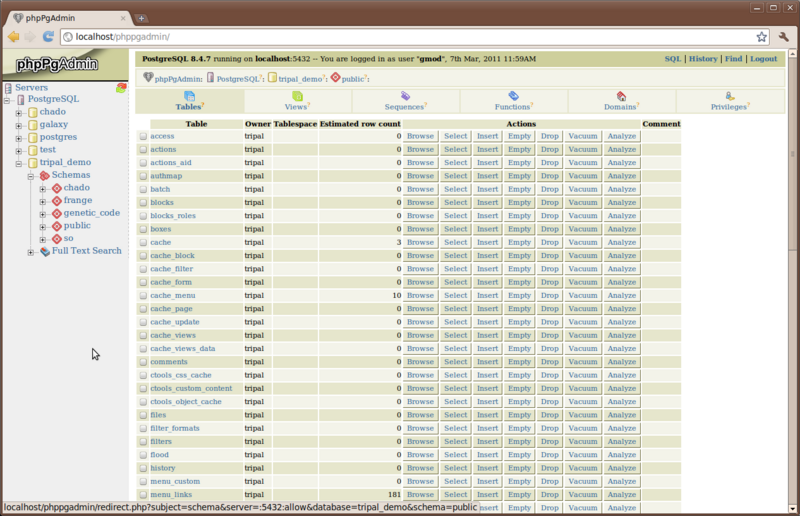
The chado, frange, genetic_code and so schemas were all installed by our Chado installation. The public schema is used by Drupal. All of the chado tables that we will be using are housed in the ‘chado’ schema and all tables for Drupal are in the ‘public’ schema.
Open the chado schema look at the Chado tables. Then open the public schema and take a look at the Drupal tables
The Chado database:
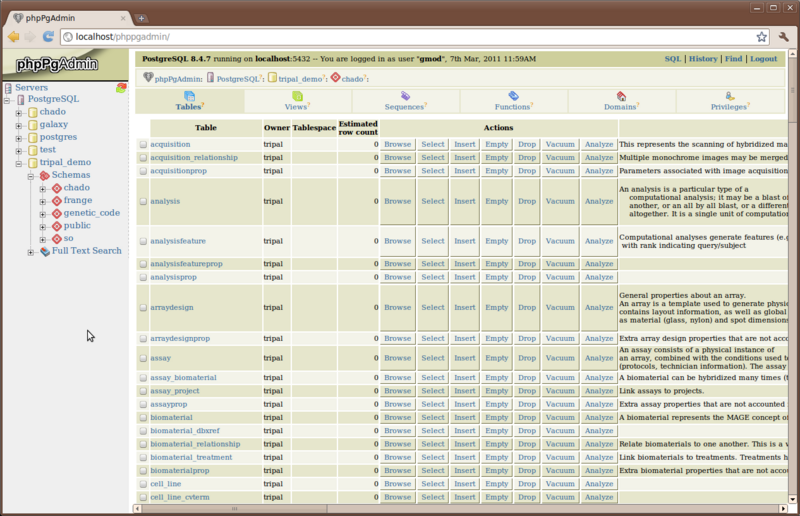
The Drupal database
Install Additional Tripal Modules
Now that we have the core module installed and the Chado database installed and ready we can install the other Tripal modules.
Note: For this workshop we will not be using all of the modules available for Tripal, only those related to the Chado feature module.
Return to the Administer → Site building → Modules page and turn on the following Tripal modules in the order specified:
- Tripal DB
- Tripal CV
- Tripal Organism
- Tripal Analysis
- Tripal Feature
Notice that for some of these modules messages appear after installation indicating directories being created and Materialize views (we will discuss these in a bit).
Now, when you visit the Administer’ → Tripal Management page you will see several more administrative options available to you.
Install the Tripal Theme
Tripal provides a theme for Drupal, but it is designed to be a base theme. This way the site can use any theme you want, but Tripal can still provide some theming support for the data components it generates. To enable the Tripal theme, Navigate to the Adminster → Site Building → Themes page and click the checkbox to Enable the Tripal theme. DO NOT click the default radio button for the Tripal theme. We do not want it to be default. The Sky theme should remain as default.
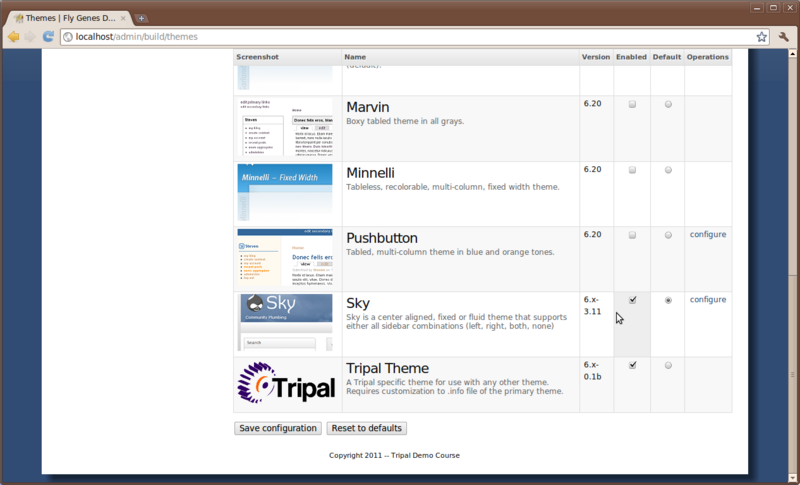
Next we have to inform our Enabled them (a.k.a the Sky theme) that it should use Tripal as it’s base theme. To do this, we need to edit the .info file in the Sky theme directory.
   cd /var/www/sites/all/themes/sky
   gedit sky.info
Scroll to the bottom of the file and add the following line
base theme = tripal
Materialized Views
Chado is very efficient as a data warehouse but queries can become slow depending on the number of table joins and amount of data. To help simplify and speed these queries, materialized views were introduced into Chado by the GMOD folks.
A materialized views will take an SQL query like this
   SELECT DISTINCT CVT.name,CVT.cvterm_id, CV.cv_id, CV.name
   FROM {cvterm_relationship} CVTR
     INNER JOIN cvterm CVT on CVTR.object_id = CVT.cvterm_id
     INNER JOIN CV on CV.cv_id = CVT.cv_id
   WHERE CVTR.object_id not in
        (SELECT subject_id FROM {cvterm_relationship})
And turn it into this:
SELECT * FROM cv_root_mview WHERE cvterm_id = 100
For this to work a table named cv_root_mview is created and populated with the results of the larger query. The query on the materialized view is there more simple and faster. A side effect, however is redundant data, with the materialized view becoming stale if not updated regularly.
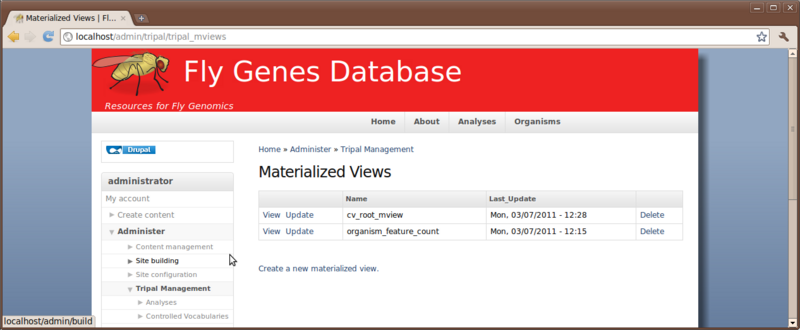
Tripal provides a mechanism for updating these materialized views. These can be found on the Administer → Tripal Management → Materialized Views page.
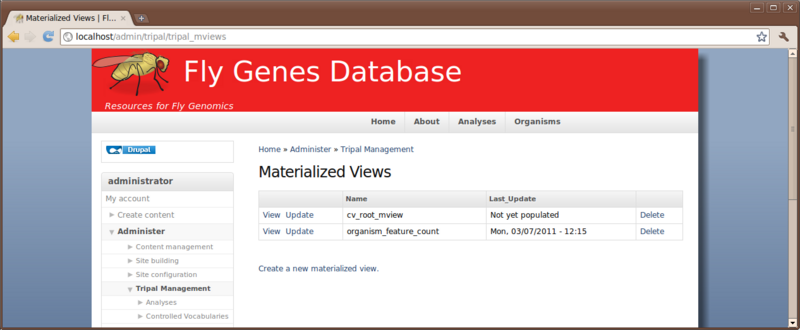
Here we see two materialized views. These were installed automatically by the Tripal CV and Tripal Feature modules. We need to update these and populate them with data. To do so, click the Update button for the first one. This will add a job to our jobs management system to update the view. Now, return to the Materialized Vies page and click to update the other view as well.
So, let’s run these two jobs:
cd /var/www; php ./sites/all/modules/tripal_core/tripal_launch_jobs.php administrator
You can now see that both views are up-to-date on the Materialized Views Page
Controlled Vocabularies: Installing CVs
Before we can proceed with populating our Chado table with genomic data we must first load some Ontologies. To do this, navigate to Administer → Tripal Management → Controlled Vocabularies. You’ll see a page describing the purpose of the module and how to use it (right now just a shell). On the left hand menu find the link for ‘Add/Update Ontology With OBO File’ and click that. You’ll see the following page:
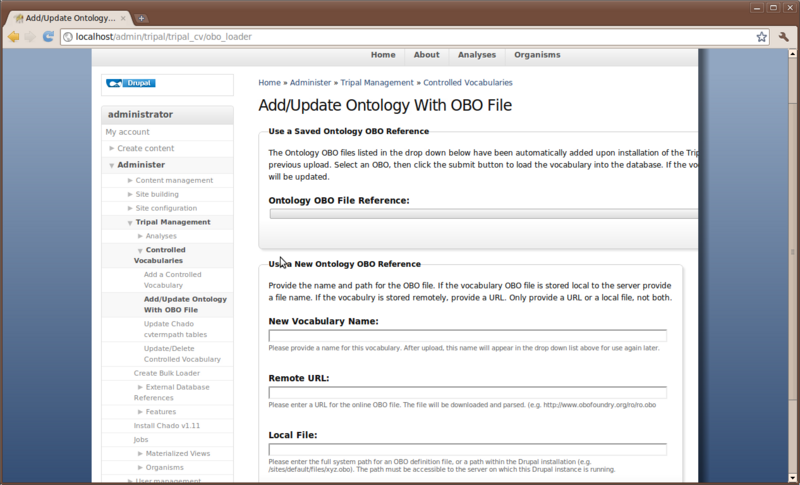
The Ontology loader will allow you to select a pre-defined ontology from the drop down list or allow you to provide your own to be loaded. If you were to provide your own, you would give the remote URL of the OBO file or provide the full path on the local web server where the OBO file is located. In the case of the file residing remotely, Tripal first download and the parse the OBO file for loading. If you do provide your own OBO file it will appear in the saved drop down list for loading of future updates to the ontology.
For this workshop, need to install these ontologies:
- Chado feature properties
- Relationship ontology
- Sequence ontology
Do so by selecting one and clicking the Submit button. Repeat this process for each of the three ontologies. You’ll notice each time that a job is added to the jobs subsystem.
Now manually launch these jobs
cd /var/www; php ./sites/all/modules/tripal_core/tripal_launch_jobs.php administrator
Note: Normally, we would also want to load the Gene Ontology. However, this process will take several hours which we do not have time for in the lecture. Unfortunately, this means we will not be able to demonstrate the GO analysis module in this workshop.
Organism Page
What if Our Organism is Already in Chado?
Now that we have Chado loaded and populated we would like to create a home page for our species. Chado comes pre-loaded with a few species already, so we will check to see if our organism is already present. To do this navigate to Administer -> Tripal Management → Organisms → Configuration
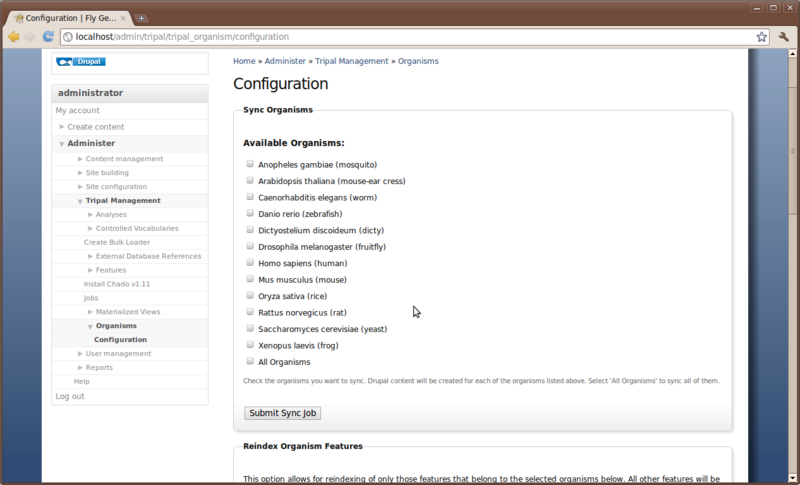
This configuration page has several different options. We will discuss two of these here. The first is the top section labeled Sync Organisms. In this section is a list of organisms. These are the organisms that come by default with Chado. Fortunately our Organism is already in the list: Drosophila melenogaster
We need to inform Drupal that we have data in Chado that we would like a web page for. This is what we call Syncing. We need to sync Drupal and Chado so that Drupal knows about our organism. To do this, click the check box next to Drosophila melenogaster and then click the Submit Sync Job.
As usual we want to run this job manually:
cd /var/www; php ./sites/all/modules/tripal_core/tripal_launch_jobs.php administrator
Now that our organism is synced we should have a new page for Drosophila melenogaster. To find out, click the Organisms menu item at the top of the page. This menu item was automatically added when we installed the Tripal Organism module. On this page we see a list of organisms that have been “synced” with Drupal and Chado. There should only be our the one we just synced.
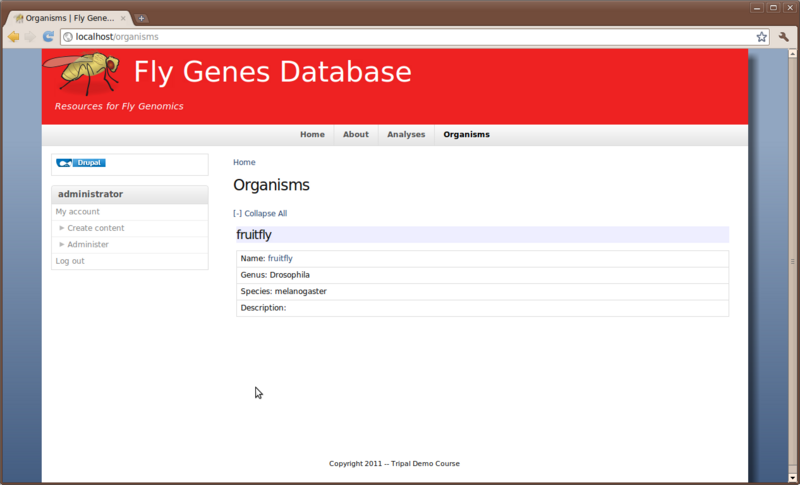
Now if we click the ‘fruitfly’ link it should take us to our new organism page:
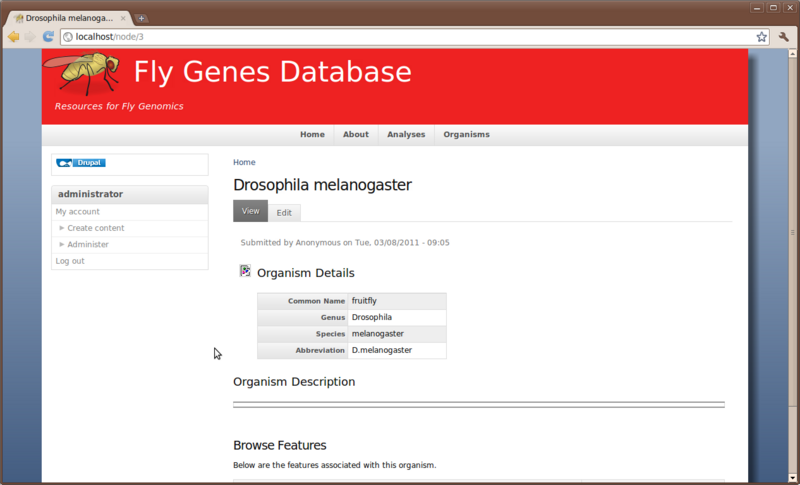
This page, however is a bit empty. We need to add some details. Click the Edit tab towards the top of the page. Notice two if the fields are missing content: the description and the organism image
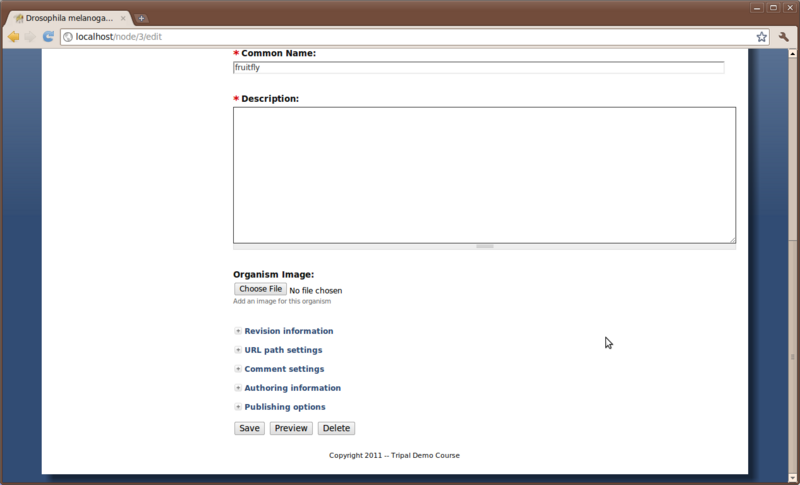
For the description add the following text (taken from wikipedia: http://en.wikipedia.org/wiki/Drosophila_melanogaster):
“The genome of D. melanogaster (sequenced in 2000, and curated at the FlyBase database) contains four pairs of chromosomes: an X/Y pair, and three autosomes labeled 2, 3, and 4. The fourth chromosome is so tiny that it is often ignored, aside from its important eyeless gene. The D. melanogaster sequenced genome of 165 million base pairs has been annotated[17] and contains approximately 13,767 protein-coding genes, which comprise ~20% of the genome out of a total of an estimated 14,000 genes. More than 60% of the genome appears to be functional non-protein-coding DNA involved in gene expression control. Determination of sex in Drosophila occurs by the ratio of X chromosomes to autosomes, not because of the presence of a Y chromosome as in human sex determination. Although the Y chromosome is entirely heterochromatic, it contains at least 16 genes, many of which are thought to have male-related functions.”
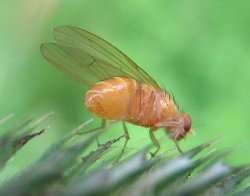
For the image, download this image below and upload it using the interface on the page.
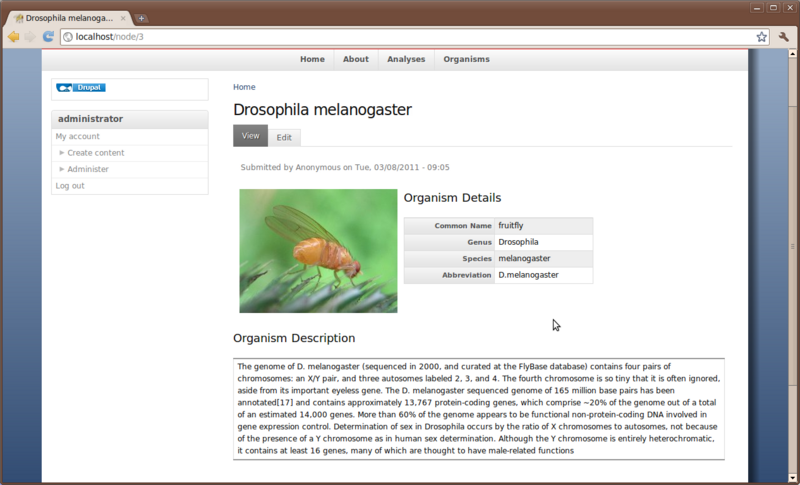
Save the page. Now we have a more informative page:
What if Our Organisms Isn’t Present in Chado?
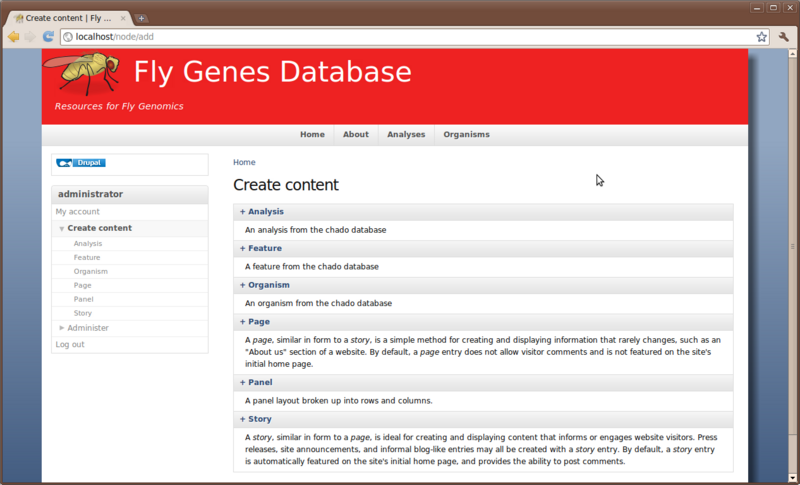
If we have an organism that is not already present in Chado, we can easily add one using the Create Content page. You can find this link on the left side bar navigation menu. The Create Content page has many more content types than when we first saw it. Previously we only had Page and Story content types. Now we have three additional content types added by the Tripal Analysis, Organism and Feature modules.
To add a new organism simply click the Organism link and and fill in the fields.
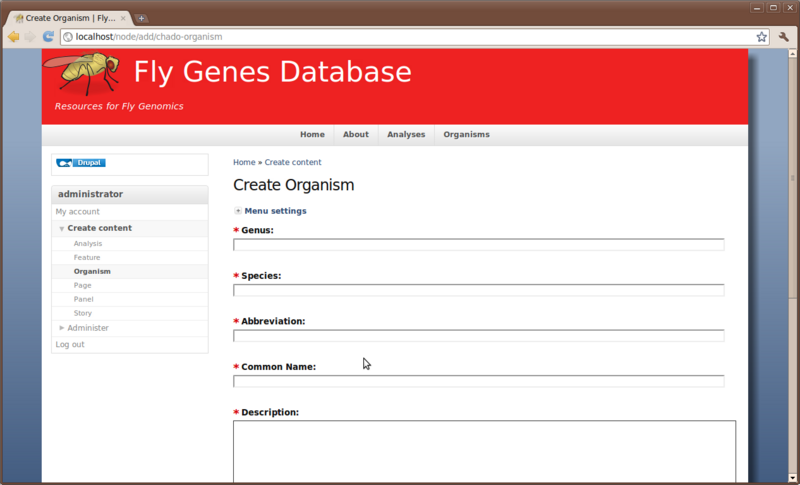
Excercise #8
 Create a new organism of your choice.   Once complete, click the
 Organism menu item at the top to see it in the list.
Loading Data
Review of the Data
Now that we have our organism ready, we can to being loading feature data. For this workshop only a few genomic features from the genome of Drosophila melenogaster (obtained from FlyBase) have been selected. This is to ensure we can move through the demonstration rather quickly. But Tripal can support very large datasets. Also, we are not loading the entire compendium of data for these genomic features. Tripal does not have loaders or visualization pages for all of the data types available on FlyBase.
Below is a summary of the data types Tripal can currently handle for genomic features:
- Genomic loci or features (e.g. genes, mRNA, CDS, EST, contig, or any other type in the Sequence Ontology)
- Feature relationships (e.g. mRNA part_of gene, protein derived_from mRNA).
- Feature synonyms
- External Database cross-references for features
- Feature localizations (e.g. genes are located on chromosomes or scaffolds)
- Feature properties
Also display of analyses results are also available for these methods:
- Blast
- KEGG
- InterProScan
- Gene Ontology
- Unigene
We will demonstrate all of the above with the exception of the Gene Ontology viewer (because the GO takes too long to load for this course) and the Unigene (we are not building a unigene set).
Loading a GFF3 File
GFF3 files can be parsed and data loaded into Chado using the GFF3 loader that now comes with Chado. The GFF loader supports these operations:
- Inserting of features into Chado
- Inserting of location of features relative to others (including phase and strand)
- Inserting of relationships between features (e.g. parent relationships)
- Inserting of external database references for features
- Inserting of synonyms (or Aliases) for features
As of the SVN version it does not yet support (but will as time progesses):
- loading of FASTA sequences at the bottom of the file
- target relationships (between aligned sequences, e.g. blast)
- other non reserved attributes as properties
A GFF3 file containing the genes and mRNA sequences we will be using can be downloaded here: Flybase demo data (Aside from filtering the original FlyBase GFF file, no alterations have been made to this file).
Right-click and download this data into the directory
/home/gmod/Tripal
Now, navigate to Administer → Tripal Management → Features → Import a GFF3 file.
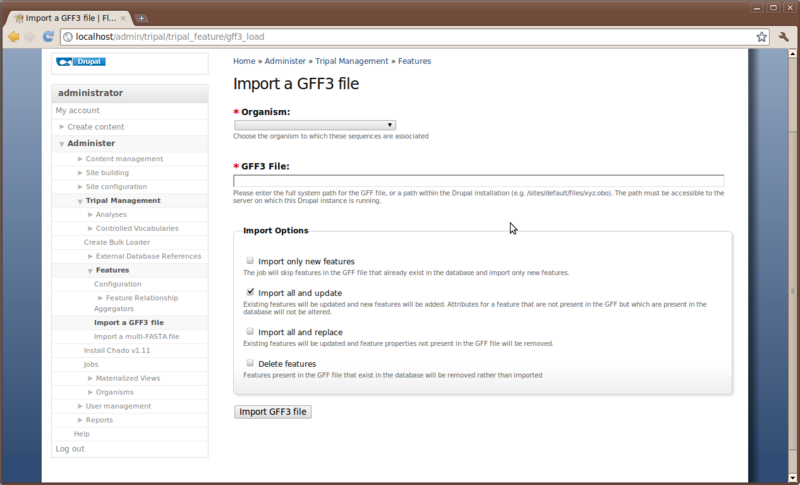
Here we will simply choose the organism to which the GFF3 file describes, enter the path on the file system where our GFF file resides and select the appropriate import options.
Enter the following values
- Organism: Drosophila melenogaster (fruitfly)
- GFF3 file: /home/gmod/Tripal/Flybase-tripal-demo.gff.txt
- Import option: Import all and update.
Click the Import GFF3 button when complete. You’ll notice a job was submitted to the jobs substem. Now, to complete the process we need the job to run. We’ll do this manually:
cd /var/www; php ./sites/all/modules/tripal_core/tripal_launch_jobs.php administrator
Feature Pages
Syncing Features
Just as we had to sync our organisms, we must also do the same for our genomics features. Loading of the GFF file in the previous step has populated the feature tables of Chado for us, but now Drupal must know about these features. Similar to the Organism Configuration page there is also a Feature Configuration page. This can be found by navigating to Administer → Tripal Management → Features → Configuration.
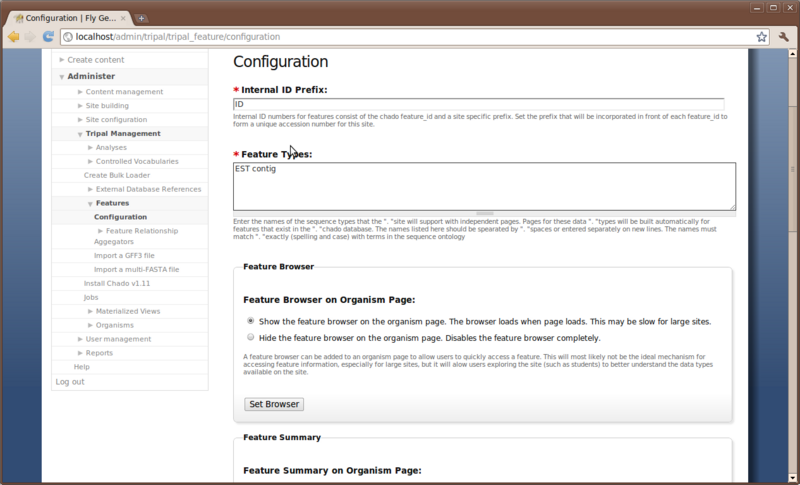
The first text box is for specifying internal ID prefix. This is used to form a unique numeric identifier for each feature in your site. The number is prefixed with the value chosen here. Enter a value of ‘FGD’ for Fly Genes Database.
The second text box is for specifying the types of features to sync with Drupal. You should enter the Sequence Ontology terms for the features that should have pages on the site. In our case, we want gene and mRNA pages. Features of these types were present in our GFF file. So, add the SO terms ‘gene’ and ‘mRNA’ to the this box.
Now, click the Save configuration button at the bottom of the page to save the changes.
Next, we want to sync the ‘gene’ and ‘mRNA’ features with Drupal. To do this, scroll down until you find the Sync Features section. click the Sync All Features button. A job is then added to the jobs management system which we need to manually run.
cd /var/www; php ./sites/all/modules/tripal_core/tripal_launch_jobs.php administrator
Our features are now synced:
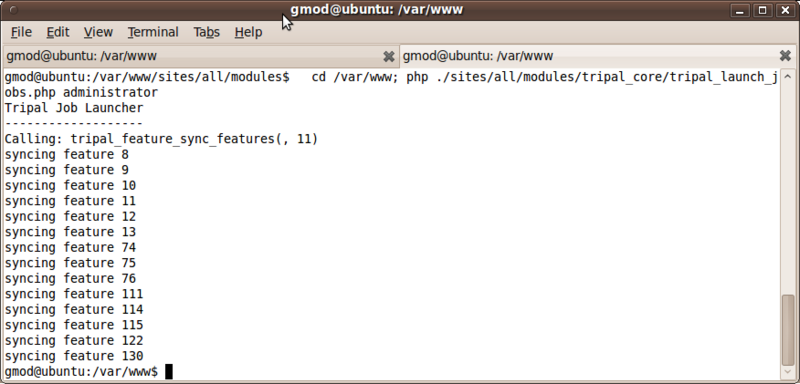
Exercise #9
Find the feature pages we just synced. We previously discussed one way to find content.
Manually Adding a New Feature
In the same way that we created an organism using the Create content page, we can also add a new feature as well. We will not review how to do this as the steps are the same as for creating an organism. Also, it is not practical to add all features in this way, but this interface can be useful for cases where a feature may have been forgotten and needs to be easily added.
Loading FASTA files
Locate the gene page for the gene named ‘CG40042’. Scroll through the page. Notice, we can see the feature details, synonyms, external database references, locations for this feature and relationships that this feature has. We are missing the sequence information. When we loaded the GFF file there was no sequence data (although our GFF loader currently doesn’t handle FASTA sequences in the GFF file… it will in the future). So, we need to add the sequence data. We also want to add peptide information as well.
To do this, we will load three FASTA files which you can download from these links:
- Media:Flybase-tripal-demo.2LHet.fna.txt: 2LHet chromosomal sequence
- Media:Flybase-tripal-demo.genes.fna.txt: nucleotide sequences for genes
- Media:Flybase-tripal-demo.peptides.fna.txt: translated peptide sequences
Save these files in the /home/gmod/Tripal directory
Now,navigate to the Administer → Tripal Management → Features → Import a Multi-FASTA file Page
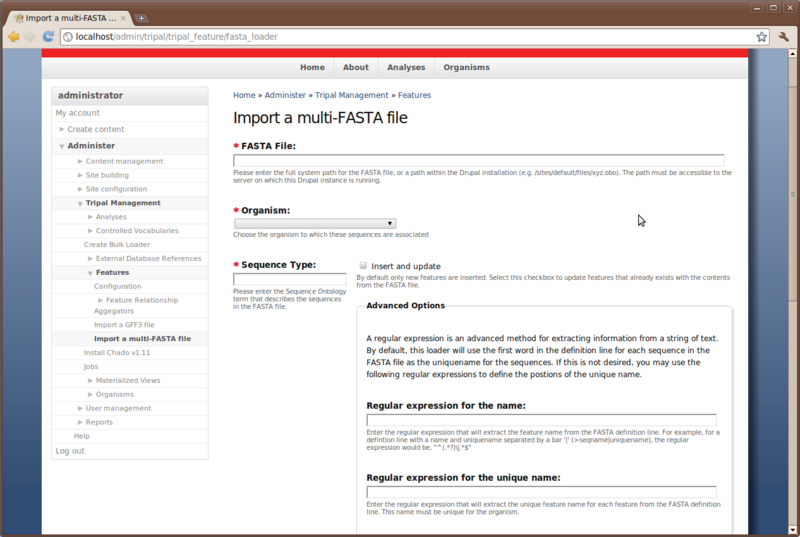
Before loading the FASTA file we must first know the SO term that describes the sequences we are about to upload. We can find the appropriate SO terms from our GFF file. In the GFF file we see the SO terms that correspond to our FASTA files are ‘chromosome_arm’ and ‘gene’. However, the protein sequences were not present in our GFF file so these will need to be added as new features of type ‘peptide’.
We will load our FASTA files in the order they appear for download above. Use these settings when loading each one:
Loading Flybase-tripal-demo.2LHet.fna.txt (chromosomal sequence)
- FASTA file: /home/gmod/Tripal/Flybase-tripal-demo.2LHet.fna.txt
- Organism: Drosophila melenogaster (fruitfly)
- Sequence type: chromosome_arm
- Insert & Update: checked
- Do not set any advanced options
When parsing the FASTA file, Tripal assumes that the first word in the definition line is the unique name for the feature and will try to find the feature for updating. If it cannot find the feature then it will insert it.
IMPORTANT: It is important to ensure prior to importing, that the FASTA loader will be able to appropriately match the sequence in the FASTA file with existing sequences or it may add duplicates.
The advanced options provide a mechanism for helping the loader find the unique name (and other information) if the name is not the first word in the definition line. They also provide a mechanism for generating relationships and external database references using information that may be in the definition line as well. This, however, requires knowledge of regular expressions. A reference can be found here: http://www.regular-expressions.info/tutorial.html
In the case of this first FASTA import, the first word on the definition line matches the uniquename of our 2LHet feature so we do not need any advanced options. Click the Import Fasta File, and a job will be added to the jobs system. Run the job:
cd /var/www; php ./sites/all/modules/tripal_core/tripal_launch_jobs.php administrator
Loading Flybase-tripal-demo.genes.fna.txt We have gene pages for sequences. If we look back at one of our gene pages, notice that there is not a database reference to FlyBase, where these sequences came from. This information was not present in our GFF file because the GFF file came from FlyBase. We want to add that database reference and can do so using the FASTA loader.
Before we can load this FASTA file we first need to add the ‘FlyBase’ database to Chado. To mange external databases, navigate to Administer → Tripal Management → External Database References → Update/Delete Database References. On this page appears a singe drop down list of the available databases stored in Chado.
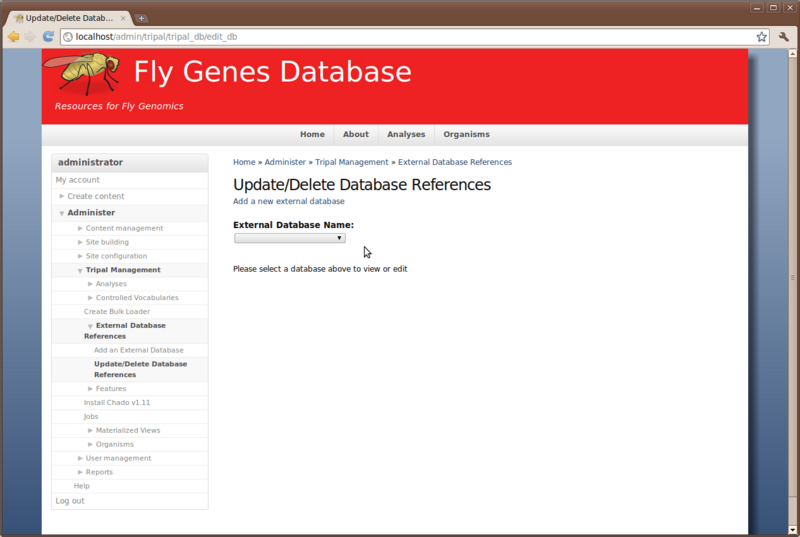
Look in the drop down list for an existing FlyBase database. Most of these databases were added automatically be the Chado installation. However, some of these, including the ‘FlyAtlas’ and ‘FlyBase_Annotation_ID’ database were added automatically by the GFF loader. Since we do not find a database that matches what we want, we will add our own. To do this, click the link Add a new external database. Enter the following values for the fields:
- Name: FlyBase
- Description: FlyBase: a database for drosophila genetics and molecular biology
- URL: http://flybase.org/
- URL prefix: http://flybase.org/reports/
Click Add.
We now have added a new database! Now, return to the FASTA import page and use the following values for loading the next FASTA file:
- FASTA file: /home/gmod/Tripal/Flybase-tripal-demo.genes.fna.txt
- Organism: Drosophila melenogaster (fruitfly)
- Sequence type: gene
- Insert & Update: checked
- Under advanced options set the following
- External database: FlyBase (the database we just created)
- Regular expression for the accession: ^(.*?)\s.*$
Here is the meaning of the characters in the regular expression:
  ^         matches the beginning of the line
  $         matches the end of the line
  .         matches any character
  \s        matches a space
  (.*?)\s   matches all characters up to the first space.  The text in parenthesis will be the accession
Click the Import Fasta File, and a job will be added to the jobs system. Run the job:
cd /var/www; php ./sites/all/modules/tripal_core/tripal_launch_jobs.php administrator
You should see output from the jobs similar to the following indicating that the gene sequences were updated and the database cross references were added:
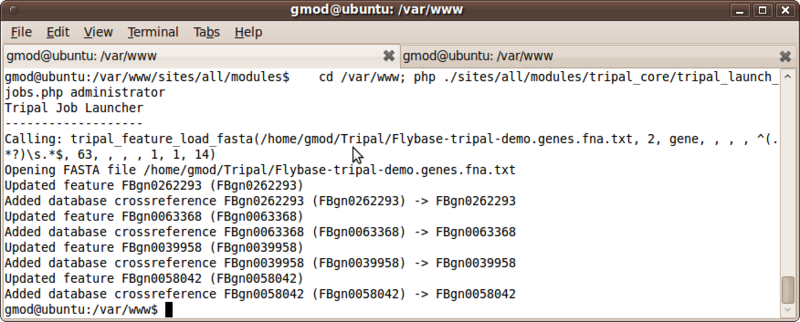
Now, if we visit our feature page, for feature ‘CG40042’ you can see the nucleotide sequences for the gene, but if you scroll to the database references you will also see an entry for our FlyBase database which we added using the FASTA importer. The link will take you to the FlyBase website for this feature.
Loading Flybase-tripal-demo.peptides.fna.txt The sequences present in the other FASTA files were already added to Chado by the GFF loader, so the FASTA loader simply updated those features by added the sequence information. Their relationships and database references were already in the database so we didn’t need to use the advanced options of the FASTA loader to add this information. However, the protein sequences were not added by the GFF loader as they were not present in the GFF file. We will need to use the advanced options to associate these protein sequences with the mRNA features from which they are derived.
We will need to use the advanced options to associate relationships and a database reference with these peptides. Here is an example of a definition line in the FASTA file:
` `
>FBpp0112427 type=protein; loc=2LHet:complement(20469..20650,20723..21383,21436..21569,32573..32645); ID=FBpp0112427; name=CG12567-PA; parent=FBgn0039958,FBtr0113704; dbxref=FlyBase_Annotation_IDs:CG12567-PA,FlyBase:FBpp0112427,REFSEQ:NP_001015384,GB_protein:EAA46065,FlyMine:FBpp0112427,modMine:FBpp0112427; MD5=246ea191b614901ccb7ba87d545d6308; length=349; release=r5.34; species=Dmel;
We will use regular expressions to pull out the necessary information. Return to the FASTA loader and load the final peptide file and use these values:
- FASTA file: /home/gmod/Tripal/Flybase-tripal-demo.peptides.fna.txt
- Organism: Drosophila melenogaster (fruitfly)
- Sequence type: peptide
- Insert & Update: checked
- Under advanced options set the following
- Regular expression for the name: name=(.*?);
- Regular expression for the unique name: ID=(.*?);
- Relationships
- Relationship type: produced by
- Regular expression for the parent: parent=.*?,(.*?);
- Parent type: mRNA
- External Database Reference:
- External Database: FlyBase
- Regular expression for the accession: ID=(.*?);
Click the Import FASTA file button and then run the job:
cd /var/www; php ./sites/all/modules/tripal_core/tripal_launch_jobs.php administrator
You should see output where the protein feature was added, along with relationship information and database cross-reference information:
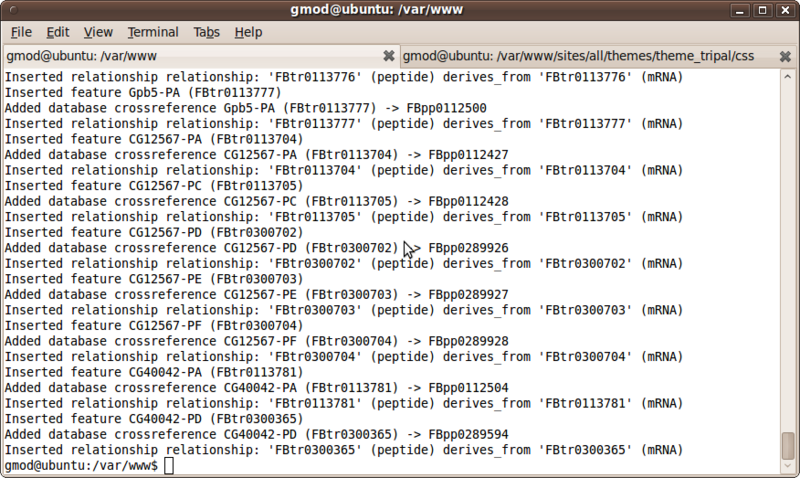
Finally, return to the feature page for feature ‘CG40042’. We can now see the protein feature listed in the relationships section of the page.
Loading Functional Data
Blast Results
Now that we have our features loaded we want to add some functional data as well. Prior to the course, a blastx analysis was performed for the gene squences against the ExPASy SwissProt database. You can find the results from that job here:
Media:Flybase-tripal-demo.genes.blastx.xml.txt.
Download this file and save it in /home/gmod/Tripal
Exercise #10
Enable the Tripal Blast Module
Analyses are similar to organisms and features in that they all have pages in Drupal. This is to help site visitors associate data derived from any analysis with information about that analysis. If we provide enough details the user can see how we performed the analysis and the date it was performed.
To create an analysis, navigate to the Create Content page and select the content type Blast Analysis. Add the following values for this analysis
- Analysis Name: blastx Dmel genes vs ExPASy SwissProt
- Program: blastx
- Program Version: NCBI Blast 2.2.19
- Source name: FlyBase 2LHet genes FASTA file
- Source version: FB2011_02
- Time Executed: Mar 6 2011
- Description: blastx vs ExPASy SwissProt of four genes from the Dmel
2LHet chromosomal region to provide evidence of function
- Blast Settings
- Database: DB:swisprot:display
- Blast XML file: /home/gmod/Tripal/Flybase-tripal-demo.genes.blastx.xml.txt
- Submit a job to parse the XML output: checked
- Parameters: -e 1e-6
- Check the box ‘Use Unique Name’
- Blast Settings
Click the Save button. You can now see our new Analysis.
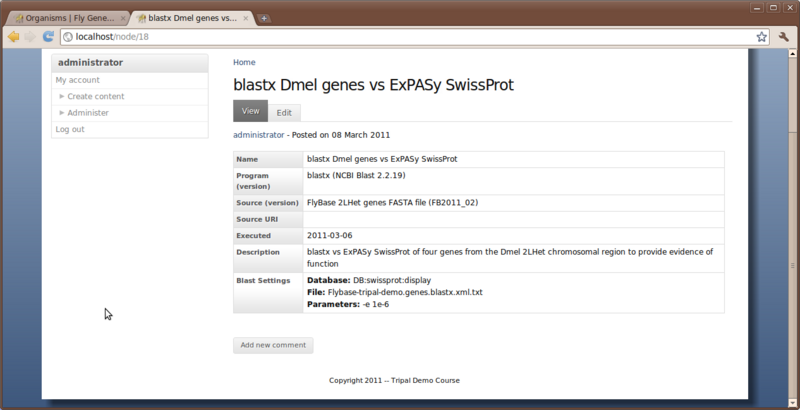
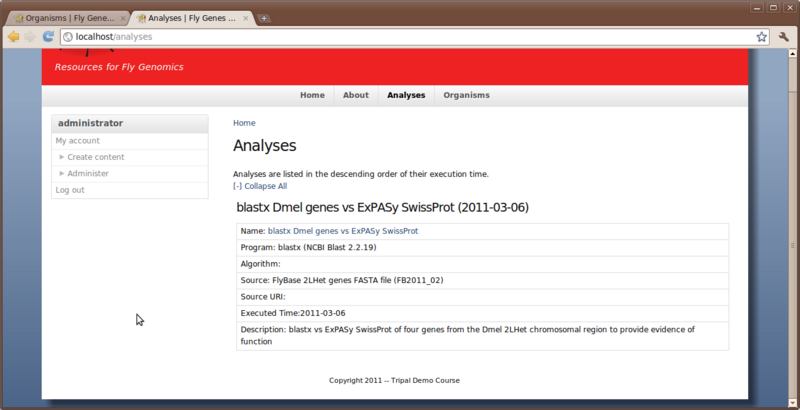
The analysis also appears under the Analysis menu item at the top of the page.
Now we need to manually run the job to parse the Blast results:
cd /var/www; php ./sites/all/modules/tripal_core/tripal_launch_jobs.php administrator
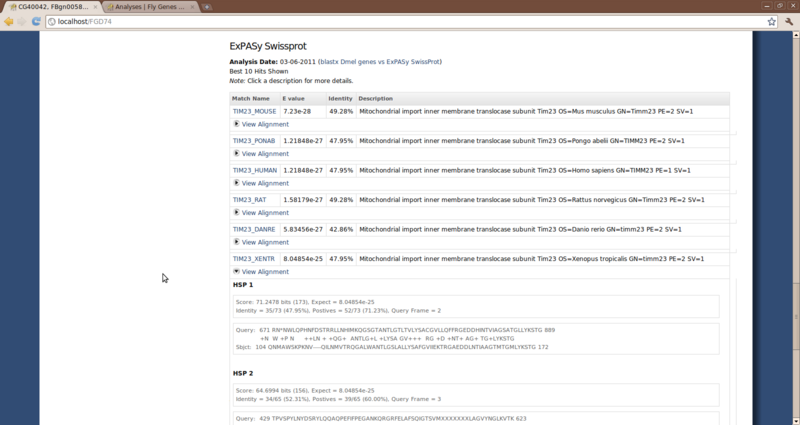
The results should now be loaded. if we visit our feature page, for feature ‘CG40042’ we should now see blast results at the bottom of the page
InterProScan Results
Since the writing of this tutorial, the Tripal Analysis Interpro module now supports loading of InterProScan XML results. This is now the preferred method for loading this type of data. However, Tripal v0.3b is still backwards compatible and can load HTML formatted results, so the steps below should still work.
Prior to the course, an InterProScan analysis was performed for the gene sequences. You can find the results from that job here:
http://www.bioinfo.wsu.edu/system/files/flybase-tripal-demo.iprscan.html.txt (couldn’t upload a file with HTML content to the wiki).
Download this file and save it in /home/gmod/Tripal
Exercise #11
Enable the Tripal Interpro Module
To create an analysis, navigate to the Create Content page and select the content type Analysis: Interpro. Add the following values for this analysis
- Analysis Name: InterProScan of Dmel genes
- Program: iprscan
- Program Version: InterProScan 4.7
- Source name: FlyBase 2LHet genes FASTA file
- Source version: FB2011_02
- Time Executed: Mar 6 2011
- Description: Local InterProScan search of Dmel genes against all databases
- InterPro Settings
- Interproscan Output File (in html format): /home/gmod/Tripal/flybase-tripal-demo.iprscan.html.txt
- Submit a job to parse the Interpro html output: checked
- Parameters: -goterms -ipr -format html
- Check the box ‘Use Unique Name’
- Check the box ‘The input file is in HTML format’
Click the Save button. You can now see our new Analysis.
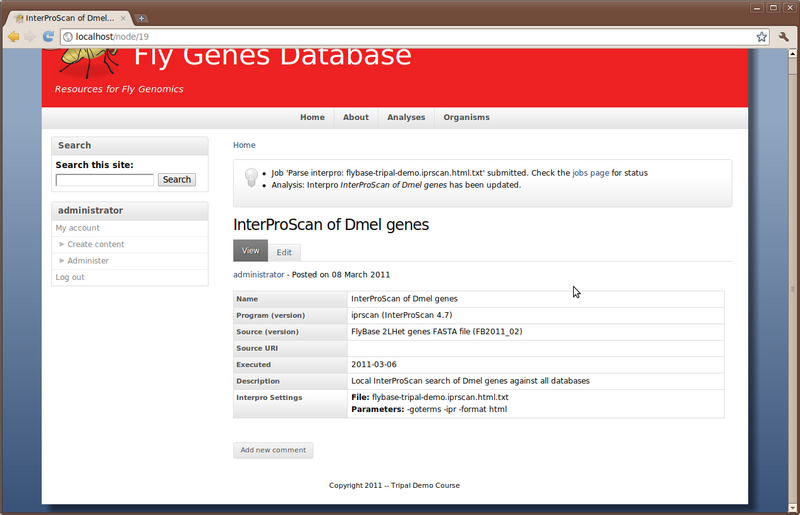
Now we need to manually run the job to parse the Blast results:
cd /var/www; php ./sites/all/modules/tripal_core/tripal_launch_jobs.php administrator
The results should now be loaded. if we visit our feature page, for feature ‘CG40042’ we should now see blast results at the bottom of the page
GO Analysis
We did not have time to load the Gene Ontology because it takes several hours. So we cannot demonstrate the use of this module. however, we will take time to see the results on a live production website running Tripal.
KEGG Results
To preserve time we will review this by viewing a live production website running Tripal. Essentially, the steps are similar to that of creating a Blast or KEGG analysis.
Drupal Taxonomy & Searching
Drupal Taxonomy
Drupal provides a tagging mechanism that allows the site creator to tag pages with certain words that categorize the page. Drupal calls this categorizing mechanism Taxonomy. This allows users to search for and find pages with certain tag words on them.
Similar to the controlled vocabularies we loaded earlier, Drupal maintains it’s own vocabularies for these categories. You can find this interface by navigating to Administer → Content Management → Taxonomy.
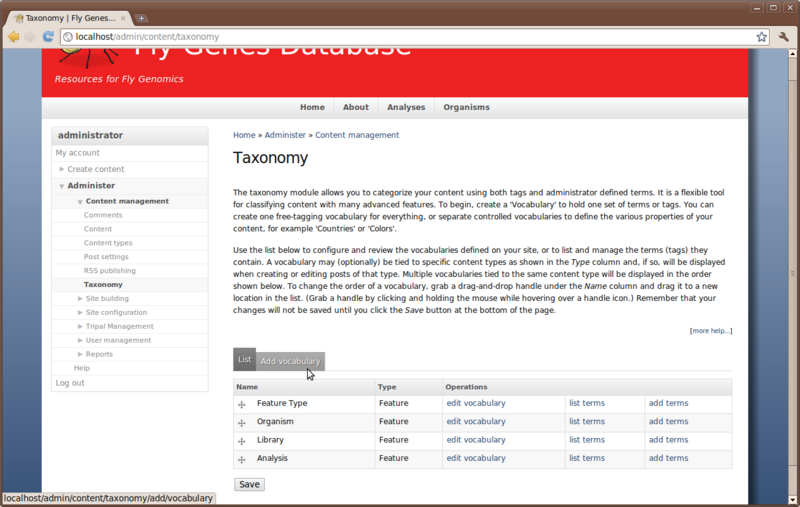
Here you will some existing vocabularies for Feature Type, Organism, Library and Analysis. If you click the link ‘list terms’ you will see that we have no terms in any of the vocabularies.
We would like to tag all of our gene pages to enable searching by category for our feature pages using Drupal’s built-in searching mechanism. To do this, navigate to Administer → Tripal Management → Features → Configuration. Look for the section titled Set Taxonomy. Check the boxes next to Organism name and Feature type and then click the Set/Reset Taxonomy for all features button.
This will add a job to our jobs subsystem which we want to run manually:
cd /var/www; php ./sites/all/modules/tripal_core/tripal_launch_jobs.php administrator
Now, if we visit the feature page for feature ‘CG40042’, we should now see the taxonomy added to the page
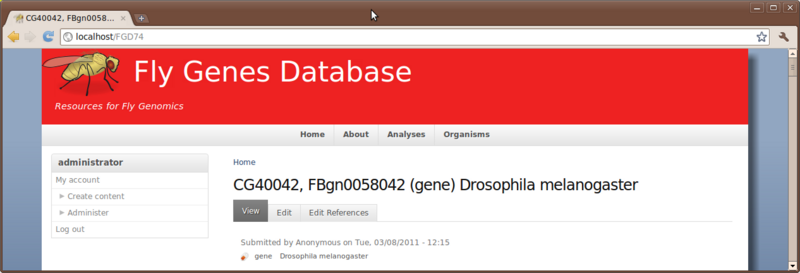
Drupal Searching
Now that we have added taxonomy terms to our feature pages we want to enable searching. The first step is to index our feature pages for searching. Drupal will do this automatically each time the Drupal cron is run. This is one of the housekeeping tasks that Drupal perfoms. However, when syncing large data sets we can generate thousands of pages at a time. The Drupal cron will only index 500 pages at a time. If we rely on Drupal indexing it will take an extreme amount of time to index all of our new pages.
Therefore, we can submit an indexing job using Tripal which will index all of our features pages in one sitting. This can take quite a bit of time for very large datasets, but once it completes it does not need to be repeated very often. For small dataset, indexing should complete quickly.
To submit an job for indexing, Navigate to the Administer → Tripal Management → Features → Configuration page, look for the section titled Reindex and click the Reindex All Feature nodes button.

Then manually run the job:
cd /var/www; php ./sites/all/modules/tripal_core/tripal_launch_jobs.php administrator
Drupal searching will not work unless all of the pages are indexed. To see if the site is fully index, navigate to Administer -> Site Configuration -> Search Settings
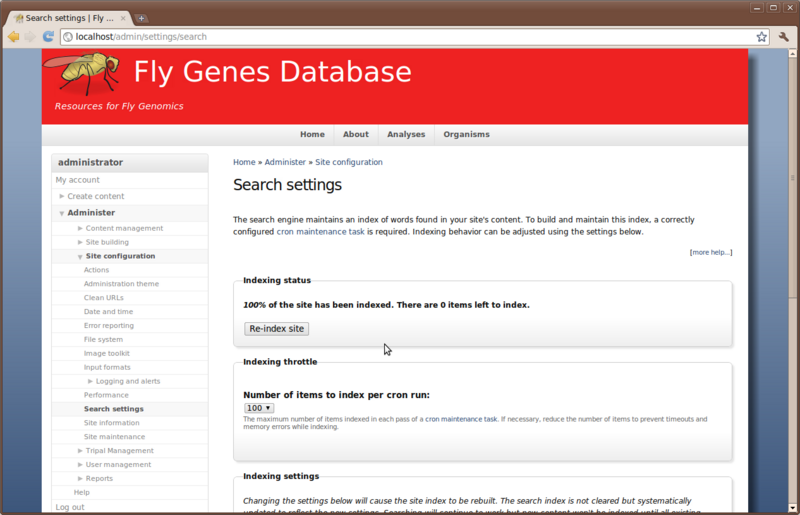
If the indexing status says 100% then all is well and searching will work. If it is less than 100% then most likely there are other pages,such as our About page, which have not yet been indexed. To quickly index these we can manually run the Drupal cron. The Drupal cron can easily be run by going to this URL:
When the cron completes there will be no output to the browser, but the page load will stop indicating the cron is complete. Now, return to the Administer → Site Configuration → Search Settings to see if the search status is 100%.
Next, we need to expose the search box.
Exercise #11
 Drupal provides a "Search" block which is not enabled by default.  Turn on this
 block and place it on the left sidebar just above the navigation menu.
The site should now appear with a search box on the left:
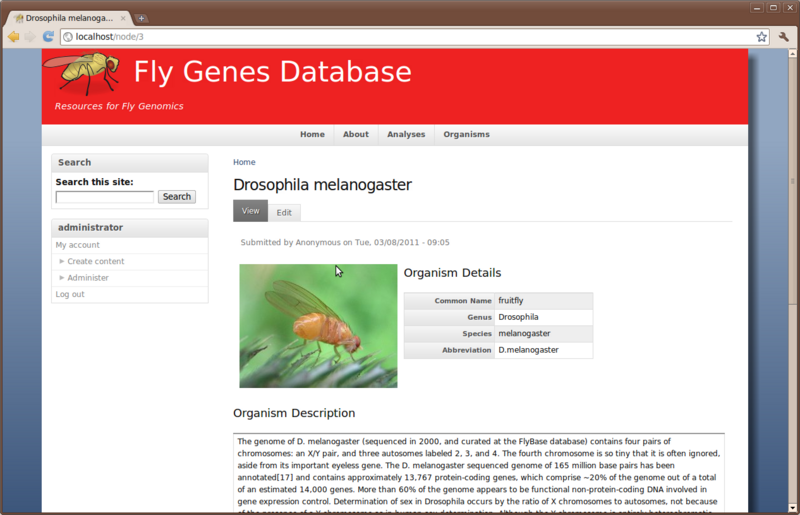
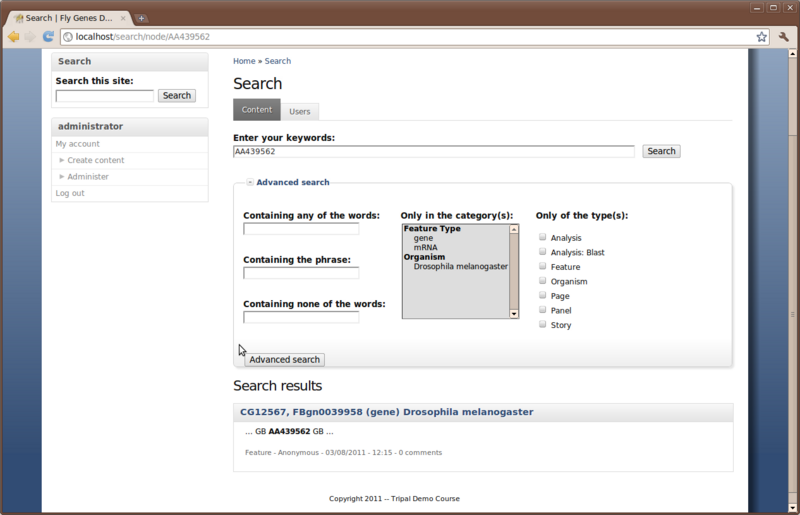
We can now perform searches. For example, to find the gene with the GenBank accession ‘AA439562’, enter the accession in the search box and click Search.
Click the Advanced search link to open additional searching options that can be used to refine a search. Notice that the taxonomy terms for our synced organism and features appears in the list. You can therefore limit your search results to specific organisms or feature types.
Customizations
Panels & Custom Layouts
Suppose we do not like the way the feature page looks. Right now, all content is presented linearly down the page. We can use the Panels module to correct this. Earlier, as an exercise, we installed the ‘Panels’ module. To begin using Panels, navigate to Administer → Site Building → Panels.
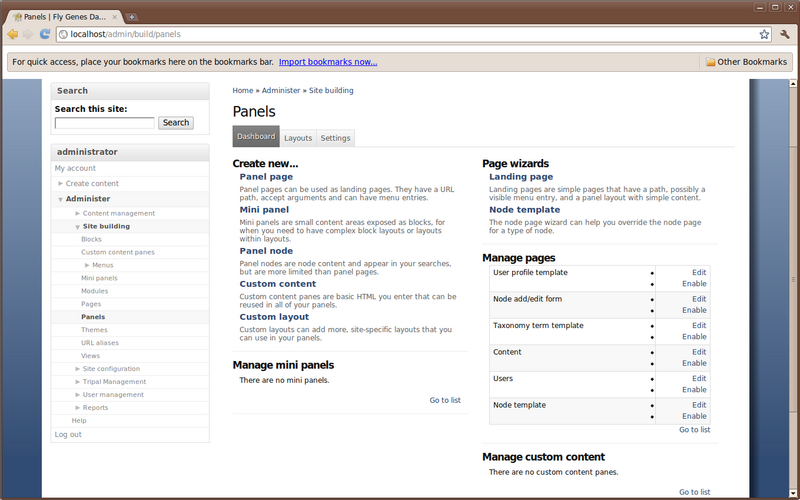
The Panels configuration page has many options. For brevity we will not discuss them all. But in short, we want to alter the layout of our feature pages. We can do this by first enabling the Node template. We can do this by clicking the Enable link next to Node template under the ‘Manage Pages at the bottom right of the screen. This will take you to the Pages configuration page where you’ll see that the Node template is now Enabled.
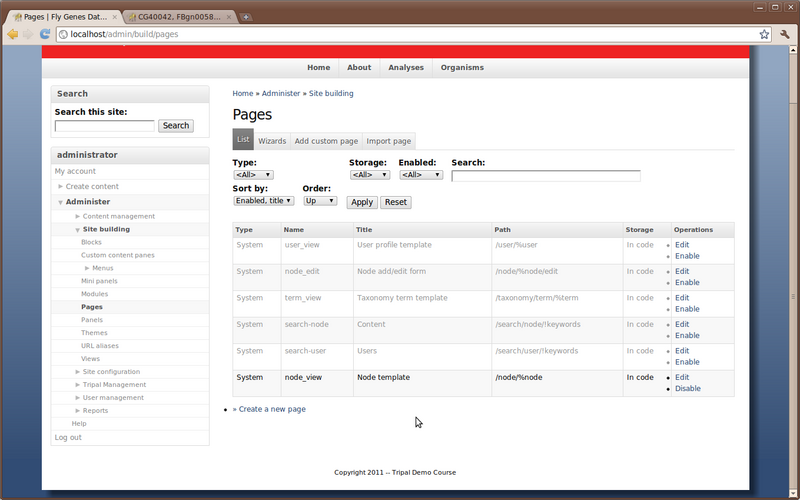
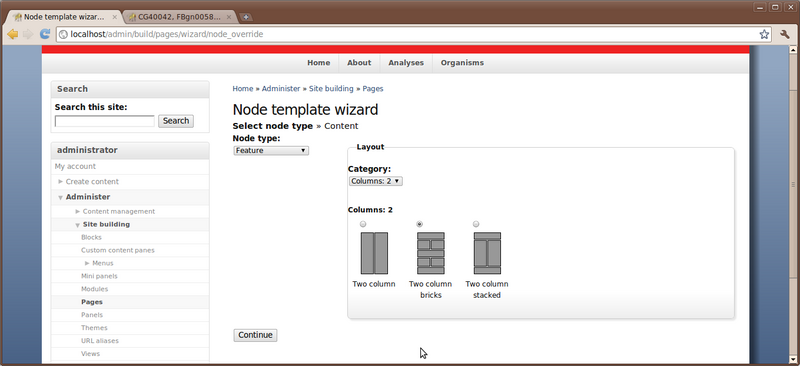
Next, return to the Panels configuration page at Administer → Site Building → Panels. We now want to create the page layout. We begin this step by clicking Node Template under the Page wizards section.
Here, you should select the node type to be ‘Feature’ because this is the content type for which we want a custom layout. Next, select the category. This is where you choose the layout type. Choose the category Columns: 2 and then select the second layout named Two column bricks. Click the continue button.
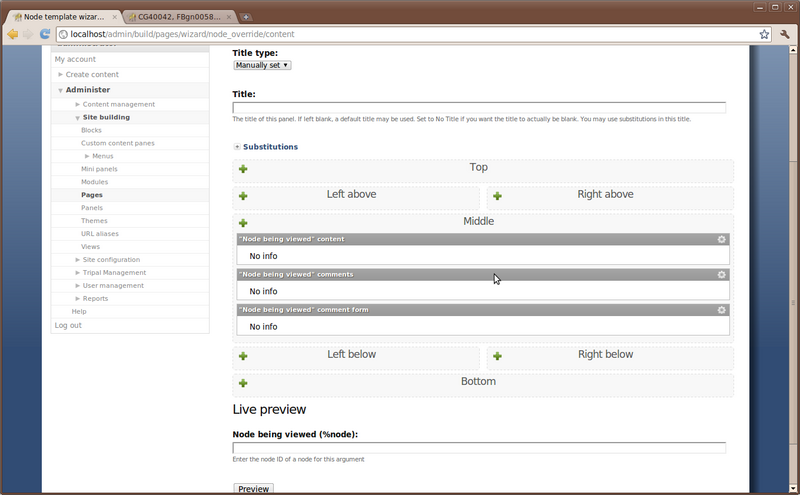
The following configuration page will appear. Simply click the Finish button.
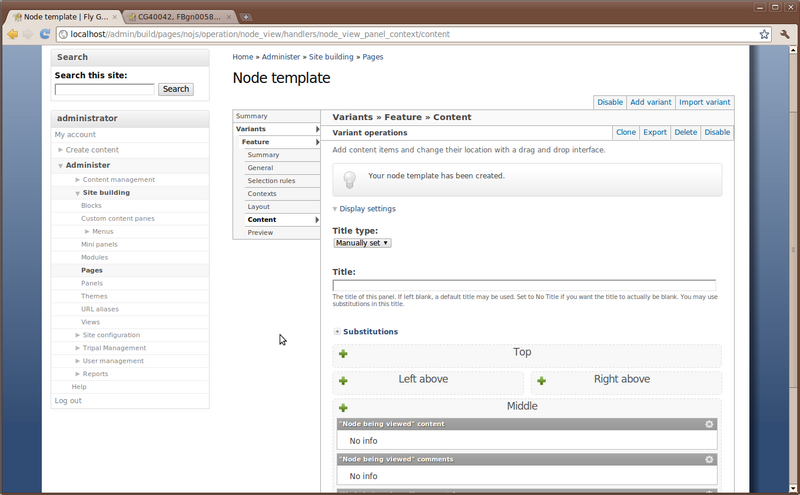
Finally, we are taken to the Panel configuration page where we can set all of the parameters. Notice that we are currently set on the Layout section of the configuration.
Using the layout interface, the following will be demonstrated (but not shown here in this tutorial). But first, open to the feature page ‘CG40042’ so we can watch the changes as we proceed:
- How to remove default content from the panel regions
- How to add content to each panel region
- Adding of blocks in this order:
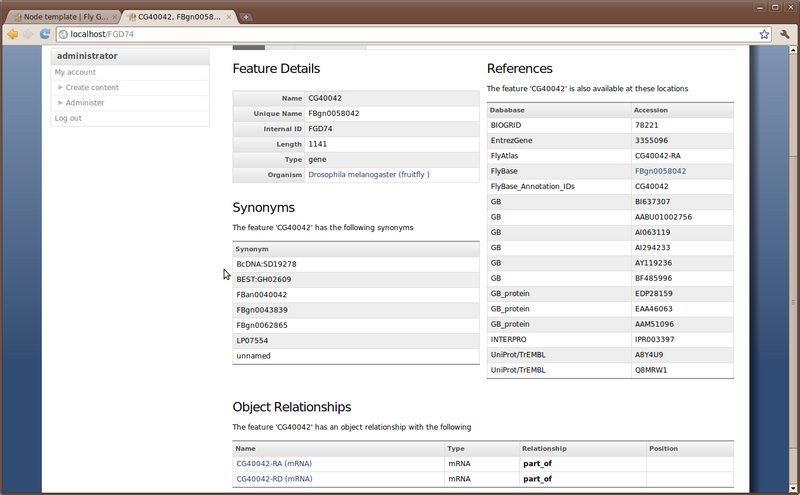
- Feature Details in the Left Above section
- Feature Synonyms in the Left Above section, just below the feature details.
- Feature References in the Right Above section
- Feature Relationships as Object in the Middle section
- Add any other blocks desired to the Middle or lower sections
When finished our page now looks like this:
Adding a GBrowse Image
We would now like to add a GBrowse image onto our gene page. Tripal does not support this directly, but can facilitate this. The easiest way to add this content is to create a new Block. But, we’ll have to code a bit of PHP to do it. So, we need to first turn on the PHP filter module.
Exercise
Enable the PHP filter module
Next, we want to create our block. To do this, navigate to Administer’ → Site Building → Blocks, then click on the tab, Add Block.
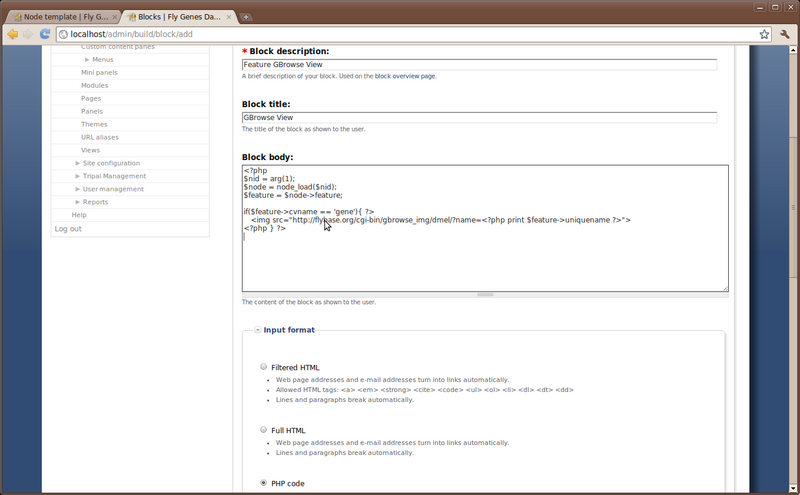
Enter the values, as shown in the image above:
- Block Description: Feature GBrowse View
- Block Title: GBrowse View
- Block Body: enter the PHP code below
<?php
$nid = arg(1);
$node = node_load($nid);
$feature = $node->feature;

if($feature->cvname == 'gene' or $feature->cvname == 'mRNA'){
   print "<img src=\"http://flybase.org/cgi-bin/gbrowse_img/dmel/?name=$feature->uniquename\">";
}
?>
Note The URL used for the link in the img tag may not work. In
that case, we can change the print statement to use the Metazome GBrowse
(Ideally we would want to use GBrowse installed on our own system):
print "<img src=\"http://www.metazome.net/cgi-bin/gbrowse_img/Dmelanogaster/?name=$feature->featurename\">";
We’ll try the flybase link first. If it doesn’t work we can return here to switch it out for the Metazome URL.
Then, under the Input Format section, select the radio button PHP code. Now click Save Block
Exercise
 Return to the Panels configuration page for the node template and
 add this new block to our feature page in the Middle section and place
 it as the first item in the Middle section.
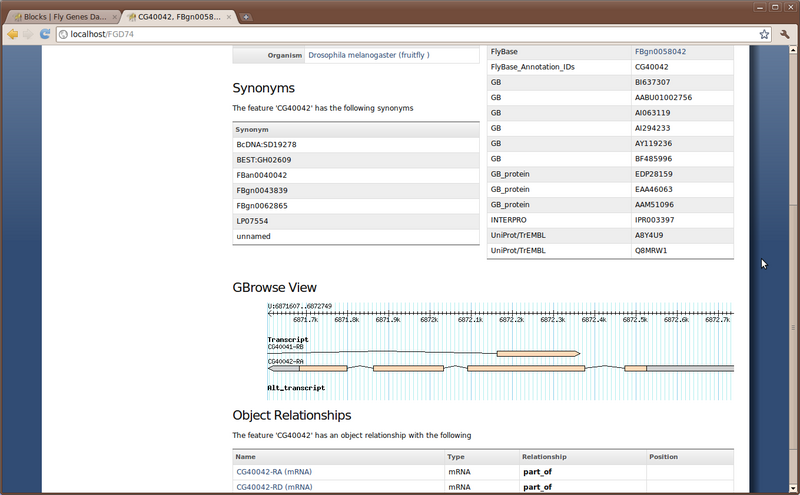
Drupal Views
Creating new Data Views
Misc
- how to remove the organism menu
- permissions
Facts about “Tripal Tutorial (pre version 0.3b)”
| Has topic | Tripal + |