GMOD
WebApollo Installation
NOTE: This document is provided for versions of Web Apollo 2014-04-03 and older.
Newer documentation can be found on Genome architect and Readthedocs. Source and documentation is (still) found on Github.
Contents
- 1 Introduction
- 2 Installation
- 3 Deploying the servlet
- 4 Configuration
- 5 Data generation
- 6 Upgrading existing instances
- 7 Accessing your WebApollo installation
Introduction
This guide will walk you through the server side installation for Web Apollo. Web Apollo is a web-based application, so the only client side requirement is a web browser. Note that Web Apollo has only been tested on Chrome, Firefox, and Safari. It has not been tested with Internet Explorer.
Installation
You can download the latest Web Apollo release here. All installation steps will be done through a shell. We’ll be using Tomcat 7 as our servlet container and PostgreSQL as our relational database management system. We’ll use sample data from the Pythium ultimum genome, provided as a separate download.
Server operating system
Any Unix like system (e.g., Unix, Linux, Mac OS X)
Prerequisites
- Servlet container (must support servlet spec 3.0+) [officially supported: Tomcat 7]
- Relational Database Management System [officially supported: PostgreSQL]
- User database helper scripts
- Perl modules
- DBI
- DBD module for your specific RDBMS [officially supported: DBD::Pg for PostgresSQL]
- Perl modules
- Data generation pipeline (see JBrowse
prerequisites for more information
on its prerequisites)
- Perl modules
- System packages
- libpng12-0
- libpng12-dev
- zlib1g (Debian/Ubuntu)
- zlib1g-dev (Debian/Ubuntu)
- zlib (RedHat/CentOS)
- zlib-devel (RedHat/CentOS)
- Sequence search (optional)
- Blat (along with a configured search database)
Tomcat memory
Tomcat is known to have issues with memory, in particular permgen memory
in the JVM. The memory requirements will depend on the the size of your
genome and how many instances of Web Apollo you host in the same Tomcat
instance. We recommend at least 1g for the heap size and 256m for the
permgen size as a starting point. Add the following to your Tomcat
configuration in CATALINA_OPTS:
-Xms512m -Xmx1g -XX:+CMSClassUnloadingEnabled -XX:+CMSPermGenSweepingEnabled -XX:+UseConcMarkSweepGC -XX:MaxPermSize=256m
The location of your Tomcat environment configuration will be dependent
on how you installed it (manually vs using a package manager). It’s
recommended that you add this configuration in
$TOMCAT_BIN_DIR/setenv.sh where $TOMCAT_BIN_DIR is where the
directory where the Tomcat binaries reside.
Conventions
This guide will use the following conventions to make it more concise (you might want to keep these convention definitions handy so that you can easily reference them as you go through this guide):
- $WEB_APOLLO_DIR
- Location where the tarball was uncompressed or checked out from git.
- $WEB_APOLLO_SAMPLE_DIR
- Location where the sample tarball was uncompressed (e.g.,
~/webapollo/webapollo_sample)
- Location where the sample tarball was uncompressed (e.g.,
- $WEB_APOLLO_DATA_DIR
- Location for WebApollo annotations (e.g.,
/data/webapollo/annotations)
- Location for WebApollo annotations (e.g.,
- $JBROWSE_DATA_DIR
- Location for JBrowse data (e.g.,
/data/webapollo/jbrowse/data)
- Location for JBrowse data (e.g.,
- $TOMCAT_LIB_DIR
- Location where Tomcat libs are installed (e.g.,
/usr/share/tomcat7/lib)
- Location where Tomcat libs are installed (e.g.,
- $TOMCAT_CONF_DIR
- Location where Tomcat configuration is installed (e.g.,
/etc/tomcat7/conf)
- Location where Tomcat configuration is installed (e.g.,
- $TOMCAT_WEBAPPS_DIR
- Location where deployed servlets for Tomcat go (e.g.,
/var/lib/tomcat7/webapps)
- Location where deployed servlets for Tomcat go (e.g.,
- $BLAT_DIR
- Location where the Blat binaries are installed (e.g.,
/usr/local/bin)
- Location where the Blat binaries are installed (e.g.,
- $BLAT_TMP_DIR
- Location for temporary Blat files (e.g.,
/data/webapollo/blat/tmp)
- Location for temporary Blat files (e.g.,
- $BLAT_DATABASE
- Location for the Blat database (e.g.,
/data/webapollo/blat/db/pyu.2bit)
- Location for the Blat database (e.g.,
The Tomcat related paths are the ones used by default in Ubuntu 12.04 and Ubuntu’s provided Tomcat7 package. Paths will likely be different in your system depending on how Tomcat was installed.
Installation
Uncompress the WebApollo.tgz tarball.
$ tar -xvzf WebApollo-RELEASE_DATE.tgz
Authentication
Postgres can use Ident and password authentication. Because it is set up to use Ident by default, you might have to add a line to pg_hba.conf specifying that the user will connect via password authentication.
Edit /etc/postgres/8.4/main/pg_hba.conf and add the following line:
local all web_apollo_users_admin md5
Restart the postgres server for changes to take effect
$ /etc/init.d/postgresql-8.4 restart
User database
Web Apollo uses a database to determine who can access and edit annotations for a given sequence.
First we’ll need to create a database. You can call it whatever you want
(remember the name as you’ll need to point the configuration to it). For
the purposes of this guide, we’ll call it web_apollo_users You might
want to create a separate account to manage the database. We’ll have the
user web_apollo_users_admin with password web_apollo_users_admin who
has database creation privilege. Depending on how your database server
is setup, you might not need to set a password for the user. See the
PostgreSQL documentation for more information. We’ll
assume that the database is in the same server where Web Apollo is being
installed (“localhost”). These commands will be run as the postgres
user.
$ sudo su postgres
$ createuser -P web_apollo_users_admin
Enter password for new role:
Enter it again:
Shall the new role be a superuser? (y/n) n
Shall the new role be allowed to create databases? (y/n) y
Shall the new role be allowed to create more new roles? (y/n) n
Next we’ll create the user database.
$ createdb -U web_apollo_users_admin web_apollo_users
If you get an authentication error, use the -W flag to get a password prompt.
$ createdb -U web_apollo_users_admin -W web_apollo_users
Now that the database is created, we need to load the schema to it.
$ cd $WEB_APOLLO_DIR/tools/user
$ psql -U web_apollo_users_admin web_apollo_users < user_database_postgresql.sql
Now the user database has been setup.
Let’s populate the database.
First we’ll create an user with access to Web Apollo. We’ll use the
add_user.pl script in $WEB_APOLLO_DIR/tools/user. Let’s create an
user named web_apollo_admin with the password web_apollo_admin.
$ ./add_user.pl -D web_apollo_users -U web_apollo_users_admin -P web_apollo_users_admin \
-u web_apollo_admin -p web_apollo_admin
Next we’ll add the annotation tracks ids for the genomic sequences for
our organism. We’ll use the add_tracks.pl script in the same
directory. We need to generate a file of genomic sequence ids for the
script. For convenience, there’s a script called
extract_seqids_from_fasta.pl in the same directory which will go
through a FASTA file and extract all the ids from the deflines. Let’s
first create the list of genomic sequence ids. We’ll store it in
~/scratch/seqids.txt. We’ll want to add the prefix “Annotations-” to
each identifier.
$ mkdir ~/scratch
$ ./extract_seqids_from_fasta.pl -p Annotations- -i $WEB_APOLLO_SAMPLE_DIR/scf1117875582023.fa \
-o ~/scratch/seqids.txt
Now we’ll add those ids to the user database.
$ ./add_tracks.pl -D web_apollo_users -U web_apollo_users_admin -P web_apollo_users_admin \
-t ~/scratch/seqids.txt
Now that we have an user created and the annotation track ids loaded,
we’ll need to give the user permissions to access the sequence. We’ll
have the all permissions (read, write, publish, user manager). We’ll use
the set_track_permissions.pl script in the same directory. We’ll need
to provide the script a list of genomic sequence ids, like in the
previous step.
$ ./set_track_permissions.pl -D web_apollo_users -U web_apollo_users_admin \
-P web_apollo_users_admin -u web_apollo_admin -t ~/scratch/seqids.txt -a
We’re all done setting up the user database.
Note that we’re only using a subset of the options for all the scripts mentioned above. You can get more detailed information on any given script (and other available options) using the “-h” or “–help” flag when running the script.
Deploying the servlet
Depending on how Tomcat was setup on your server, you might need to run the following command as root.
Note that Web Apollo server sends error to the client through JSON messages. Your servlet container must be configured to allow raw JSON to be sent as when errors occur. In the case of Tomcat, you’ll need to configure it to use the custom valve that is provided with the Web Apollo package.
$ cp $WEB_APOLLO_DIR/tomcat/custom-valves.jar $TOMCAT_LIB_DIR
You’ll then need to add
errorReportValveClass="org.bbop.apollo.web.ErrorReportValve" as an
attribute to the existing <Host> element in
$TOMCAT_CONF_DIR/server.xml
<Host name="localhost" appBase="webapps"
      unpackWARs="true" autoDeploy="true"
      errorReportValveClass="org.bbop.apollo.web.ErrorReportValve">
</Host>
We need to deploy the WAR file in the war directory from the unpacked tarball.
$ cd $TOMCAT_WEBAPPS_DIR
Next we need to create the directory that will contain the application.
$ mkdir WebApollo
Now we’ll go into the newly created directory and unpack the WAR file into it.
$ cd WebApollo
$ jar -xvf $WEB_APOLLO_DIR/war/WebApollo.war
That’s it! We’re done installing Web Apollo. Now we need to move on to configuring the application.
Configuration
Most configuration files will reside in
$TOMCAT_WEBAPPS_DIR/WebApollo/config. We’ll need to configure a number
of things before we can get Web Apollo up and running.
Supported annotation types
Many configurations will require you to define which annotation types the configuration will apply to. WebApollo supports the following “higher level” types (from the Sequence Ontology):
- sequence:gene
- sequence:pseudogene
- sequence:transcript
- sequence:mRNA
- sequence:tRNA
- sequence:snRNA
- sequence:snoRNA
- sequence:ncRNA
- sequence:rRNA
- sequence:miRNA
- sequence:repeat_region
- sequence:transposable_element
Main configuration
The main configuration is stored in
$TOMCAT_WEBAPPS_DIR/WebApollo/config/config.xml. Let’s take a look at
the file.
<?xml version="1.0" encoding="UTF-8"?>
<server_configuration>
<!-- mapping configuration for GBOL data structures -->
<gbol_mapping>/config/mapping.xml</gbol_mapping>
<!-- directory where JE database will be created -->
<datastore_directory>ENTER_DATASTORE_DIRECTORY_HERE</datastore_directory>
<!-- minimum size for introns created -->
<default_minimum_intron_size>1</default_minimum_intron_size>
<!-- size of history for each feature - setting to 0 means unlimited history -->
<history_size>0</history_size>
<!-- overlapping strategy for adding transcripts to genes -->
<overlapper_class>org.bbop.apollo.web.overlap.OrfOverlapper</overlapper_class>
<!-- javascript file for comparing track names (refseqs) (used for sorting in selection table) -->
<track_name_comparator>/config/track_name_comparator.js</track_name_comparator>
<!-- whether to use an existing CDS when creating new transcripts -->
<use_cds_for_new_transcripts>true</use_cds_for_new_transcripts>
<!-- set to false to use hybrid disk/memory store which provides a little slower performance
but uses a lot less memory - great for annotation rich genomes -->
<use_pure_memory_store>true</use_pure_memory_store>
<!-- user authentication/permission configuration -->
<user>
<!-- database configuration -->
<database>
<!-- driver for user database -->
<driver>org.postgresql.Driver</driver>
<!-- JDBC URL for user database -->
<url>ENTER_USER_DATABASE_JDBC_URL</url>
<!-- username for user database -->
<username>ENTER_USER_DATABASE_USERNAME</username>
<!-- password for user database -->
<password>ENTER_USER_DATABASE_PASSWORD</password>
</database>
<!-- class for generating user authentication page
(login page) -->
<authentication_class>org.bbop.apollo.web.user.localdb.LocalDbUserAuthentication</authentication_class>
</user>
<tracks>
<!-- path to JBrowse refSeqs.json file -->
<refseqs>ENTER_PATH_TO_REFSEQS_JSON_FILE</refseqs>
<!-- annotation track name the current convention is to append
the genomic region id to the the name of the annotation track
e.g., if the annotation track is called "Annotations" and the
genomic region is chr2L, the track name will be
"Annotations-chr2L".-->
<annotation_track_name>Annotations</annotation_track_name>
<!-- organism being annotated -->
<organism>ENTER_ORGANISM</organism>
<!-- CV term for the genomic sequences - should be in the form
of "CV:term". This applies to all sequences -->
<sequence_type>ENTER_CVTERM_FOR_SEQUENCE</sequence_type>
<!-- path to file containing translation table.
optional - defaults to NCBI translation table 1 if absent -->
<translation_table>/config/translation_tables/ncbi_1_translation_table.txt</translation_table>
<!-- splice acceptor and donor sites. Multiple entries may be
added to allow multiple accepted sites.
optional - defaults to GT for donor and AG for acceptor
if absent -->
<splice_sites>
<donor_site>GT</donor_site>
<acceptor_site>AG</acceptor_site>
</splice_sites>
</tracks>
<!-- path to file containing canned comments XML -->
<canned_comments>/config/canned_comments.xml</canned_comments>
<!-- configuration for what to display in the annotation info editor.
Sections can be commented out to not be displayed or uncommented
to make them active -->
<annotation_info_editor>
<!-- grouping for the configuration. The "feature_types" attribute takes a list of
SO terms (comma separated) to apply this configuration to
(e.g., feature_types="sequence:transcript,sequence:mRNA" will make it so the group
configuration will only apply to features of type "sequence:transcript" or "sequence:mRNA").
A value of "default" will make this the default configuration for any types not explicitly
defined in other groups. You can have any many groups as you'd like -->
<annotation_info_editor_group feature_types="default">
<!-- display status section. The text for each <status_flag>
element will be displayed as a radio button in the status
section, in the same order -->
<!--
<status>
<status_flag>Approved</status_flag>
<status_flag>Needs review</status_flag>
</status>
-->
<!-- display generic attributes section -->
<attributes />
<!-- display dbxrefs section -->
<dbxrefs />
<!-- display PubMed IDs section -->
<pubmed_ids />
<!-- display GO IDs section -->
<go_ids />
<!-- display comments section -->
<comments />
</annotation_info_editor_group>
</annotation_info_editor>
<!-- tools to be used for sequence searching. This is optional.
If this is not setup, WebApollo will not have sequence search support -->
<sequence_search_tools>
<!-- one <sequence_search_tool> element per tool -->
<sequence_search_tool>
<!-- display name for the search tool -->
<key>BLAT nucleotide</key>
<!-- class for handling search -->
<class>org.bbop.apollo.tools.seq.search.blat.BlatCommandLineNucleotideToNucleotide</class>
<!-- configuration for search tool -->
<config>/config/blat_config.xml</config>
</sequence_search_tool>
<sequence_search_tool>
<!-- display name for the search tool -->
<key>BLAT protein</key>
<!-- class for handling search -->
<class>org.bbop.apollo.tools.seq.search.blat.BlatCommandLineProteinToNucleotide</class>
<!-- configuration for search tool -->
<config>/config/blat_config.xml</config>
</sequence_search_tool>
</sequence_search_tools>
<!-- data adapters for writing annotation data to different formats.
These will be used to dynamically generate data adapters within
WebApollo. This is optional. -->
<data_adapters>
<!-- one <data_adapter> element per data adapter -->
<data_adapter>
<!-- display name for data adapter -->
<key>GFF3</key>
<!-- class for data adapter plugin -->
<class>org.bbop.apollo.web.dataadapter.gff3.Gff3DataAdapter</class>
<!-- required permission for using data adapter
available options are: read, write, publish -->
<permission>read</permission>
<!-- configuration file for data adapter -->
<config>/config/gff3_config.xml</config>
<!-- options to be passed to data adapter -->
<options>output=file&format=gzip</options>
</data_adapter>
<data_adapter>
<!-- display name for data adapter -->
<key>Chado</key>
<!-- class for data adapter plugin -->
<class>org.bbop.apollo.web.dataadapter.chado.ChadoDataAdapter</class>
<!-- required permission for using data adapter
available options are: read, write, publish -->
<permission>publish</permission>
<!-- configuration file for data adapter -->
<config>/config/chado_config.xml</config>
<!-- options to be passed to data adapter -->
<options>display_features=false</options>
</data_adapter>
<!-- group the <data_adapter> children elements together -->
<data_adapter_group>
<!-- display name for adapter group -->
<key>FASTA</key>
<!-- required permission for using data adapter group
available options are: read, write, publish -->
<permission>read</permission>
<!-- one child <data_adapter> for each data adapter in the group -->
<data_adapter>
<!-- display name for data adapter -->
<key>peptide</key>
<!-- class for data adapter plugin -->
<class>org.bbop.apollo.web.dataadapter.fasta.FastaDataAdapter</class>
<!-- required permission for using data adapter
available options are: read, write, publish -->
<permission>read</permission>
<!-- configuration file for data adapter -->
<config>/config/fasta_config.xml</config>
<!-- options to be passed to data adapter -->
<options>output=file&format=gzip&seqType=peptide</options>
</data_adapter>
<data_adapter>
<!-- display name for data adapter -->
<key>cDNA</key>
<!-- class for data adapter plugin -->
<class>org.bbop.apollo.web.dataadapter.fasta.FastaDataAdapter</class>
<!-- required permission for using data adapter
available options are: read, write, publish -->
<permission>read</permission>
<!-- configuration file for data adapter -->
<config>/config/fasta_config.xml</config>
<!-- options to be passed to data adapter -->
<options>output=file&format=gzip&seqType=cdna</options>
</data_adapter>
<data_adapter>
<!-- display name for data adapter -->
<key>CDS</key>
<!-- class for data adapter plugin -->
<class>org.bbop.apollo.web.dataadapter.fasta.FastaDataAdapter</class>
<!-- required permission for using data adapter
available options are: read, write, publish -->
<permission>read</permission>
<!-- configuration file for data adapter -->
<config>/config/fasta_config.xml</config>
<!-- options to be passed to data adapter -->
<options>output=file&format=gzip&seqType=cds</options>
</data_adapter>
</data_adapter_group>
</data_adapters>
</server_configuration>
Let’s look through each element in more detail with values filled in.
<!-- mapping configuration for GBOL data structures -->
<gbol_mapping>/config/mapping.xml</gbol_mapping>
File that contains type mappings used by the underlying data model. It’s best not to change the default option.
<!-- directory where JE database will be created -->
<datastore_directory>$WEB_APOLLO_DATA_DIR</datastore_directory>
Directory where user generated annotations will be stored. The data is stored using Berkeley DB.
<!-- minimum size for introns created -->
<default_minimum_intron_size>1</default_minimum_intron_size>
Minimum length of intron to be created when using the “Make intron” operation. The operation will try to make the shortest intron that’s at least as long as this parameter. So if you set it to a value of “40”, then all calculated introns will be at least of length 40.
<!-- size of history for each feature - setting to 0 means unlimited history -->
<history_size>0</history_size>
The size of your history stack, meaning how many “Undo/Redo” steps you can do. The larger the number, the larger the storage space needed. Setting it to “0” makes it to that there’s no limit.
<!-- overlapping strategy for adding transcripts to genes -->
<overlapper_class>org.bbop.apollo.web.overlap.OrfOverlapper</overlapper_class>
Defines the strategy to be used for deciding whether overlapping
transcripts should be considered splice variants to the same gene. This
points to a Java class implementing the
org.bbop.apollo.overlap.Overlapper interface. This allows you to
create your own custom overlapping strategy should the need arise.
Currently available options are:
org.bbop.apollo.web.overlap.NoOverlapper- No transcripts should be considered splice variants, regardless of overlap.
org.bbop.apollo.web.overlap.SimpleOverlapper- Any overlapping of transcripts will cause them to be part of the same gene
org.bbop.apollo.web.overlap.OrfOverlapper- Only transcripts that overlap within the coding region and within frame are considered part of the same gene
<!-- javascript file for comparing track names (refseqs) (used for sorting in selection table) -->
<track_name_comparator>/config/track_name_comparator.js</track_name_comparator>
Defines how to compare genomic sequence names for sorting purposes in the genomic region selection list. Points to a javascript file. You can implement your logic to allow whatever sorting you’d like for your own organism. This doesn’t make much of a difference in our case since we’re only dealing with one genomic region. The default behavior is to sort names lexicographically.
<!-- whether to use an existing CDS when creating new transcripts -->
<use_cds_for_new_transcripts>true</use_cds_for_new_transcripts>
Tells Web Apollo whether to use an existing CDS when creating a new transcript (otherwise it computes the longest ORF). This can be useful when gene predictors suggest a CDS that’s not the longest ORF and you want to use that instead. This is only applicable when using features that have a CDS associated with them.
<!-- set to false to use hybrid disk/memory store which provides a little slower performance
but uses a lot less memory - great for annotation rich genomes -->
<use_pure_memory_store>true</use_pure_memory_store>
Defines whether the internal data store is purely a memory one or a
hybrid memory/disk store. The memory store provides faster performance
at the cost of more memory. The hybrid store provides a little slower
performance but uses a lot less memory, so it’s a good option for
annotation rich genomes. Set to true to use the memory store and
false to use the hybrid one.
Let’s take look at the user element, which handles configuration for
user authentication and permission handling.
<!-- user authentication/permission configuration -->
<user>

    <!-- database configuration -->
    <database>

        <!-- driver for user database -->
        <driver>org.postgresql.Driver</driver>

        <!-- JDBC URL for user database -->
        <url>ENTER_USER_DATABASE_JDBC_URL</url>

        <!-- username for user database -->
        <username>ENTER_USER_DATABASE_USERNAME</username>

        <!-- password for user database -->
        <password>ENTER_USER_DATABASE_PASSWORD</password>

    </database>

    <!-- class for generating user authentication page (login page) -->
    <authentication_class>org.bbop.apollo.web.user.localdb.LocalDbUserAuthentication</authentication_class>

</user>
Let’s first look at the database element that defines the database
that will handle user permissions (which we created previously).
<!-- driver for user database -->
<driver>org.postgresql.Driver</driver>
This should point the JDBC driver for communicating with the database. We’re using a PostgreSQL driver since that’s the database we’re using for user permission management.
<!-- JDBC URL for user database -->
<url>jdbc:postgresql://localhost/web_apollo_users</url>
JDBC URL to the user permission database. We’ll use
jdbc:postgresql://localhost/web_apollo_users since the database is
running in the same server as the annotation editing engine and we named
the database web_apollo_users.
<!-- username for user database -->
<username>web_apollo_users_admin</username>
User name that has read/write access to the user database. The user with
access to the user database has the user name web_apollo_users_admin.
<!-- password for user database -->
<password>web_apollo_users_admin</password>
Password to access user database. The user with access to the user database has the password </tt>web_apollo_users_admin</tt>.
Now let’s look at the other elements in the user element.
<!-- class for generating user authentication page (login page) -->
<authentication_class>org.bbop.apollo.web.user.localdb.LocalDbUserAuthentication</authentication_class>
Defines how user authentication is handled. This points to a class
implementing the org.bbop.apollo.web.user.UserAuthentication
interface. This allows you to implement any type of authentication you’d
like (e.g., LDAP). Currently available options are:
org.bbop.apollo.web.user.localdb.LocalDbUserAuthentication- Uses the user permission database to also store authentication information, meaning it stores user passwords in the database
org.bbop.apollo.web.user.browserid.BrowserIdUserAuthentication- Uses Mozilla’s BrowserID service for authentication. This has the benefits of offloading all authentication security to Mozilla and allows one account to have access to multiple resources (as long as they have BrowserID support). Being that the service is provided through Mozilla, it will require users to create a BrowserID account
Now let’s look at the configuration for accessing the annotation tracks for the genomic sequences.
<tracks>

    <!-- path to JBrowse refSeqs.json file -->
    <refseqs>ENTER_PATH_TO_REFSEQS_JSON_FILE</refseqs>

    <!-- annotation track name the current convention is to append
     the genomic region id to the the name of the annotation track
     e.g., if the annotation track is called "Annotations" and the
     genomic region is chr2L, the track name will be
     "Annotations-chr2L".-->
    <annotation_track_name>Annotations</annotation_track_name>

    <!-- organism being annotated -->
    <organism>ENTER_ORGANISM</organism>

    <!-- CV term for the genomic sequences - should be in the form
     of "CV:term".  This applies to all sequences -->
    <sequence_type>ENTER_CVTERM_FOR_SEQUENCE</sequence_type>

    <!-- path to file containing translation table.
     optional - defaults to NCBI translation table 1 if absent -->
    <translation_table>/config/translation_tables/ncbi_1_translation_table.txt</translation_table>

    <!-- splice acceptor and donor sites. Multiple entries may be
     added to allow multiple accepted sites.
     optional - defaults to GT for donor and AG for acceptor
     if absent -->
    <splice_sites>
        <donor_site>GT</donor_site>
        <acceptor_site>AG</acceptor_site>
    </splice_sites>

</tracks>
Let’s look at each element individually.
<!-- path to JBrowse refSeqs.json file -->
<refseqs>$TOMCAT_WEBAPPS_DIR/WebApollo/jbrowse/data/seq/refSeqs.json</refseqs>
Location where the refSeqs.json file resides, which is created from
the data generation pipeline (see the data
generation section). By default, the JBrowse data
needs to reside in $TOMCAT_WEBAPPS_DIR/WebApollo/jbrowse/data. If you
want the data to reside elsewhere, you’ll need to do configure your
servlet container to handle the appropriate alias to jbrowse/data or
symlink the data directory to somewhere else. Web Apollo is
pre-configured to allow symlinks.
IMPORTANT: In the previous versions of Web Apollo (2013-05-16 and
prior), this element pointed to the symlink created from the data
generation pipeline. The current pipeline no longer creates the symlink,
so you need to point to the actual file itself (hence
jbrowse/data/seq/refSeqs.json as opposed to
jbrowse/data/refSeqs.json in the previous versions. If you’re
accessing data generated from a previous version of Web Apollo, you’ll
still need to point to the symlink.
<annotation_track_name>Annotations</annotation_track_name>
Name of the annotation track. Leave it as the default value of
Annotations.
<!-- organism being annotated -->
<organism>Pythium ultimum</organism>
Scientific name of the organism being annotated (genus and species).
We’re annotating Pythium ultimum.
<!-- CV term for the genomic sequences - should be in the form
 of "CV:term".  This applies to all sequences -->
<sequence_type>sequence:contig</sequence_type>
The type for the genomic sequences. Should be in the form of CV:term.
Our genomic sequences are of the type sequence:contig.
<!-- path to file containing translation table.
 optional - defaults to NCBI translation table 1 if absent -->
<translation_table>/config/translation_tables/ncbi_1_translation_table.txt</translation_table>
File that contains the codon translation table. This is optional and defaults to NCBI translation table 1 if absent. See the translation tables section for details on which tables are available and how to customize your own table.
<!-- splice acceptor and donor sites. Multiple entries may be
 added to allow multiple accepted sites.
 optional - defaults to GT for donor and AG for acceptor
 if absent -->
<splice_sites>
    <donor_site>GT</donor_site>
    <acceptor_site>AG</acceptor_site>
</splice_sites>
Defines what the accepted donor and acceptor splice sites are. This will
determine whether the client displays a warning on splice sites (if the
splice site sequence doesn’t match what’s defined here, then it flags
the splice site). You can add multiple <donor_site> and
<acceptor_site> elements if your organism should support multiple
values. This is optional and defaults to GT for donor and AG for
acceptor sites.
<!-- path to file containing canned comments XML -->
<canned_comments>/config/canned_comments.xml</canned_comments>
File that contains canned comments (predefined comments that will be available from a pull-down menu when creating comments). It’s best not to change the default option. See the canned comments section for details on configuring canned comments.
<!-- configuration for what to display in the annotation info editor.
Sections can be commented out to not be displayed or uncommented
to make them active -->
<annotation_info_editor>

    <!-- grouping for the configuration.  The "feature_types" attribute takes a list of
 SO terms (comma separated) to apply this configuration to
 (e.g., feature_types="sequence:transcript,sequence:mRNA" will make it so the group
 configuration will only apply to features of type "sequence:transcript" or "sequence:mRNA").
 A value of "default" will make this the default configuration for any types not explicitly
 defined in other groups.  You can have any many groups as you'd like -->
    <annotation_info_editor_group feature_types="default">

        <!-- display status section.  The text for each <status_flag>
     element will be displayed as a radio button in the status
     section, in the same order -->
        <!--
     <status>
         <status_flag>Approved</status_flag>
         <status_flag>Needs review</status_flag>
     </status>
     -->

        <!-- display generic attributes section -->
        <attributes />

        <!-- display dbxrefs section -->
        <dbxrefs />

        <!-- display PubMed IDs section -->
        <pubmed_ids />

        <!-- display GO IDs section -->
        <go_ids />

        <!-- display comments section -->
        <comments />

    </annotation_info_editor_group>

</annotation_info_editor>
Here’s the configuration on what to display in the annotation info
editor. It will always display Name, Symbol, and Description but
the rest is optional. This allows you to make the editor more compact if
you’re not interested in editing certain metadata. Let’s look at the
options in more detail.
<!-- grouping for the configuration.  The "feature_types" attribute takes a list of
SO terms (comma separated) to apply this configuration to
(e.g., feature_types="sequence:transcript,sequence:mRNA" will make it so the group
configuration will only apply to features of type "sequence:transcript" or "sequence:mRNA").
A value of "default" will make this the default configuration for any types not explicitly
defined in other groups.  You can have any many groups as you'd like -->
<annotation_info_editor_group feature_types="default">
    ...
</annotation_info_editor_group>
Each configuration is grouped by annotation type. This allows you to
have different options on what’s displayed for specified types. The
feature_types attribute defines which types this group will apply to.
feature_types takes a list of SO terms (comma separated), such as
"sequence:transcript,sequence:mRNA", which will apply this
configuration to annotations of type sequence:transcript and
sequence:mRNA. Alternatively, you can set the value to "default"
which will become the default configuration for any types not explicitly
defined in other groups. You can have any many groups as you’d like. All
supported annotation types can be used.
Next, let’s look at each item to configure in each group.
<!-- display status section.  The text for each <status_flag>
 element will be displayed as a radio button in the status
 section, in the same order -->
<status>
    <status_flag>Approved</status_flag>
    <status_flag>Needs review</status_flag>
</status>
Allows selecting the status for a particular annotation. The value for
<status_flag> is arbitrary (you can enter any text) and you can add as
many as you’d like, but you need to at least have one (they’ll show up
as selectable buttons in the editor).
<!-- display generic attributes section -->
<attributes />
Allows editing of generic attributes (tag/value pairs). Think non-reserved GFF3 tags for column 9.
<!-- display dbxrefs section -->
<dbxrefs />
Allows editing of database cross references.
<!-- display PubMed IDs section -->
<pubmed_ids />
Allows editing of PubMed IDs (for associating an annotation with a publication).
<!-- display GO IDs section -->
<go_ids />
Allows editing of Gene Ontology terms (for associating an annotation to a particular function).
<!-- display comments section -->
<comments />
Allows editing of comments for annotations.
<!-- tools to be used for sequence searching.  This is optional.
 If this is not setup, WebApollo will not have sequence search support -->
<sequence_search_tools>

    <!-- one <sequence_search_tool> element per tool -->
    <sequence_search_tool>

        <!-- display name for the search tool -->
        <key>BLAT nucleotide</key>

        <!-- class for handling search -->
        <class>org.bbop.apollo.tools.seq.search.blat.BlatCommandLineNucleotideToNucleotide</class>

        <!-- configuration for search tool -->
        <config>/config/blat_config.xml</config>

    </sequence_search_tool>

    <sequence_search_tool>

        <!-- display name for the search tool -->
        <key>BLAT protein</key>

        <!-- class for handling search -->
        <class>org.bbop.apollo.tools.seq.search.blat.BlatCommandLineProteinToNucleotide</class>

        <!-- configuration for search tool -->
        <config>/config/blat_config.xml</config>

    </sequence_search_tool>

</sequence_search_tools>
Here’s the configuration for sequence search tools (allows searching
your genomic sequences). Web Apollo does not implement any search
algorithms, but instead relies on different tools and resources to
handle searching (this provides much more flexible search options). This
is optional. If it’s not configured, Web Apollo will not have sequence
search support. You’ll need one sequence_search_tool element per
search tool. Let’s look at the element in more detail.
<!-- display name for the search tool -->
<key>BLAT nucleotide</key>
This is a string that will be used for the display name for the search tool, in the pull down menu that provides search selection for the user.
<!-- class for handling search -->
<class>org.bbop.apollo.tools.seq.search.blat.BlatCommandLineNucleotideToNucleotide</class>
Should point to the class that will handle the search request. Searching
is handled by classes that implement the
org.bbop.apollo.tools.seq.search.SequenceSearchTool interface. This
allows you to add support for your own favorite search tools (or
resources). We currently only have support for command line Blat, in the
following flavors:
org.bbop.apollo.tools.seq.search.blat.BlatCommandLineNucleotideToNucleotide- Blat search for a nucleotide query against a nucleotide database
org.bbop.apollo.tools.seq.search.blat.BlatCommandLineProteinToNucleotide- Blat search for a protein query against a nucleotide database
<!-- configuration for search tool -->
<config>/config/blat_config.xml</config>
File that contains the configuration for the searching plugin chosen. If you’re using Blat, you should not change this. If you’re using your own plugin, you’ll want to point this to the right configuration file (which will be dependent on your plugin). See the Blat section for details on configuring Web Apollo to use Blat.
<!-- data adapters for writing annotation data to different formats.
These will be used to dynamically generate data adapters within
WebApollo. It contains either <data_adapter> or <data_adapter_group> elements.
<data_adapter_group> will allow grouping adapters together and will provide a
submenu for those adapters in WebApollo. This is optional. -->
<data_adapters>
<!-- one <data_adapter> element per data adapter -->
<data_adapter>
<!-- display name for data adapter -->
<key>GFF3</key>
<!-- class for data adapter plugin -->
<class>org.bbop.apollo.web.dataadapter.gff3.Gff3DataAdapter</class>
<!-- required permission for using data adapter
available options are: read, write, publish -->
<permission>read</permission>
<!-- configuration file for data adapter -->
<config>/config/gff3_config.xml</config>
<!-- options to be passed to data adapter -->
<options>output=file&format=gzip</options>
</data_adapter>
<data_adapter>
<!-- display name for data adapter -->
<key>Chado</key>
<!-- class for data adapter plugin -->
<class>org.bbop.apollo.web.dataadapter.chado.ChadoDataAdapter</class>
<!-- required permission for using data adapter
 available options are: read, write, publish -->
<permission>publish</permission>
<!-- configuration file for data adapter -->
<config>/config/chado_config.xml</config>
<!-- options to be passed to data adapter -->
<options>display_features=false</options>
</data_adapter>
<!-- group the <data_adapter> children elements together -->
<data_adapter_group>
<!-- display name for adapter group -->
<key>FASTA</key>
<!-- required permission for using data adapter group
available options are: read, write, publish -->
<permission>read</permission>
<!-- one child <data_adapter> for each data adapter in the group -->
<data_adapter>
<!-- display name for data adapter -->
<key>peptide</key>
<!-- class for data adapter plugin -->
<class>org.bbop.apollo.web.dataadapter.fasta.FastaDataAdapter</class>
<!-- required permission for using data adapter
available options are: read, write, publish -->
<permission>read</permission>
<!-- configuration file for data adapter -->
<config>/config/fasta_config.xml</config>
<!-- options to be passed to data adapter -->
<options>output=file&format=gzip&seqType=peptide</options>
</data_adapter>
<data_adapter>
<!-- display name for data adapter -->
<key>cDNA</key>
<!-- class for data adapter plugin -->
<class>org.bbop.apollo.web.dataadapter.fasta.FastaDataAdapter</class>
<!-- required permission for using data adapter
available options are: read, write, publish -->
<permission>read</permission>
<!-- configuration file for data adapter -->
<config>/config/fasta_config.xml</config>
<!-- options to be passed to data adapter -->
<options>output=file&format=gzip&seqType=cdna</options>
</data_adapter>
<data_adapter>
<!-- display name for data adapter -->
<key>CDS</key>
<!-- class for data adapter plugin -->
<class>org.bbop.apollo.web.dataadapter.fasta.FastaDataAdapter</class>
<!-- required permission for using data adapter
available options are: read, write, publish -->
<permission>read</permission>
<!-- configuration file for data adapter -->
<config>/config/fasta_config.xml</config>
<!-- options to be passed to data adapter -->
<options>output=file&format=gzip&seqType=cds</options>
</data_adapter>
</data_adapter_group>
</data_adapters>
Here’s the configuration for data adapters (allows writing annotations
to different formats). This is optional. If it’s not configured, Web
Apollo will not have data writing support. You’ll need one
<data_adapter> element per data adapter. You can group data adapters
by placing each <data_adapter> inside a <data_adapter_group>
element. Let’s look at the <data_adapter> element in more detail.
<!-- display name for data adapter -->
<key>GFF3</key>
This is a string that will be used for the data adapter name, in the dynamically generated data adapters list for the user.
<!-- class for data adapter plugin -->
<class>org.bbop.apollo.web.dataadapter.gff3.Gff3DataAdapter</class>
Should point to the class that will handle the write request. Writing is
handled by classes that implement the
org.bbop.apollo.web.dataadapter.DataAdapter interface. This allows you
to add support for writing to different formats. We currently only have
support for:
org.bbop.apollo.web.dataadapter.gff3.Gff3DataAdapter- GFF3 (see the GFF3 section for details on this adapter)
org.bbop.apollo.web.dataadapter.chado.ChadoDataAdapter- Chado (see the Chado section for details on this adapter)
<!-- required permission for using data adapter
available options are: read, write, publish -->
<permission>publish</permission>
Required user permission for accessing this data adapter. If the user
does not have the required permission, it will not be available in the
list of data adapters. Available permissions are read, write, and
publish.
<!-- configuration for data adapter -->
<config>/config/gff3_config.xml</config>
File that contains the configuration for the data adapter plugin chosen.
<!-- options to be passed to data adapter -->
<options>output=file&format=gzip</options>
Options to be passed to the data adapter. These are dependent on the data adapter.
Next, let’s look at the <data_adapter_group> element:
<!-- display name for adapter group -->
<key>FASTA</key>
This is a string that will be used for the data adapter submenu name.
<permission>read</permission> Required user permission for accessing
this data adapter group. If the user does not have the required
permission, it will not be available in the list of data adapters.
Available permissions are read, write, and publish.
Translation tables
Web Apollo has support for alternate translation tables. For your
convenience, Web Apollo comes packaged with the current NCBI translation
tables. They reside in the config/translation_tables directory in your
installation
($TOMCAT_WEBAPPS_DIR/WebApollo/config/translation_tables). They’re all
named ncbi_#_translation_table.txt where # represents the NCBI
translation table number (for example, for ciliates, you’d use
ncbi_6_translation_table.txt).
You can also customize your own translation table. The format is tab
delimited, with each entry containing either 2 or 3 columns. The 3rd
column is only used in the cases of start and stop codons. You only need
to put entries for codons that differ from the standard translation
table (#1). The first column has the codon triplet and the second has
the IUPAC single letter representation for the translated amino acid.
The stop codon should be represented as * (asterisk).
TAA Q
As mentioned previously, you’ll only need the 3rd column for start and
stop codons. To denote a codon as a start codon, put in start in the
third column. For example, if we wanted to assign GTG as a start
codon, we’d enter:
GTG V start
For stop codons, if we enter an IUPAC single letter representation for the amino acid in the 3rd column, we’re denoting that amino acid to be used in the case of a readthrough stop codon. For example, to use pyrrolysine, we’d enter:
TAG * O
If you write your own customized translation table, make sure to update
the <translation_table> element in your configuration to your
customized file.
Canned comments
You can configure a set of predefined comments that will be available
for users when adding comments through a dropdown menu. The
configuration is stored in
/usr/local/tomcat/tomcat7/webapps/WebApollo/config/canned_comments.xml.
Let’s take a look at the configuration file.
<?xml version="1.0" encoding="UTF-8"?>

<canned_comments>
    <!-- one <comment> element per comment.
 it must contain either the attribute "feature_type" that defines
 the type of feature this comment will apply to or the attribute "feature_types"
 that defines a list (comma separated) of types of features this comment will
 apply to.
 types must be be in the form of "CV:term" (e.g., "sequence:gene")

 <comment feature_type="sequence:gene">This is a comment for sequence:gene</comment>
 or
 <comment feature_types="sequence:tRNA,sequence:ncRNA">This is a comment for both sequence:tRNA and sequence:ncRNA</comment>
 -->
</canned_comments>
You’ll need one <comment> element for each predefined comment. The
element needs to have either a feature_type attribute in the form of
CV:term that this comment applies to or a feature_types attribute, a
comma separated list of types this comment will apply to, where each
type is also in the form of CV:term. Let’s make a few comments for
feature of type sequence:gene and sequence:transcript,
sequence:mRNA:
<comment feature_type="sequence:gene">This is a comment for a gene</comment>
<comment feature_type="sequence:gene">This is another comment for a gene</comment>
<comment feature_types="sequence:transcript,sequence:mRNA">This is a comment for both a transcript or mRNA</comment>
All supported annotation types can be used.
Search tools
As mentioned previously, Web Apollo makes use of tools for sequence searching rather than employing its own search algorithm. The only currently supported tool is command line Blat.
Blat
You’ll need to have Blat installed and a search database with your
genomic sequences available to make use of this feature. You can get
documentation on the Blat command line suite of tools at
BLAT Suite Program Specifications
and User Guide and get information on setting up the tool in the
official BLAT FAQ. The configuration is
stored in $TOMCAT_WEBAPPS_DIR/WebApollo/config/blat_config.xml. Let’s
take a look at the configuration file:
<?xml version="1.0" encoding="UTF-8"?>

<!-- configuration file for setting up command line Blat support -->

<blat_config>

    <!-- path to Blat binary →
 <blat_bin>ENTER_PATH_TO_BLAT_BINARY</blat_bin>

 <!-- path to where to put temporary data -->
    <tmp_dir>ENTER_PATH_FOR_TEMPORARY_DATA</tmp_dir>

    <!-- path to Blat database -->
    <database>ENTER_PATH_TO_BLAT_DATABASE</database>

    <!-- any Blat options (directly passed to Blat) e.g., -minMatch -->
    <blat_options>ENTER_ANY_BLAT_OPTIONS</blat_options>

    <!-- true to remove temporary data path after search (set to false for debugging purposes) -->
    <remove_tmp_dir>true</remove_tmp_dir>

</blat_config>
Let’s look at each element with values filled in.
<!-- path to Blat binary -->
<blat_bin>$BLAT_DIR/blat</blat_bin>
We need to point to the location where the Blat binary resides. For this
guide, we’ll assume Blat in installed in /usr/local/bin.
<!-- path to where to put temporary data -->
<tmp_dir>$BLAT_TMP_DIR</tmp_dir>
We need to point to the location where to store temporary files to be used in the Blat search. It can be set to whatever location you’d like.
<!-- path to Blat database -->
<database>$BLAT_DATABASE</database>
We need to point to the location of the search database to be used by Blat. See the Blat documentation for more information on generation search databases.
<!-- any Blat options (directly passed to Blat) e.g., -minMatch -->
<blat_options>-minScore=100 -minIdentity=60</blat_options>
Here we can configure any extra options to used by Blat. These options
are passed verbatim to the program. In this example, we’re passing the
-minScore parameter with a minimum score of 100 and the
-minIdentity parameter with a value of 60 (60% identity). See the
Blat documentation for information of all available options.
<!-- true to remove temporary data path after search (set to false for debugging purposes) -->
<remove_tmp_dir>true</remove_tmp_dir>
Whether to delete the temporary files generated for the BLAT search. Set
it to false to not delete the files after the search, which is useful
for debugging why your search may have failed or returned no results.
Data adapters
GFF3
The GFF3 data adapter will allow exporting the current annotations as a
GFF3 file. You can get more information about the GFF3 format at
The Sequence Ontology GFF3 page.
The configuration is stored in
$TOMCAT_WEBAPPS_DIR/WebApollo/config/gff3_config.xml. Let’s take a
look at the configuration file:
<?xml version="1.0" encoding="UTF-8"?>

<!-- configuration file for GFF3 data adapter -->

<gff3_config>

    <!-- path to where to put generated GFF3 file.  This path is
     relative path that will be where you deployed your
     instance (so that it's accessible from HTTP download requests) -->
    <tmp_dir>tmp</tmp_dir>

    <!-- value to use in the source column (column 2) of the generated
     GFF3 file. -->
    <source>.</source>

    <!-- which metadata to export as an attribute - optional.
     Default is to export everything except owner, date_creation, and date_last_modified -->
    <!--
 <metadata_to_export>
     <metadata type="name" />
     <metadata type="symbol" />
     <metadata type="description" />
     <metadata type="status" />
     <metadata type="dbxrefs" />
     <metadata type="attributes" />
     <metadata type="comments" />
     <metadata type="owner" />
     <metadata type="date_creation" />
     <metadata type="date_last_modified" />
 </metadata_to_export>
 -->

    <!-- whether to export underlying genomic sequence - optional.
 Defaults to true -->
    <export_source_genomic_sequence>true</export_source_genomic_sequence>

</gff3_config>
<tmp_dir>tmp</tmp_dir>
This is the root directory where the GFF3 files will be generated. The
actual GFF3 files will be in subdirectories that are generated to
prevent collisions from concurrent requests. This directory is relative
to $TOMCAT_WEBAPPS_DIR/WebApollo. This is done to allow the generated
GFF3 to be accessible from HTTP requests.
<!-- value to use in the source column (column 2) of the generated
 GFF3 file. -->
<source>.</source>
This is what to put as the source (column 2) in the generated GFF3 file. You can change the value to anything you’d like.
<!-- which metadata to export as an attribute - optional.
 Default is to export everything except owner, date_creation, and date_last_modified -->
<metadata_to_export>
    <metadata type="name" />
    <metadata type="symbol" />
    <metadata type="description" />
    <metadata type="status" />
    <metadata type="dbxrefs" />
    <metadata type="attributes" />
    <metadata type="comments" />
    <metadata type="owner" />
    <metadata type="date_creation" />
    <metadata type="date_last_modified" />
</metadata_to_export>
This defines which metadata to export in the GFF3 (in column 9). This
configuration is optional. The default is to export everything except
owner, date_creation, and date_last_modified. You need to define one
<metadata<> element with the appropriate type attribute per metadata
type you want to export. Available types are:
- name
- symbol
- description
- status
- dbxrefs
- attributes
- comments
- owner
- date_creation
- date_last_modified
<!-- whether to export underlying genomic sequence - optional.
Defaults to true -->
<export_source_genomic_sequence>true</export_source_genomic_sequence>
Determines whether to export the underlying genomic sequence as FASTA
attached to the GFF3 file. Set to false to disable it. Defaults to
true.
Note that the generated files will reside in that directory indefinitely
to allow users to download them. You’ll need to eventually remove those
files to prevent the file system from cluttering up. There’s a script
that will traverse the directory and remove any files that are older
than a provided time and cleanup directories as they become empty. It’s
recommended to setup this script as a cron job that runs hourly to
remove any files older than an hour (should provide plenty of time for
users to download those files). The script is in
$WEB_APOLLO_DIR/tools/cleanup/remove_temporary_files.sh.
$ $WEB_APOLLO_DIR/tools/cleanup/remove_temporary_files.sh -d $TOMCAT_WEBAPPS_DIR/WebApollo/tmp -m 60
Chado
The Chado data adapter will allow writing the current annotations to a
Chado database. You can get more information about the Chado at
GMOD Chado page.
The configuration is stored in
$TOMCAT_WEBAPPS_DIR/WebApollo/config/chado_config.xml. Let’s take a
look at the configuration file:
<?xml version="1.0" encoding="UTF-8"?>

<!-- configuration file for Chado data adapter -->

<chado_config>

    <!-- Hibernate configuration file for accessing Chado database -->
    <hibernate_config>/config/hibernate.xml</hibernate_config>

</chado_config>
There’s only one element to be configured:
<hibernate_config>/config/hibernate.xml</hibernate_config>
This points to the Hibernate configuration for accessing the Chado
database. Hibernate provides an ORM (Object Relational Mapping) for
relational databases. This is used to access the Chado database. The
Hibernate configuration is stored in
$TOMCAT_WEBAPPS_DIR/WebApollo/config/hibernate.xml. It is quite large
(as it contains a lot of mapping resources), so let’s take a look at the
parts of the configuration file that are of interest (near the top of
the file):
<?xml version="1.0" encoding="UTF-8"?>
<!DOCTYPE hibernate-configuration PUBLIC
      "-//Hibernate/Hibernate Configuration DTD 3.0//EN"
      "http://hibernate.sourceforge.net/hibernate-configuration-3.0.dtd">
<hibernate-configuration>
    <session-factory name="SessionFactory">
        <property name="hibernate.connection.driver_class">org.postgresql.Driver</property>
        <property name="hibernate.connection.url">ENTER_DATABASE_CONNECTION_URL</property>
        <property name="hibernate.connection.username">ENTER_USERNAME</property>
        <property name="hibernate.connection.password">ENTER_PASSWORD</property>

        ...

    </session-factory>
</hibernate-configuration>
Let’s look at each element:
<property name="hibernate.connection.driver_class">org.postgresql.Driver</property>
The database driver for the RDBMS where the Chado database exists. It will most likely be PostgreSQL (as it’s the officially recommended RDBMS for Chado), in which case you should leave this at its default value.
<property name="hibernate.connection.url">ENTER_DATABASE_CONNECTION_URL</property>
JDBC URL to connect to the Chado database. It will be in the form of
jdbc:$RDBMS://$SERVERNAME:$PORT/$DATABASE_NAME where $RDBMS is the
RDBMS used for the Chado database, $SERVERNAME is the server’s name,
$PORT is the database port, and $DATABASE_NAME is the database’s
name. Let’s say we’re connecting to a Chado database running on
PostgreSQL on server my_server, port 5432 (PostgreSQL’s default),
and a database name of my_organism, the connection URL will look as
follows: jdbc:postgresql://my_server:5432/my_organism.
<property name="hibernate.connection.username">ENTER_USERNAME</property>
User name used to connect to the database. This user should have write privileges to the database.
<property name="hibernate.connection.password">ENTER_PASSWORD</property>
Password for the provided user name.
FASTA
The FASTA data adapter will allow exporting the current annotations to a
FASTA file. The configuration is stored in
$TOMCAT_WEBAPPS_DIR/WebApollo/config/fasta_config.xml. Let’s take a
look at the configuration file:
<?xml version="1.0" encoding="UTF-8"?>

<!-- configuration file for FASTA data adapter -->

<fasta_config>

    <!-- path to where to put generated FASTA file.  This path is a
 relative path that will be where you deployed your WebApollo
 instance (so that it's accessible from HTTP download requests) -->
    <tmp_dir>tmp</tmp_dir>

    <!-- feature types to process when dumping FASTA sequence -->
    <feature_types>

        <!-- feature type to process - one element per type -->
        <feature_type>sequence:mRNA</feature_type>

        <feature_type>sequence:transcript</feature_type>

    </feature_types>

    <!-- which metadata to export as an attribute - optional.
 Default does not export any metadata -->
    <!--
 <metadata_to_export>
     <metadata type="name" />
     <metadata type="symbol" />
     <metadata type="description" />
     <metadata type="status" />
     <metadata type="dbxrefs" />
     <metadata type="attributes" />
     <metadata type="comments" />
     <metadata type="owner" />
     <metadata type="date_creation" />
     <metadata type="date_last_modified" />
 </metadata_to_export>
 -->

</fasta_config>
<!-- path to where to put generated FASTA file.  This path is a
relative path that will be where you deployed your WebApollo
instance (so that it's accessible from HTTP download requests) -->
<tmp_dir>tmp</tmp_dir>
This is the root directory where the FASTA files will be generated. The actual FASTA files will be in subdirectories that are generated to prevent collisions from concurrent requests. This directory is relative to $TOMCAT_WEBAPPS_DIR/WebApollo. This is done to allow the generated FASTA to be accessible from HTTP requests.
<!-- feature types to process when dumping FASTA sequence -->
<feature_types>

    <!-- feature type to process - one element per type -->
    <feature_type>sequence:mRNA</feature_type>

    <feature_type>sequence:transcript</feature_type>

</feature_types>
This defines which annotation types should be processed when exporting
the FASTA data. You’ll need one <feature_type> element for each type
you want to have processed. Only the defined feature_type elements
will all be processed, so you might want to have different configuration
files for processing different types of annotations (which you can point
to in FASTA data adapter in the config element in config.xml). All
supported annotation types can be used
for the value of feature_type, with the addition of sequence:exon.
In config.xml, in the <options> element in the <data_adapter>
configuration for the FASTA adapter, you’ll notice that there’s a
seqType option. You can change that value to modify which type of
sequence will be exported as FASTA. Available options are:
- peptide
- Export the peptide sequence. This will only apply to protein coding transcripts and protein coding exons
- cdna
- Export the cDNA sequence. This will only apply to transcripts and exons
- cds
- Export the CDS sequence. This will only apply to protein coding transcripts and protein coding exons
- genomic
- Export the genomic within the feature’s boundaries. This applies to all feature types.
<!-- which metadata to export as an attribute - optional.
Default does not export any metadata -->
<!--
<metadata_to_export>
 <metadata type="name" />
 <metadata type="symbol" />
 <metadata type="description" />
 <metadata type="status" />
 <metadata type="dbxrefs" />
 <metadata type="attributes" />
 <metadata type="comments" />
 <metadata type="owner" />
 <metadata type="date_creation" />
 <metadata type="date_last_modified" />
</metadata_to_export>
-->
Defines which metadata to export in the defline for each feature. The
default is to not output any of the listed metadata. Uncomment to turn
on this option. Note that you can remove (or comment) any <metadata>
elements that you’re not interested in exporting.
Note that like the GFF3 adapter, the generated files will reside in that
directory indefinitely to allow users to download them. You’ll need to
eventually remove those files to prevent the file system from cluttering
up. You can use the remove_temporary_files.sh script to handle the
cleanup. In fact, if you configure both the GFF3 and FASTA adapters to
use the same temporary directory, you’ll only need to worry about
cleanup from a single location. See the GFF3 section for
information about remove_temporary_files.sh.
Data generation
The steps for generating data (in particular static data) are mostly
similar to JBrowse data generation steps, with
some extra steps required. The scripts for data generation reside in
$TOMCAT_WEBAPPS_DIR/WebApollo/jbrowse/bin. Let’s go into WebApollo’s
JBrowse directory.
$ cd $TOMCAT_WEBAPPS_DIR/WebApollo/jbrowse
It will make things easier if we make sure that the scripts in the bin
directory are executable.
$ chmod 755 bin/*
As mentioned previously, the data resides in the data directory by
default. We can symlink $JBROWSE_DATA_DIR giving you a lot of
flexibility in allowing your WebApollo instance to easily point to a new
data directory.
$ ln -sf $JBROWSE_DATA_DIR data
IMPORTANT: If you’re using data generated in previous versions of WebApollo (2013-09-04 and prior), you won’t need to regenerate the data, but you will need to run the Adding the WebApollo plugin step.
DNA track setup
The first thing we need to do before processing our evidence is to
generate the reference sequence data to be used by JBrowse. We’ll use
the prepare-refseqs.pl script.
$ bin/prepare-refseqs.pl --fasta $WEB_APOLLO_SAMPLE_DIR/scf1117875582023.fa
We now have the DNA track setup. Note that you can also use a GFF3 file
containing the genomic sequence by using the --gff option instead of
--fasta and point it to the GFF3 file.
Adding the WebApollo plugin
We now need to setup the data configuration to use the WebApollo plugin.
We’ll use the add-webapollo-plugin.pl script to do so.
$ bin/add-webapollo-plugin.pl -i data/trackList.json
Static data generation
Generating data from GFF3 works best by having a separate GFF3 per
source type. If your GFF3 has all source types in the same file, we need
to split up the GFF3. We can use the split_gff_by_source.pl script in
$WEB_APOLLO_DIR/tools/data to do so. We’ll output the split GFF3 to
some temporary directory (we’ll use $WEB_APOLLO_SAMPLE_DIR/split_gff).
$ mkdir -p $WEB_APOLLO_SAMPLE_DIR/split_gff
$ $WEB_APOLLO_DIR/tools/data/split_gff_by_source.pl \
-i $WEB_APOLLO_SAMPLE_DIR/scf1117875582023.gff -d $WEB_APOLLO_SAMPLE_DIR/split_gff
If we look at the contents of $WEB_APOLLO_SAMPLE_DIR/split_gff, we can
see we have the following files:
$ ls $WEB_APOLLO_SAMPLE_DIR/split_gff
blastn.gff  est2genome.gff  protein2genome.gff  repeatrunner.gff
blastx.gff  maker.gff       repeatmasker.gff    snap_masked.gff
We need to process each file and create the appropriate tracks.
(If you’ve previously used JBrowse, you may know that JBrowse also has an alternative approach to generating multiple static data tracks from a GFF3 file, which uses the biodb-to-json script and a configuration file. However, WebApollo is not yet compatible with that approach)
GFF3 with gene/transcript/exon/CDS/polypeptide features
We’ll start off with maker.gff. We need to handle that file a bit
differently than the rest of the files since the GFF represents the
features as gene, transcript, exons, and CDSs.
$ bin/flatfile-to-json.pl --gff $WEB_APOLLO_SAMPLE_DIR/split_gff/maker.gff \
--arrowheadClass trellis-arrowhead --getSubfeatures \
--subfeatureClasses '{"wholeCDS": null, "CDS":"brightgreen-80pct", "UTR": "darkgreen-60pct", "exon":"container-100pct"}' \
--className container-16px --type mRNA --trackLabel maker
Note that brightgreen-80pct, darkgreen-60pct, container-100pct,
container-16px, gray-center-20pct are all CSS classes defined in
WebApollo stylesheets that describe how to display their respective
features and subfeatures. WebApollo also tries to use reasonable default
CSS styles, so it is possible to omit these CSS class arguments. For
example, to accept default styles for maker.gff, the above could instead
be shortened to:
$ bin/flatfile-to-json.pl --gff $WEB_APOLLO_SAMPLE_DIR/split_gff/maker.gff \
--getSubfeatures --type mRNA --trackLabel maker
See the Customizing features section for more information on CSS styles. There are also many other configuration options for flatfile-to-json.pl, see JBrowse data formatting for more information.
GFF3 with match/match_part features
Now we need to process the other remaining GFF3 files. The entries in those are stored as “match/match_part”, so they can all be handled in a similar fashion.
We’ll start off with blastn as an example.
$ bin/flatfile-to-json.pl --gff $WEB_APOLLO_SAMPLE_DIR/split_gff/blastn.gff \
--arrowheadClass webapollo-arrowhead --getSubfeatures \
--subfeatureClasses '{"match_part": "darkblue-80pct"}' \
--className container-10px --trackLabel blastn
Again, container-10px and darkblue-80pct are CSS class names that
define how to display those elements. See the Customizing
features section for more information.
We need to follow the same steps for the remaining GFF3 files. It can be a bit tedious to do this for the remaining six files, so we can use a simple Bash shell script to help us out (write the script to a file and execute as shown below). Don’t worry if the script doesn’t make sense, you can always process each file manually on the command line:
  for i in $(ls $WEB_APOLLO_SAMPLE_DIR/split_gff/*.gff | grep -v maker); do
    j=$(basename $i)
    j=${j/.gff/}
    echo "Processing $j"
    bin/flatfile-to-json.pl --gff $i --arrowheadClass webapollo-arrowhead \
    --getSubfeatures --subfeatureClasses "{\"match_part\": \"darkblue-80pct\"}" \
    --className container-10px --trackLabel $j
  done

$ /bin/bash myscript.sh
Generate searchable name index
Once data tracks have been created, you will need to generate a searchable index of names using the generate-names.pl script:
$ bin/generate-names.pl
This script creates an index of sequence names and feature names in order to enable auto-completion in the navigation text box. This index is required, so if you do not wish any of the feature tracks to be indexed for auto-completion, you can instead run generate-names.pl immediately after running prepare_refseqs.pl, but before generating other tracks.
The script can be also rerun after any additional tracks are generated
if you wish feature names from that track to be added to the index
(using the --incremental option).
IMPORTANT: If you’re running this script with a Perl version 5.10 or
older, you’ll need to add the --safeMode option. Note that running it
in safe mode will be much slower.
BAM data
Now let’s look how to configure BAM support. WebApollo has native support for BAM, so no extra processing of the data is required.
First we’ll copy the BAM data into the WebApollo data directory. We’ll
put it in the data/bam directory. Keep in mind that this BAM data was
randomly generated, so there’s really no biological meaning to it. We
only created it to show BAM support.
$ mkdir data/bam
$ cp $WEB_APOLLO_SAMPLE_DIR/*.bam* data/bam
Now we need to add the BAM track.
$ bin/add-bam-track.pl --bam_url bam/simulated-sorted.bam \
   --label simulated_bam --key "simulated BAM"
You should now have a simulated BAM track available.
BigWig data
WebApollo has native support for BigWig files (.bw), so no extra processing of the data is required.
Configuring a BigWig track is very similar to configuring a BAM track.
First we’ll copy the BigWig data into the WebApollo data directory.
We’ll put it in the data/bigwig directory. Keep in mind that this
BigWig data was generated as a coverage map derived from the randomly
generated BAM data, so like the BAM data there’s really no biological
meaning to it. We only created it to show BigWig support.
$ mkdir data/bigwig
$ cp $WEB_APOLLO_SAMPLE_DIR/*.bw data/bigwig
Now we need to add the BigWig track.
$ bin/add-bw-track.pl --bw_url bigwig/simulated-sorted.coverage.bw \
  --label simulated_bw --key "simulated BigWig"
You should now have a simulated BigWig track available.
Customizing different annotation types
To change how the different annotation types look in the annotation
track, you’ll need to update the mapping of the annotation type to the
appropriate CSS class. This data resides in trackList.json after
running add-webapollo-plugin.pl. You’ll need to modify the JSON entry
whose label is Annotations. Of particular interest is the
alternateClasses element. Let’s look at that default element:
"alternateClasses": {
    "pseudogene" : {
       "className" : "light-purple-80pct",
       "renderClassName" : "gray-center-30pct"
    },
    "tRNA" : {
       "className" : "brightgreen-80pct",
       "renderClassName" : "gray-center-30pct"
    },
    "snRNA" : {
       "className" : "brightgreen-80pct",
       "renderClassName" : "gray-center-30pct"
    },
    "snoRNA" : {
       "className" : "brightgreen-80pct",
       "renderClassName" : "gray-center-30pct"
    },
    "ncRNA" : {
       "className" : "brightgreen-80pct",
       "renderClassName" : "gray-center-30pct"
    },
    "miRNA" : {
       "className" : "brightgreen-80pct",
       "renderClassName" : "gray-center-30pct"
    },
    "rRNA" : {
       "className" : "brightgreen-80pct",
       "renderClassName" : "gray-center-30pct"
    },
    "repeat_region" : {
       "className" : "magenta-80pct"
    },
    "transposable_element" : {
       "className" : "blue-ibeam",
       "renderClassName" : "blue-ibeam-render"
    }
},
For each annotation type, you can override the default class mapping for
both className and renderClassName to use another CSS class. Check
out the Customizing features section for more
information on customizing the CSS classes.
Customizing features
The visual appearance of biological features in WebApollo (and JBrowse)
is handled by CSS stylesheets. Every feature and subfeature is given a
default CSS “class” that matches a default CSS style in a CSS
stylesheet. These styles are are defined in
$TOMCAT_WEBAPPS_DIR/WebApollo/jbrowse/track_styles.css and
$TOMCAT_WEBAPPS_DIR/WebApollo/jbrowse/plugins/WebApollo/css/webapollo_track_styles.css.
Additional styles are also defined in these files, and can be used by
explicitly specifying them in the –className, –subfeatureClasses,
–renderClassname, or –arrowheadClass parameters to
flatfile-to-json.pl. See example
above
WebApollo differs from JBrowse in some of it’s styling, largely in order to help with feature selection, edge-matching, and dragging. WebApollo by default uses invisible container elements (with style class names like “container-16px”) for features that have children, so that the children are fully contained within the parent feature. This is paired with another styled element that gets rendered within the feature but underneath the subfeatures, and is specified by the –renderClassname argument to flatfile-to-json.pl. Exons are also by default treated as special invisible containers, which hold styled elements for UTRs and CDS.
It is relatively easy to add other stylesheets that have custom style
classes that can be used as parameters to flatfile-to-json.pl. An
example is
$TOMCAT_WEBAPPS_DIR/WebApollo/jbrowse/sample_data/custom_track_styles.css
which contains two new styles:
.gold-90pct,
.plus-gold-90pct,
.minus-gold-90pct  {
    background-color: gold;
    height: 90%;
    top: 5%;
    border: 1px solid gray;
}

.dimgold-60pct,
.plus-dimgold-60pct,
.minus-dimgold-60pct  {
    background-color: #B39700;
    height: 60%;
    top: 20%;
}
In this example, two subfeature styles are defined, and the top property is being set to (100%-height)/2 to assure that the subfeatures are centered vertically within their parent feature. When defining new styles for features, it is important to specify rules that apply to plus-stylename and minus-stylename in addition to stylename, as WebApollo adds the “plus-“ or “minus-“ to the class of the feature if the the feature has a strand orientation.
You need to tell WebApollo where to find these styles. This can be done via standard CSS loading in the index.html file by adding a <link> element:
<link rel="stylesheet" type="text/css" href="sample_data/custom_track_styles.css">
Or alternatively, to avoid modifying the web application, additional CSS can be specified in the trackList.json file that is created in the data directory during static data generation, by adding a “css” property to the JSON data:
"css" : "sample_data/custom_track_styles.css"
Then these new styles can be used as arguments to flatfile-to-json.pl, for example:
bin/flatfile-to-json.pl --gff $WEB_APOLLO_SAMPLE_DIR/split_gff/maker.gff
--getSubfeatures --type mRNA --trackLabel maker --webApollo
--subfeatureClasses '{"CDS":"gold-90pct", "UTR": "dimgold-60pct"}'
Depending on how your Tomcat server is setup, you might need to restart the server to pick up all the changes (or at least restart the WebApollo web application). You’ll also need to do this any time you change the configuration files (not needed when changing the data files).
Bulk loading annotations to the user annotation track
GFF3
You can use the
$WEB_APOLLO_DIR/tools/data/add_transcripts_from_gff3_to_annotations.pl
script to bulk load GFF3 files with transcripts to the user annotation
track. Let’s say we want to load our maker.gff transcripts.
$ $WEB_APOLLO_DIR/tools/data/add_transcripts_from_gff3_to_annotations.pl \
-U localhost:8080/WebApollo -u web_apollo_admin -p web_apollo_admin \
-i $WEB_APOLLO_SAMPLE_DIR/split_gff/maker.gff
The default options should be handle GFF3 most files that contain genes, transcripts, and exons.
You can still use this script even if the file you’re loading does not
contain transcripts and exons. Let’s say we want to load match and
match_part features as transcripts and exons respectively. We’ll use
the blastn.gff file as an example.
$ $WEB_APOLLO_DIR/tools/data/add_transcripts_from_gff3_to_annotations.pl \
-U localhost:8080/WebApollo -u web_apollo_admin -p web_apollo_admin \
-i $WEB_APOLLO_SAMPLE_DIR/split_gff/blastn.gff -t match -e match_part
Look at the script’s help (-h) for all available options.
Congratulations, you’re done configuring WebApollo!
Upgrading existing instances
We suggest creating a new instance to prevent disruption to existing instances and to have a staging site before making the upgrade public. Since the local storage is file based, you can just copy the BerkeleyDB databases to another directory and have the new instance point to it:
$ cp -R $WEB_APOLLO_DATA_DIR $WEB_APOLLO_DATA_DIR_STAGING
Create a staging instance in your $TOMCAT_WEBAPPS_DIR:
$ cd $TOMCAT_WEBAPPS_DIR
$ mkdir WebApolloStaging
Unpack the WAR in the WebApoloStaging and point <datastore_directory>
in $TOMCAT_WEBAPPS_DIR/WebApolloStaging/config.xml file to wherever
$WEB_APOLLO_DATA_DIR_STAGING is. Afterwards, just setup the
configuration as normal.
To use the existing static data, we can just copy the data symlink (or directory if you chose not to use a symlink):
$ cp -R WebApollo/jbrowse/data WebApolloStaging/jbrowse/data
You can also copy over any custom CSS modifications you may have made to the staging site.
Once you’ve had a chance to test out the upgrade and make sure everything’s working fine, just delete (or move it somewhere else for backup purposes) and rename the staging site:
$ rm -rf WebApollo
$ mv WebApolloStaging WebApollo
You might also want to update <datastore_directory> back to
$WEB_APOLLO_DATA_DIR and delete $WEB_APOLLO_DATA_DIR_STAGING so that
you can continue to keep the data in the same location. It’s also
recommended that you restart Tomcat after this.
Upgrading existing JBrowse data stores
You’ll need to upgrade the trackList.json file in your
$JBROWSE_DATA_DIR directory. The WebApollo plugin needs to be
reconfigured, so run through the steps in the Adding the WebApollo
plugin section.
Upgrading existing annotation data stores
Transcript type updating
Releases 2013-09-04 and prior only supported annotating protein coding genes. WebApollo now supports annotating other feature types. If you’re running WebApollo on annotation data generated from the 2013-09-04 and prior releases, you might want to run a tool that will update all protein coding transcripts from type “sequence:transcript” to “sequence:mRNA”. Although this step is not required (WebApollo has proper backwards support for the generic “sequence:transcript” type, we recommend updating your data.
Although issues with the update are not expected, it’s highly recommended to backup the databases before the update (you can delete them once you’ve tested the update and made sure that everything’s ok).
$ cp -R $WEB_APOLLO_DATA_DIR $WEB_APOLLO_DATA_DIR.bak
Note that before you run the update, you’ll need to stop WebApollo (either by shutting down Tomcat or stopping WebApollo through Tomcat’s Application Manager).
You’ll need to run update_transcript_to_mrna.sh, located in
$WEB_APOLLO_DIR/tools/data. You’ll only need to run this tool when
first upgrading your WebApollo version. You can either choose to run the
tool on individual annotation data stores (using the -i option) or
more conveniently run through all the data stores that are within a
parent directory (using the -d option). We’ll go ahead with the later.
You can choose to update either the annotation data store or the history
data store (using the -H option). You’ll need to tell the tool where
you deployed WebApollo (using the -w option).
$ $WEB_APOLLO_DIR/tools/data/update_transcripts_to_mrna.sh -w $TOMCAT_WEBAPPS_DIR/WebApollo -d $WEB_APOLLO_DATA_DIR
$ $WEB_APOLLO_DIR/tools/data/update_transcripts_to_mrna.sh -w $TOMCAT_WEBAPPS_DIR/WebApollo -d $WEB_APOLLO_DATA_DIR -H
Restart WebApollo and test out that the update didn’t break anything. Once you’re satisfied, you can go ahead and remove the backup we made:
$ rm -rf $WEB_APOLLO_DATA_DIR.bak
Sequence alterations updating
We’ve modified how sequence alterations are indexed compared to releases 2013-09-04 and prior. If you’re running WebApollo on annotation data generated from the 2013-09-04 and prior releases, you’ll need to run a tool that will update all your sequence alterations. You only need to run this tool if you’ve annotated sequence alterations (e.g., insertion, deletion, substitution). If you haven’t annotated those types, you can skip this step.
Although issues with the update are not expected, it’s highly recommended to backup the databases before the update (you can delete them once you’ve tested the update and made sure that everything’s ok).
$ cp -R $WEB_APOLLO_DATA_DIR $WEB_APOLLO_DATA_DIR.bak
Note that before you run the update, you’ll need to stop WebApollo (either by shutting down Tomcat or stopping WebApollo through Tomcat’s Application Manager).
You’ll need to run update_sequence_alterations.sh. You can get the
tarball here.
Uncompress the tarball:
$ tar -xvzf update_sequence_alterations.tgz
$ cd update_sequence_alterations
You’ll only need to run this tool when first upgrading your WebApollo
version. You can either choose to run the tool on individual annotation
data stores (using the -i option) or more conveniently run through all
the data stores that are within a parent directory (using the -d
option). We’ll go ahead with the later. You’ll need to tell the tool
where you deployed WebApollo (using the -w option).
$ ./update_sequence_alterations.sh -w $TOMCAT_WEBAPPS_DIR/WebApollo -d $WEB_APOLLO_DATA_DIR
Restart WebApollo and test out that the update didn’t break anything. Once you’re satisfied, you can go ahead and remove the backup we made:
$ rm -rf $WEB_APOLLO_DATA_DIR.bak
Accessing your WebApollo installation
Let’s test out our installation. Point your browser to ` http://SERVER_ADDRESS:8080/WebApollo `.
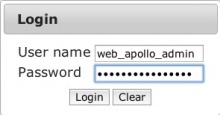
The user name and password are both web_apollo_admin as we configured
earlier. Enter them into the login dialog.

We only see one reference sequence to annotate since we’re only working
with one contig. Click on scf1117875582023 under the Name column.
Now have fun annotating!!!