GMOD
Gbrowse Benchmarking
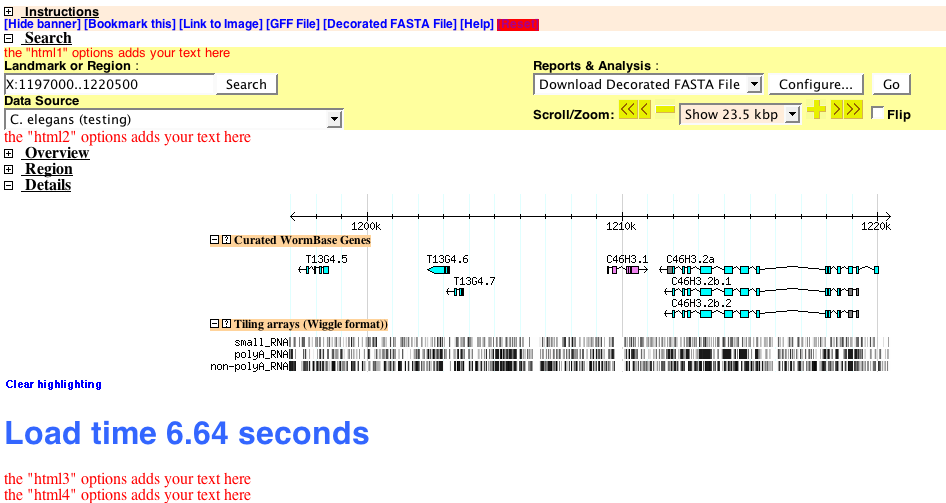
Using Javascript to Benchmark Gbrowse Image Generation and Loading
The following recipe shows how to use existing options, such as head, html2, etc., to add javascript functionality to GBrowse via the configuration file. This example is used for benchmarking page loading and image generation.
- Note: When coding Javascript in GBrowse config files, there are a
few caveats:
- The option text gets parsed into a string with no line-breaks, so be sure to terminate all javascript statements with a ‘;’.
- Do not add javascript style ‘//’ or ‘/**/’ comments to the javascript code. They will break the script due to the way the configuration file is parsed.
- You can add comments to your javascript, or anywhere else in the configuration file, by starting a new line with ‘#’, which will be ignored by the parser and not added to the final javascript.
First Step: Adding a simple script to the page header
- The first bit of javascript goes into the page header using the “head” option in the [GENERAL] section:
- Any text added with the head option gets added to the <head></head> element, before the body of the page is printed.
- In this case, we are initializing a javascript global variable ‘start’, which stores the time at which the <head></head> element was printed, to a precision of .001 seconds.
head=  <script type="text/javascript">
         var d = new Date();
         var start = d.getTime()/1000;
        </script>
Next Step: Inserting Time Stamps into the Gbrowse Output
- The next steps use the htmlx options, where x = 1-6. These options will add HTML to strategic locations in the GBrowse output.
- html3 and html4 both add HTML immediately after the ‘Overview, ‘Region’ (if applicable) and ‘Details’ panels are printed and can be use interchangeably.
- The three panels contains all of the genome browser images.
- Once printed to the browser, the javascript code will execute and replace the “placeholder” text with a calculated time interval since the <head></head> element was printed.
- This gives an approximation of how long it has taken to render or un-cache the images.
- It is useful for testing load times of different track combinations, new features, etc.
html3 = <h1 id=html3>placeholder</h1>
        <script>
          var d  = new Date();
          var e  = d.getTime()/1000 - start;
          var re = Math.round(e*100)/100;
          document.getElementById('html3').innerHTML='Load time '+re+' seconds';
        </script>